background image


IOBA-10F-AD RISC-based Panel PC 


Page 22 

4.1 Powering On/Off 


Powering On

: To power on the system, connect the power source to the DC-in jack of 

the IOBA-10F-AD (

Figure 1-3

 an

Figure 1-4

). The power LED on the front panel 

(

Figure 1-2

) lights up once the system is fed with power. 


Powering Off

: To power off the system, disconnect the power source. 

4.2 Home Screen 

The  IOBA-10F-AD  has multiple home screens,  allowing users to customize the screen 

with widgets, apps and shortcuts. The following sections describe the basic technique to 

manage the home screen. 

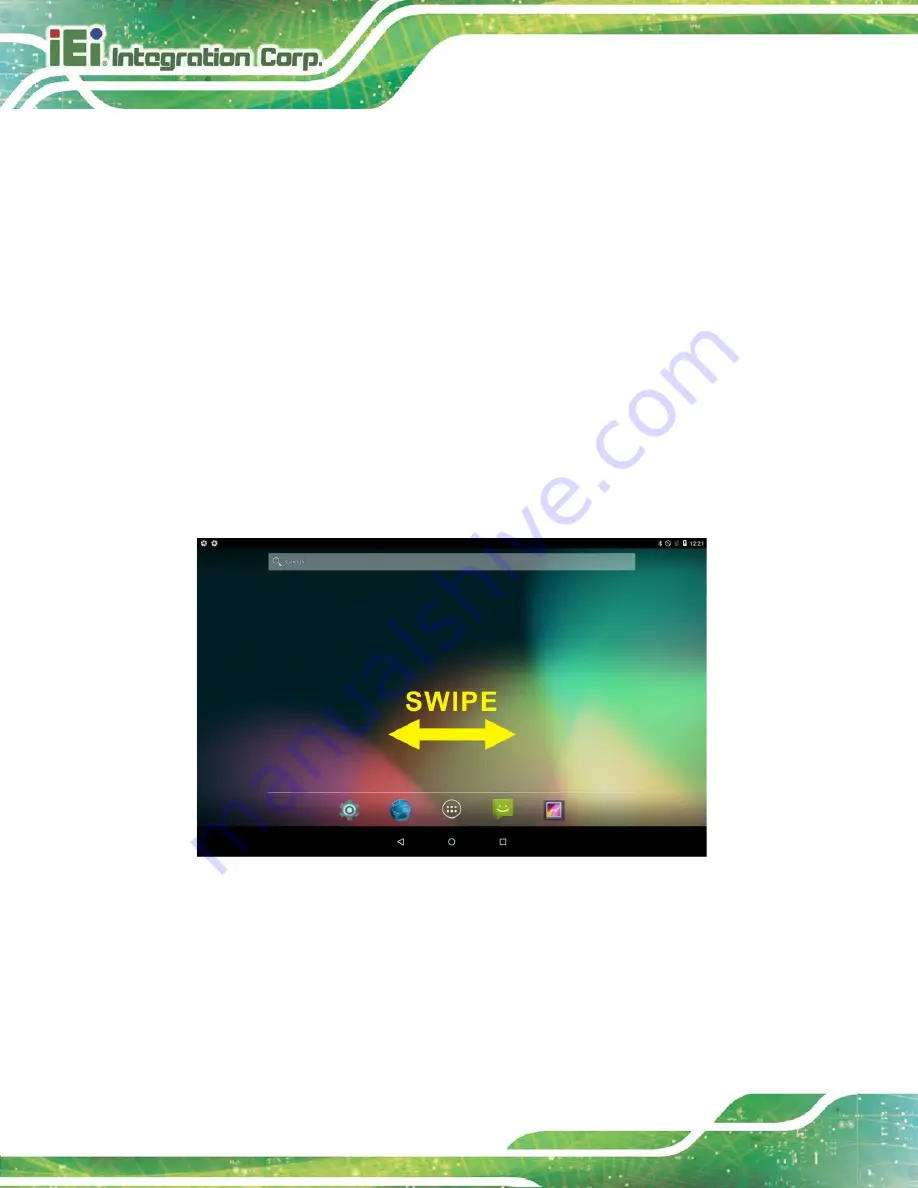
4.2.1 Switching between Home Screens 

Swipe left or right to switch between home screens. 


Figure 4-1: Multiple Home Screens 

Summary of Contents for IOBA-10F-AD

Page 1: ...Page i User Manual 10 1 RISC Based Panel PC with Touchscreen Freescale i MX6 Cortex A9 Quad Core 1 0 GHz CPU Android 5 1 OS Front Camera COM Wi Fi Bluetooth NFC PoE DIO and Sensor Connectors MODEL IOB...

Page 2: ...IOBA 10F AD RISC based Panel PC Page ii Revision Date Version Changes March 16 2018 1 00 Initial release...

Page 3: ...mages arising out of the use or inability to use the product or documentation even if advised of the possibility of such damages This document contains proprietary information protected by copyright A...

Page 4: ...AUTION Cautionary messages should be heeded to help reduce the chance of losing data or damaging the product NOTE These messages inform the reader of essential but non critical information These messa...

Page 5: ...ON PRECAUTIONS 13 3 3 EXTERNAL I O CONNECTORS 14 3 3 1 9 V 30 V DC Power Jack 14 3 3 2 AI Connectors IOBA 10F AD Only 14 3 3 3 Digital I O Connectors IOBA 10F AD Only 14 3 3 4 Digital I O Terminal Blo...

Page 6: ...4 5 3 Sound Notification 30 4 5 4 Storage 31 4 5 5 Apps 32 4 5 6 Users 32 4 5 7 Location 33 4 5 8 Security 33 4 5 9 Accounts 35 4 5 10 Language Input 35 4 5 11 Backup Reset 36 4 5 12 Date Time 37 4 5...

Page 7: ...IOBA 10F AD RISC based Panel PC Page vii B 2 2 Cleaning Tools 52 C HAZARDOUS MATERIALS DISCLOSURE 53...

Page 8: ...D ET Wall mounting Bracket 18 Figure 3 6 Mounting Screws 19 Figure 3 7 Panel PC Mounting Holes 19 Figure 3 8 Securing to the Wall Mounting Bracket 20 Figure 4 1 Multiple Home Screens 22 Figure 4 2 Fav...

Page 9: ...gure 4 18 Language Input Menu 35 Figure 4 19 Backup Reset Menu 36 Figure 4 20 Date Time Menu 37 Figure 4 21 Accessibility Menu 38 Figure 4 22 Printing Menu 39 Figure 4 23 About Tablet Menu 40 Figure 4...

Page 10: ...ptional Items 11 Table 3 1 AI Connector AI Pinouts 14 Table 3 2 DIO Connector DIO2 DIO3 Pinouts 14 Table 3 3 DIO Terminal Block DIO1 Pinouts 15 Table 3 4 I2 C Connector I2C Pinouts 15 Table 3 5 RJ 45...

Page 11: ...IOBA 10F AD RISC based Panel PC Page 1 Chapter 1 1 Introduction...

Page 12: ...fering low power in a powerful package The IOBA 10F AD provides rich input capabilities utilizing the projected capacitive touchscreen Other peripherals include one micorSD card slot two USB 2 0 host...

Page 13: ...ocessor On board 2 GB DDR3 memory 8 GB eMMC NAND flash IoT sensor connectors in Grove interface IP 64 compliant front panel 1 4 Front Panel The front panel of the IOBA 10F AD contains the 10 1 LCD wit...

Page 14: ...AD RISC based Panel PC Page 4 1 5 Rear View The rear of the IOBA 10F AD contains the I O interfaces as shown in Figure 1 3 and Figure 1 4 Figure 1 3 IOBA 10F AD Rear View Figure 1 4 IOBA 10F AD ET Re...

Page 15: ...C NAND flash OS Android 5 1 Audio 2 x Speakers 2 W 1 x Microphone Camera 2 megapixel CMOS webcam Wi Fi and Bluetooth Bluetooth v4 0 Wi Fi controller for 802 11a b g n IOBA 10F AD model only NFC 13 56...

Page 16: ...struction Material Plastic front cover and rear cover Mounting Wall mounting Color White Operating Temperature 0 C 50 C Storage Temperature 10 C 60 C Humidity 5 90 non condensing IP Level IP 64 compli...

Page 17: ...IOBA 10F AD RISC based Panel PC Page 7 1 7 Dimensions The dimensions are shown below Figure 1 5 IOBA 10F AD Dimensions unit mm...

Page 18: ...IOBA 10F AD RISC based Panel PC Page 8 Figure 1 6 IOBA 10F AD ET Dimensions unit mm...

Page 19: ...IOBA 10F AD RISC based Panel PC Page 9 Chapter 2 2 Unpacking...

Page 20: ...eep enough to break the tape Step 2 Open the box Step 3 Lift the IOBA 10F AD out of the box Step 4 Make sure all the components listed in the packing list are present Step 0 2 1 Packing List NOTE If a...

Page 21: ...0F AD ET model only P N 41320 0489E4 00 RS Table 2 1 Packing List 2 2 Optional Items The following are optional components which may be separately purchased Item Image 90V 264V AC input 12V 60W DC pow...

Page 22: ...IOBA 10F AD RISC based Panel PC Page 12 Chapter 3 3 Installation...

Page 23: ...rounded conducting material During the time the board is handled frequently touch any conducting materials that are connected to the ground Use an anti static pad When configuring the IOBA 10F AD plac...

Page 24: ...AI Connectors IOBA 10F AD Only The IOBA 10F AD model equips with three AI connectors in Grove interface The pinouts are shown below Pin Description 1 GND 2 IOT_AI 5V 3 IOT_A0 A2 A4 4 IOT_A1 A3 A5 Tab...

Page 25: ...4 VIO_3V3 DIO3 5 VIO_3V3 DIO4 6 GND Table 3 3 DIO Terminal Block DIO1 Pinouts 3 3 5 I2 C Connectors IOBA 10F AD Only The IOBA 10F AD model equips with three I2 C connectors in Grove interface The pino...

Page 26: ...unction The RJ 45 LAN connector pinouts are shown below Pin Description 1 LAN_MDI 0 2 LAN_MDI 0 3 LAN_MDI 1 4 LAN_MDI 1 5 LAN_MDI 2 6 LAN_MDI 2 7 LAN_MDI 3 8 LAN_MDI 3 Table 3 5 RJ 45 LAN Connector Pi...

Page 27: ...Series A receptacle connectors provide easier and quicker access to external USB devices Figure 3 3 USB 2 0 Host Connector 3 4 Mounting the System WARNING When mounting the panel PC it is better to ha...

Page 28: ...ion screws Step 4 Align the wall mounting bracket screw holes with the pilot holes Step 5 Secure the mounting bracket to the wall by inserting the retention screws into the four pilot holes and tighte...

Page 29: ...ur mounting screws provided in the wall mounting kit into the four screw holes on the mounting bracket and tighten until the screw shank is secured Figure 3 6 Figure 3 6 Mounting Screws Step 7 Align t...

Page 30: ...cket Step 9 Secure the panel PC by installing the two retention screws provided in the wall mounting kit into the two screw holes on the bottom of the bracket Figure 3 8 Step 0 3 5 System Maintenance...

Page 31: ...IOBA 10F AD RISC based Panel PC Page 21 Chapter 4 4 Using the IOBA 10F AD...

Page 32: ...s up once the system is fed with power Powering Off To power off the system disconnect the power source 4 2 Home Screen The IOBA 10F AD has multiple home screens allowing users to customize the screen...

Page 33: ...ss the APPS page Touch and hold an app icon and drag it to the Favorites tray or move it from the Favorites tray Figure 4 2 Favorites Tray 4 2 3 Adding Shortcut To add app or widget shortcuts on the h...

Page 34: ...he Home Screen The items on the home screen can be moved and deleted Touch and hold an item on the home screen and drag it where you want To trash the item on the screen drag it to the Remove icon Rel...

Page 35: ...shown in Figure 4 5 can always be found at the bottom of every screen Figure 4 5 Navigation Buttons Buttons Description Back Tap to return to the previous screen Home Tap to return to the home screen...

Page 36: ...4 6 displays the pending notifications and status such as the signal strength Figure 4 6 Status Bar Swipe down from the status bar to view notification details Figure 4 7 To dismiss all notifications...

Page 37: ...eless networks field the user can turn on off the Wi Fi and Bluetooth functions configure the network settings and view the data usage status Wi Fi Allows the user to turn on or off the Wi Fi function...

Page 38: ...user to change the default SMS app NFC Allows the user to turn on or off the NFC function Android Beam This item is available only when the NFC function is turned on Enabling this feature allows the u...

Page 39: ...service 4 5 2 Display Figure 4 10 Display Menu Use the Display menu to configure the following items Brightness level Adjusts the screen brightness Wallpaper Sets up the wallpaper Sleep Sets up the ti...

Page 40: ...by devices 4 5 3 Sound Notification Figure 4 11 Sound Notification Menu Use the Sound notification menu to configure the following items Media volume Alarm volume Adjusts the volume of alarms or media...

Page 41: ...s Configures the notification settings for an individual app Notification access Enables or disables an app to read notifications 4 5 4 Storage The Storage menu displays the status of the internal sto...

Page 42: ...e 32 4 5 5 Apps The Apps menu displays the applications installed in the device and allows users to manage them Figure 4 13 Apps Menu 4 5 6 Users The Users menu allows the user to configure the owner...

Page 43: ...n menu to turn on the location access function so that the apps can obtain the user s location information When this function is turned on the user can decide the method to determine the user s locati...

Page 44: ...assword when typing Device administrators Views or deactivates the device administrators Unknown sources Enables to allow installation of applications from unknown sources Storage type Displays the su...

Page 45: ...Page 35 4 5 9 Accounts Tap Add account to start setting up an e mail or corporate account Figure 4 17 Accounts Menu 4 5 10 Language Input Figure 4 18 Language Input Menu Use the Language input menu t...

Page 46: ...onary Configures the user dictionary Keyboard input methods Allows the user to set up the onscreen keyboard Text to speech output Configures the text to speech settings Pointer speed Sets up the point...

Page 47: ...provided time Automatic time zone Turns on to use the network provided time zone Set date Sets up the system date This item is available only when the Automatic date time item is disabled Set time Set...

Page 48: ...on function and configures its settings Magnification gestures Enables to zoom in and out by triple tapping the screen Large text Turns on to use large text High contrast text Turns on to display text...

Page 49: ...h hold delay Configures the touch hold delay settings Color inversion Turns on or off the color inversion function Color correction Turns on or off the color correction function 4 5 14 Printing The Pr...

Page 50: ...the microSD card Status Taps to display the status of batteries network signal etc Legal information Taps to display the legal information Model number Displays the model number Android version Displa...

Page 51: ...File Explorer Screen The user can tap the storage folder Figure 4 24 to view all the possible storage devices listed below sdcard0 Internal storage of the IOBA 10F AD sdcard1 SD card connected to the...

Page 52: ...IOBA 10F AD RISC based Panel PC Page 42 Figure 4 25 Possible Storage Devices Tap a storage device to display its contents if available...

Page 53: ...IOBA 10F AD RISC based Panel PC Page 43 Appendix A A Regulatory Compliance...

Page 54: ...ssential requirements and other relevant provisions of Directive 1999 5 EC Bulgarian IEI Integration Corp 1999 5 esky Czech IEI Integration Corp t mto prohla uje e tento za zen je ve shod se z kladn m...

Page 55: ...5 EK Lietuvi Lithuanian IEI Integration Corp deklaruoja kad is ranga atitinka esminius reikalavimus ir kitas 1999 5 EB Direktyvos nuostatas Nederlands Dutch IEI Integration Corp dat het toestel toeste...

Page 56: ...dolo ili direktive 1999 5 ES Slovensky Slovak IEI Integration Corp t mto vyhlasuje e zariadenia sp a z kladn po iadavky a v etky pr slu n ustanovenia Smernice 1999 5 ES Suomi Finnish IEI Integration...

Page 57: ...interference at his own expense Federal Communication Commission Interference Statement This equipment has been assembled with components that comply with the limits for a Class B digital device pursu...

Page 58: ...IOBA 10F AD RISC based Panel PC Page 48 Appendix B B Safety Precautions...

Page 59: ...ected whenever the IOBA 10F AD is being installed moved or modified Do not apply voltage levels that exceed the specified voltage range Doing so may cause fire and or an electrical shock Electric shoc...

Page 60: ...e following anti static precautions are strictly adhered to Wear an anti static wristband Wearing a simple anti static wristband can help to prevent ESD from damaging any electrical component Self gro...

Page 61: ...trical and electronic products carrying the mark left must be disposed of separately from normal household waste This includes monitors and electrical accessories such as signal cables or power cords...

Page 62: ...be cleaned using a product specifically designed for the purpose In such case the product will be explicitly mentioned in the cleaning tips Below is a list of items to use when cleaning the IOBA 10F A...

Page 63: ...IOBA 10F AD RISC based Panel PC Page 53 Appendix C C Hazardous Materials Disclosure...

Page 64: ...s and lamps These components will be separately marked Please refer to below table Part Name Toxic or Hazardous Substances and Elements Lead Pb Mercury Hg Cadmium Cd Hexavalent Chromium CR VI Polybrom...

Page 65: ...ased Panel PC Page 55 RoHS RoHS Pb Hg Cd CR VI PBB PBDE O O O O O O O O O O O O O O O O O O O O O O O O O O O O O O O O O O O O O O O O O O O O O O O O O SJ T11363 2006 GB T 26572 2011 X SJ T11363 200...

Reviews: