IOVU-572M Panel PC
Page 29
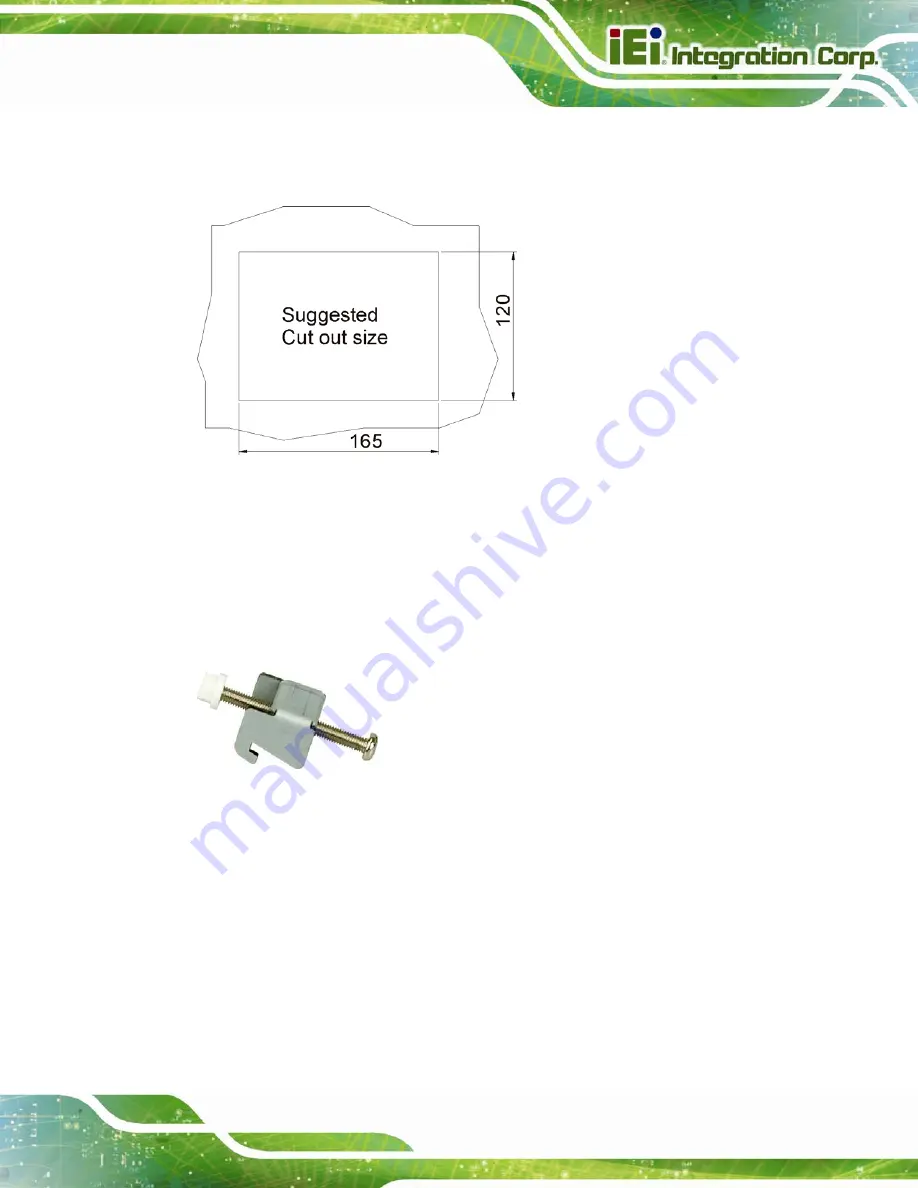
the overall size of the frame that surrounds the IOVU-572M but just large
enough for the rear panel of the IOVU-572M to fit through (see Figure 4-16).
Figure 4-16: IOVU-572M Panel Opening (mm)
Step 3:
Slide the IOVU-572M through the hole until the frame is flush against the panel.
Step 4:
Insert the panel mounting clamps into the pre-formed holes along the edges of
the chassis, behind the frame.
Figure 4-17: Panel Mounting Clamp
Step 5:
Tighten the screws that pass through the panel mounting clamps until the plastic
caps at the front of all the screws are firmly secured to the panel (Figure 4-18).
S
te
p
0
:
Summary of Contents for IOVU-572M
Page 7: ...IOVU 572M Panel PC Page vii Figure 4 27 Network Connected 35 ...
Page 9: ...IOVU 572M Panel PC Page 1 Chapter 1 1 Introduction ...
Page 14: ...IOVU 572M Panel PC Page 6 Chapter 2 2 Detailed Specifications ...
Page 19: ...IOVU 572M Panel PC Page 11 Chapter 3 3 Unpacking ...
Page 23: ...IOVU 572M Panel PC Page 15 Chapter 4 4 Installation ...
Page 44: ...IOVU 572M Panel PC Page 36 Appendix A A Certifications ...
Page 46: ...IOVU 572M Panel PC Page 38 Appendix B B Safety Precautions ...
Page 52: ...IOVU 572M Panel PC Page 44 Appendix C C Hazardous Materials Disclosure ...


