iSignager-300
Page 13
NOTE:
The iSignager-300 supports 720 x 480 resolution on the display device
through the VGA port.
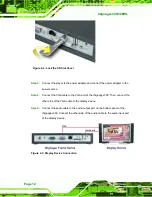
Step 6:
To transfer player settings or sequences to the player via the network, connect
the iSignager-300 to the same LAN of the PC via an Ethernet cable (optional
step).
Step 0:
2.2 Mounting the iSignager-300
The iSignager-300 can be mounted on a wall, stand or arm. The mounting methods are
described below.
CAUTION:
When mounting the iSignager-300 take care to tighten the retention screws or
bolts until fully secure, but do not over tighten. Over tightening the retention
screws or bolts may cause them to become stripped, rendering them useless.
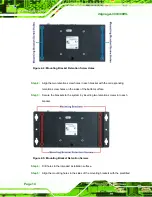
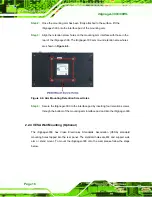
2.2.1 Wall Mounting
To mount the iSignager-300 onto a wall or some other surface using the two mounting
brackets, please follow the steps below.
Step 1:
Turn the iSignager-300 over.
Summary of Contents for Isignager-300
Page 2: ...iSignager 300 300WL Page ii Revision Date Version Changes 5 November 2009 1 00 Initial release...
Page 8: ......
Page 9: ...iSignager 300 Page 1 Chapter 1 1 Introduction...
Page 18: ...iSignager 300 300WL Page 10 Chapter 2 2 Installation...
Page 27: ...iSignager 300 Page 19 Appendix A A Check and Modify the Player Status...


