iSignager 500A
Page 15
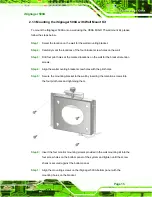
2.1.3 Mounting the iSignager 500A with Wall Mount Kit
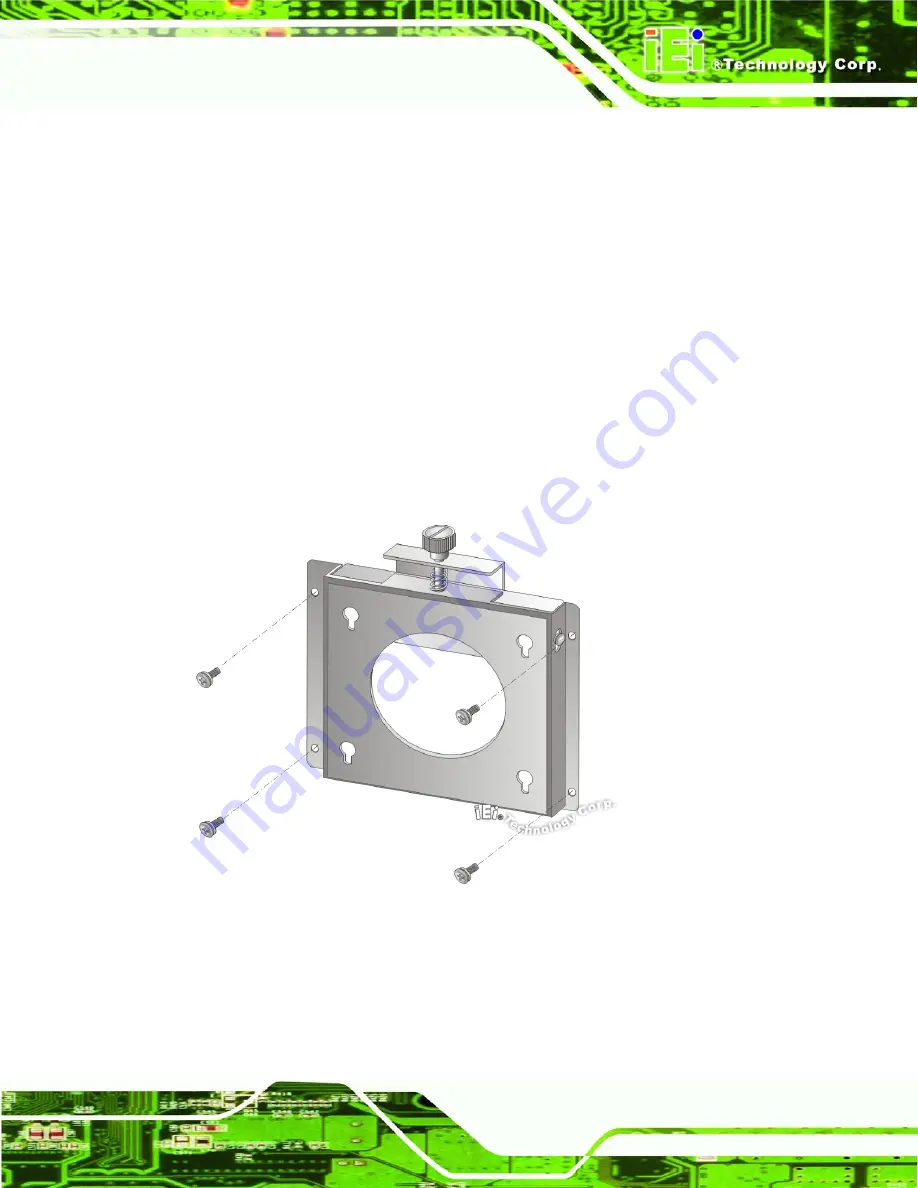
To mount the iSignager 500A onto a wall using the VESA MIS-D 75 wall mount kit, please
follow the steps below.
Step 1:
Select the location on the wall for the wall-mounting bracket.
Step 2:
Carefully mark the locations of the four bracket screw holes on the wall.
Step 3:
Drill four pilot holes at the marked locations on the wall for the bracket retention
screws.
Step 4:
Align the wall-mounting bracket screw holes with the pilot holes.
Step 5:
Secure the mounting-bracket to the wall by inserting the retention screws into
the four pilot holes and tightening them.
Step 6:
Insert the four monitor mounting screws provided in the wall mounting kit into the
four screw holes on the bottom panel of the system and tighten until the screw
shank is secured against the bottom panel.
Step 1:
Align the mounting screws on the iSignager 500A bottom panel with the
mounting holes on the bracket.
Summary of Contents for iSignager 500A
Page 1: ...iSignager 500A Page i iSignager 500A User Manual ...
Page 2: ...iSignager 500A Page ii Revision Date Version Changes 2008 04 1 0 Initial Release ...
Page 10: ......
Page 11: ...iSignager 500A Page 1 1 Introduction Chapter 1 ...
Page 20: ...iSignager 500A Page 10 THIS PAGE IS INTENTIONALLY LEFT BLANK ...
Page 21: ...iSignager 500A Page 11 2 Installation Chapter 2 ...
Page 34: ...iSignager 500A Page 24 ...
Page 36: ...iSignager 500A Page 26 THIS PAGE IS INTENTIONALLY LEFT BLANK ...
Page 37: ...iSignager 500A Page 27 A Video Audio and Graphic Formats Appendix A ...
Page 45: ...iSignager 500A Page 35 B Check and Modify the Player Status by Serial Port Appendix B ...
Page 58: ...iSignager 500A Page 48 THIS PAGE IS INTENTIONALLY LEFT BLANK ...
Page 59: ...iSignager 500A Page 49 C Hazardous Materials Disclosure Appendix C ...


