KINO-780AM2 Motherboard
Page 38
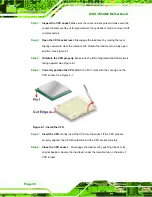
Step 1:
Inspect the CPU socket.
Make sure there are no bent pins and make sure the
socket contacts are free of foreign material. If any debris is found, remove it with
compressed air.
Step 2:
Open the CPU socket lever
. Disengage the load lever by moving the lever
slightly outward to clear the retention tab. Rotate the load lever to a fully open
position. See
Step 3:
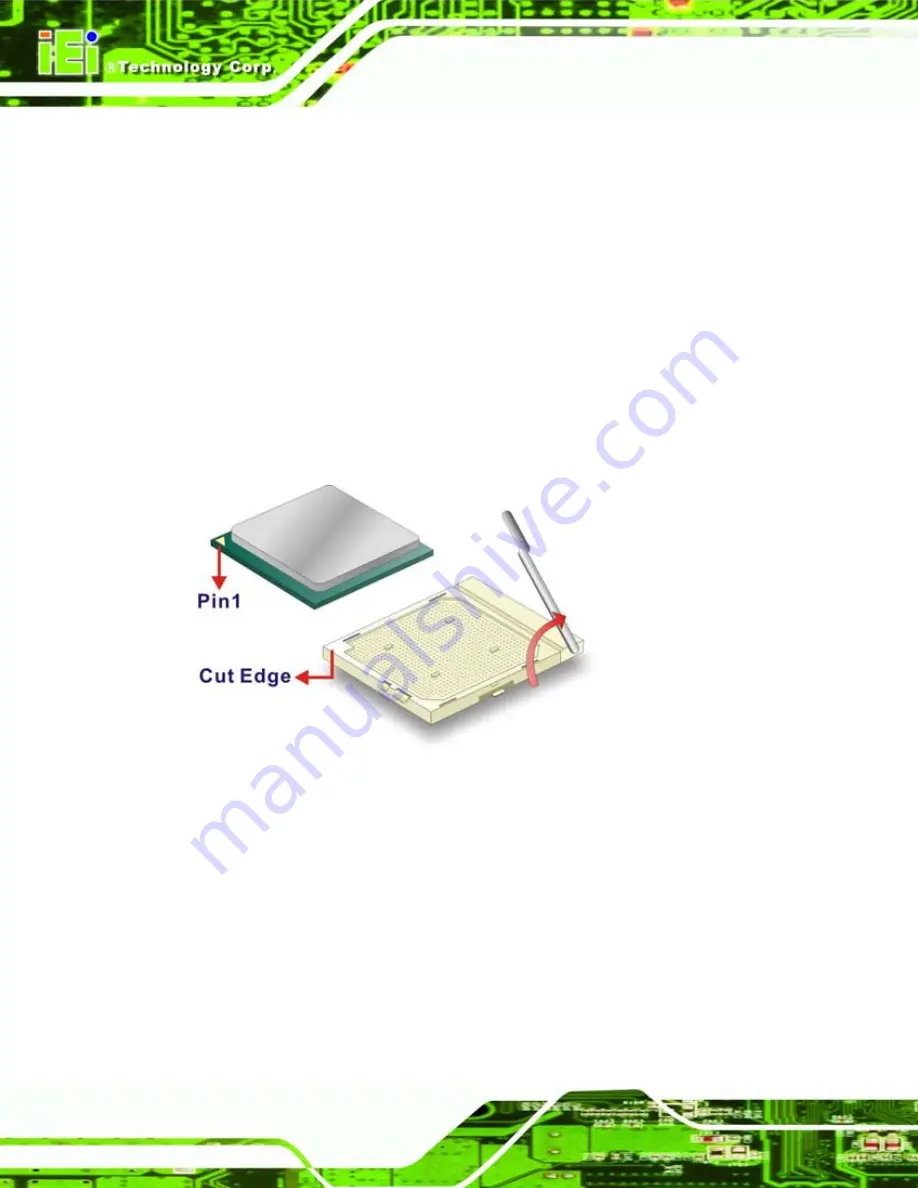
Orientate the CPU properly
. Make sure the IHS (Integrated Heat Sink) side is
facing upward. See
Step 4:
Correctly position the CPU.
Match the Pin 1 mark with the cut edge on the
CPU socket. See
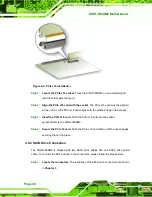
Figure 4-1: Install the CPU
Step 5:
Insert the CPU.
Gently insert the CPU into the socket. If the CPU pins are
properly aligned, the CPU should slide into the CPU socket smoothly
Step 6:
Close the CPU socket.
Re-engage the load lever by pushing it back to its
original position. Secure the load lever under the retention tab on the side of
CPU socket.
Step 0:
Summary of Contents for KINO-780AM2
Page 12: ...KINO 780AM2 Motherboard Page xii...
Page 13: ...KINO 780AM2 Motherboard Page 1 Chapter 1 1 Introduction...
Page 16: ...KINO 780AM2 Motherboard Page 4 Figure 1 3 KINO 780AM2 Dimensions mm...
Page 20: ...KINO 780AM2 Motherboard Page 8 Chapter 2 2 Packing List...
Page 24: ...KINO 780AM2 Motherboard Page 12 Chapter 3 3 Connectors...
Page 45: ...KINO 780AM2 Motherboard Page 33 Chapter 4 4 Installation...
Page 70: ...KINO 780AM2 Motherboard Page 58 Chapter 5 5 BIOS...
Page 114: ...KINO 780AM2 Motherboard Page 102 Appendix A A BIOS Options...
Page 117: ...KINO 780AM2 Motherboard Page 105 Load Optimal Defaults 100 Load Failsafe Defaults 101...
Page 118: ...KINO 780AM2 Motherboard Page 106 Appendix B B Terminology...
Page 122: ...KINO 780AM2 Motherboard Page 110 Appendix C C Digital I O Interface...
Page 125: ...KINO 780AM2 Motherboard Page 113 Appendix D D Watchdog Timer...
Page 128: ...KINO 780AM2 Motherboard Page 116 Appendix E E Hazardous Materials Disclosure...

