KINO-PVN-D5251/D4251/ Mini ITX SBC
Page 41
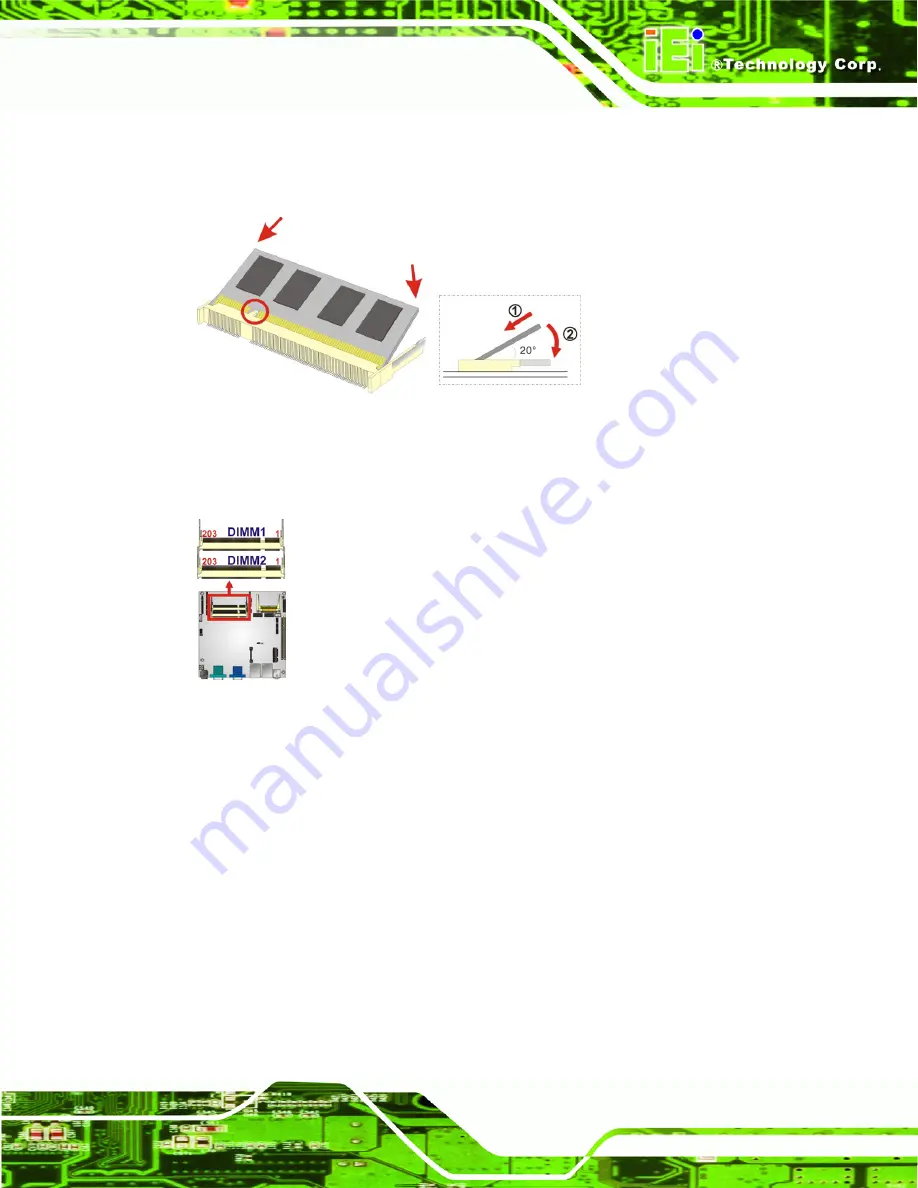
4.4.1 SO-DIMM Installation
To install a SO-DIMM, please follow the steps below and refer to
.
Figure 4-1: SO-DIMM Installation
Step 1:
Locate the SO-DIMM socket on the board
(See the figure below). Place the
board on an anti-static mat.
Figure
ٛ
4-2: SO-DIMM Connector Location
Step 2:
Align the SO-DIMM with the socket
. Align the notch on the memory with the
notch on the memory socket.
Step 3:
Insert the SO-DIMM
. Push the memory in at a 20º angle. (See
)
Step 4:
Seat the SO-DIMM
. Gently push downwards and the arms clip into place. (See
)
Step 0:
Summary of Contents for KINO-PVN-D5251
Page 14: ...KINO PVN D5251 D4251 Mini ITX SBC Page xiv...
Page 15: ...KINO PVN D5251 D4251 Mini ITX SBC Page 1 Chapter 1 1 Introduction...
Page 24: ...KINO PVN D5251 D4251 Mini ITX SBC Page 10 Chapter 2 2 Unpacking...
Page 28: ...KINO PVN D5251 D4251 Mini ITX SBC Page 14 Chapter 3 3 Connectors...
Page 51: ...KINO PVN D5251 D4251 Mini ITX SBC Page 37 Chapter 4 4 Installation...
Page 73: ...KINO PVN D5251 D4251 Mini ITX SBC Page 59 Figure 4 19 Graphics Driver Installation Reminder...
Page 74: ...KINO PVN D5251 D4251 Mini ITX SBC Page 60 Chapter 5 5 BIOS Screens...
Page 102: ...KINO PVN D5251 D4251 Mini ITX SBC Page 88 Appendix A A BIOS Options...
Page 105: ...KINO PVN D5251 D4251 Mini ITX SBC Page 91 Appendix B B One Key Recovery...
Page 133: ...KINO PVN D5251 D4251 Mini ITX SBC Page 119 Appendix C C Terminology...
Page 137: ...KINO PVN D5251 D4251 Mini ITX SBC Page 123 Appendix D D Digital I O Interface...
Page 143: ...KINO PVN D5251 D4251 Mini ITX SBC Page 129 Appendix F F Hazardous Materials Disclosure...


