KINO-SE-i2
P a g e 56
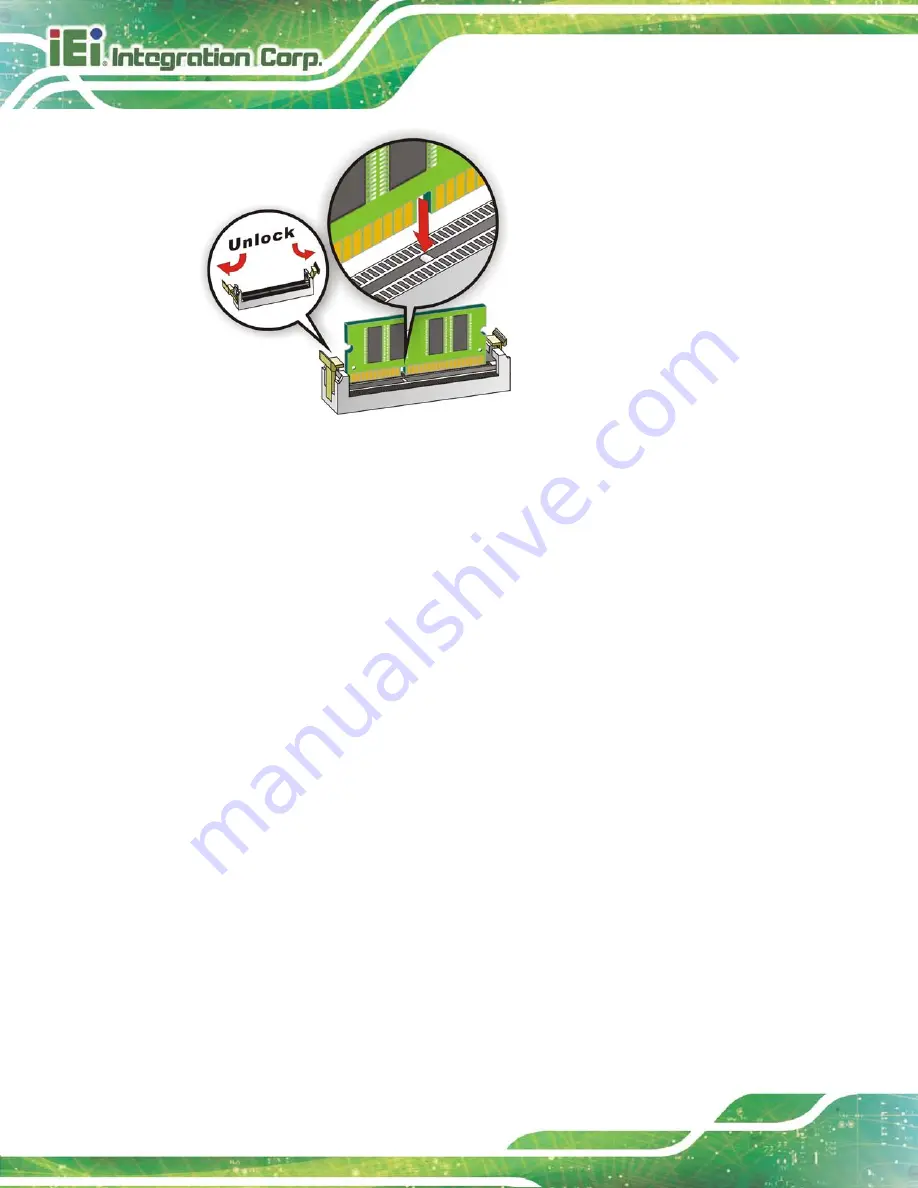
Figure 4-1: SO-DIMM Installation
S te p 1:
Open the SO-DIMM socket handles
. Open the two handles outwards as far as
they can. See
S te p 2:
Align the SO-DIMM with the socket
. Align the DIMM so the notch on the
memory lines up with the notch on the memory socket. See
S te p 3:
Insert the SO-DIMM
. Once aligned, press down until the SO-DIMM is properly
seated. Clip the two handles into place. See
S te p 4:
Removing a SO-DIMM
. To remove a SO-DIMM, push both handles outward.
The memory module is ejected by a mechanism in the socket.
S te p 0:
Summary of Contents for KINO-SE-i2
Page 2: ...KINO SE i2 Page II Revis ion Date Version Changes 27 January 2015 1 00 Initial release...
Page 13: ...KINO SE i2 Page 1 1 Introduction Chapter 1...
Page 22: ...KINO SE i2 Page 10 2 Unpacking Chapter 2...
Page 26: ...KINO SE i2 Page 14 3 Connectors Chapter 3...
Page 65: ...KINO SE i2 Page 53 4 Ins tallation Chapter 4...
Page 78: ...KINO SE i2 Page 66 5 BIOS Chapter 5...
Page 111: ...KINO SE i2 Page 99 Appendix A A BIOS Menu Options...
Page 114: ...KINO SE i2 Page 102 Appendix B B Terminology...
Page 119: ...KINO SE i2 Page 107 Appendix C C Watchdog Timer...
Page 122: ...KINO SE i2 Page 110 Appendix D D Hazardous Materials Dis clos ure...


