PAC-400AI QIG
IEI Integration Corp.
7
CHASSIS MAINTENANCE
F
AN
R
EPLACEMENT
NOTE:
Please ensure that the power of the computer is switched off
before you replace a fan.
There is one 8 cm cooling fan inside the PAC-400AI chassis. To
replace a fan, please follow the steps below:
Step 1:
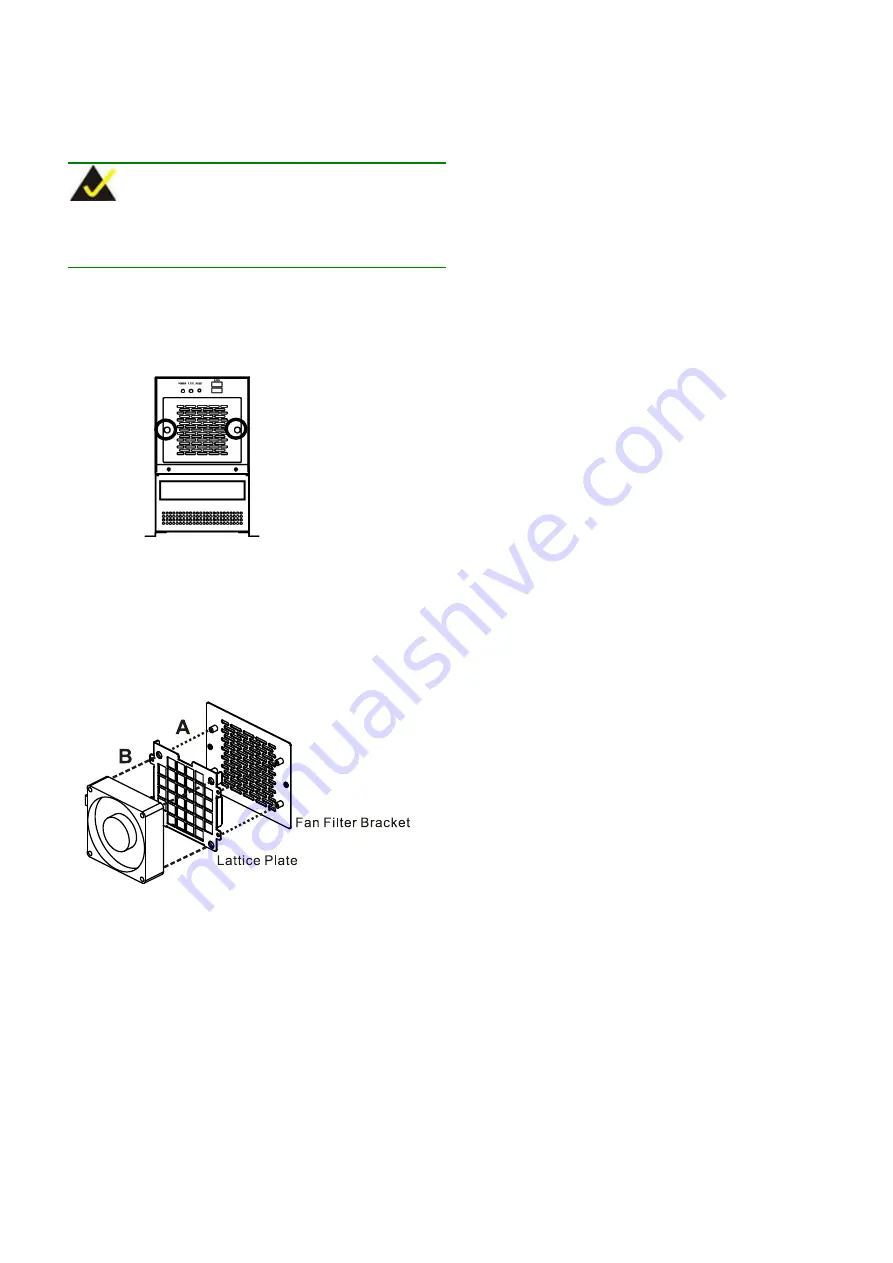
Loosen the two fan filter bracket thumbscrews.
Figure 12: Fan Filter Bracket Thumbscrews
Step 2:
Unplug the power cable connected to the fan.
Step 3:
Remove the four screws that secure the lattice plate with
the fan filter bracket (A).
Step 4:
Remove the four fan retention screws that secure the
fan to the lattice plate (B).
Figure 13: Fan Retention Screws
Step 5:
Install a new fan and reinsert the four previously
removed fan filter plate retention screws.
Step 6:
Reinstall the fan filter plate with the fan.
Step 7:
Reinstall the fan filter bracket and tighten the two fan
filter bracket thumbscrews.
F
AN
F
ILTER
R
EPLACEMENT
To replace the fan filter, please follow the steps below:
Step 1:
Loosen the two fan filter bracket thumbscrews.
Step 2:
Pull the fan filter pad out of the space between the lattice
plate and the fan filter bracket.
Step 3:
Insert a new fan filter pad.
Step 4:
Reinstall the fan filter bracket and fasten the two fan filter
bracket thumbscrews.