background image


POCi-W24C-ULT5 Medical Panel PC 


Page 61 


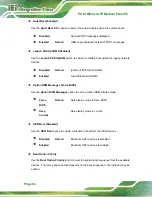
SATA Mode Selection [AHCI] 

Use the 

SATA Mode Selection

 option to configure how the SATA controller(s) operate. 


AHCI   

D

EFAULT


Configures SATA devices as AHCI device. 


Intel RST 

Premium 


Configures SATA devices as RAID device. 


  NOTE: 

Before  accessing  the  RAID  configuration  utility,  ensure  to  set  the 

Option  ROM  Messages

  BIOS  option  in  the 

Boot

  menu  to 

Force 

BIOS

.  This  is  to  allow  the  “Press  <CTRL+I>  to  enter  Configuration 

Utility……”  message  to  appear  during  POST.  Press  Ctrl+I  when 

prompted to enter the RAID configuration utility. 


PCIe Storage Dev On Port M2_M1  [Not RST Controlled] 

Use the 

PCIe Storage Dev On Port M2_M1

 option to enable or disable RST PCIe storage 

remapping for the M.2 M-key slot (M2_M1). 


RST 

Controlled 


Enable RST PCIe storage remapping. 


Not RST 

Controlled 


D

EFAULT


Disable 

RST PCIe storage remapping. 


Summary of Contents for POCi-W24C-ULT5

Page 1: ...i MODEL NAME User Manual POCi W24C ULT5 MODEL Medical Panel PC with 8th Gen Intel Core i5 i7 CPU Up to 64 GB DDR4 RAM P CAP Touchscreen HDIM Output M 2 Isolated COM Wi Fi 802 11ax Dual Isolated GbE Audio and RoHS Rev 1 01 February 22 2022 ...

Page 2: ...i MODEL NAME Revision Date Version Changes February 22 2022 1 01 Updated Table 1 2 System Specifications Updated Section 3 1 Added a warning message in Section 3 3 Updated FCC warning message in Appendix A August 3 2021 1 00 Initial release ...

Page 3: ...ibility of such damages This document contains proprietary information protected by copyright All rights are reserved No part of this manual may be reproduced by any mechanical electronic or other means in any form without prior written permission of the manufacturer TRADEMARKS All registered trademarks and product names mentioned herein are used for identification purposes only and may be tradema...

Page 4: ...n personal injury Warnings should be taken seriously CAUTION Cautionary messages should be heeded to help reduce the chance of losing data or damaging the product NOTE These messages inform the reader of essential but non critical information These messages should be read carefully as any directions or instructions contained therein can help avoid making mistakes ...

Page 5: ...9 BATTERY SPECIFICATIONS B SKU ONLY 11 1 10 DIMENSIONS 14 2 UNPACKING 15 2 1 UNPACKING 16 2 2 PACKING LIST 17 2 3 OPTIONAL ATO ITEMS 18 3 INSTALLATION 19 3 1 SAFETY PRECAUTIONS 20 3 2 ANTI STATIC PRECAUTIONS 22 3 3 INSTALLATION PRECAUTIONS 23 3 4 INSTALLATION AND CONFIGURATION STEPS 24 3 5 HDD INSTALLATION 25 3 6 M 2 M KEY MODULE INSTALLATION 27 3 7 RS 232 SERIAL PORT CONNECTION 29 3 8 VESA MOUNTI...

Page 6: ...46 4 3 7 1 Serial Port 1 Configuration 46 4 3 8 Serial Port Console Redirection 47 4 3 8 1 Console Redirection Settings 48 4 3 8 2 Legacy Console Redirection Settings 50 4 3 9 USB Configuration 51 4 3 10 CSM Configuration 52 4 3 11 NVMe Configuration 53 4 4 CHIPSET 53 4 4 1 System Agent SA Configuration 54 4 4 1 1 Memory Configuration 55 4 4 1 2 Graphics Configuration 56 4 4 2 PCH IO Configuration...

Page 7: ... B PRODUCT DISPOSAL 76 C MAINTENANCE AND CLEANING PRECAUTIONS 78 C 1 1 Maintenance and Cleaning 80 C 1 2 Cleaning Tools 80 D SYMBOL DEFINITIONS 81 E BIOS MENU OPTIONS 83 F WATCHDOG TIMER 86 G HAZARDOUS MATERIALS DISCLOSURE 89 G 1 ROHS II DIRECTIVE 2015 863 EU 90 G 2 CHINA ROHS 91 ...

Page 8: ... Holder 13 Figure 1 10 Connect the Battery Pack 13 Figure 1 11 Dimensions mm 14 Figure 3 1 HDD Cover Retention Screws 25 Figure 3 2 HDD Bracket Retention Screws 25 Figure 3 3 Secure HDD 26 Figure 3 4 HDD Installation 26 Figure 3 5 Bracket Retention Screws 27 Figure 3 6 M 2 Slot Location 27 Figure 3 7 Inserting the M 2 Module into the Slot at an Angle 28 Figure 3 8 Securing the M 2 Module 28 Figure...

Page 9: ...OCi W24C ULT5 Medical Panel PC Page ix MODEL NAME List of Tables Table 1 1 Model Variations 3 Table 1 2 System Specifications 10 Table 3 1 RS 232 Serial Port Pinouts 29 Table 4 1 BIOS Navigation Keys 35 ...

Page 10: ...t n Configuration Menu 46 BIOS Menu 12 Serial Port Console Redirection 47 BIOS Menu 13 Console Redirection Settings 48 BIOS Menu 14 Legacy Console Redirection Settings 50 BIOS Menu 15 USB Configuration 51 BIOS Menu 16 CSM Configuration 52 BIOS Menu 17 NVMe Configuration 53 BIOS Menu 18 Chipset 53 BIOS Menu 19 System Agent SA Configuration 54 BIOS Menu 20 Memory Configuration 55 BIOS Menu 21 Graphi...

Page 11: ...POCi W24C ULT5 Medical Panel PC Page 1 1 Introduction Chapter 1 ...

Page 12: ...mory and supports a maximum of 64 GB ensuring smooth data throughputs with reduced bottlenecks and fast system access One RS 232 serial port 1 5K isolated connector four USB 3 2 Gen 2 ports and two USB 2 0 ports provide simplified connectivity to a variety of external peripheral devices Wi Fi 802 11ax high efficiency wireless and two RJ 45 GbE connectors 1 5K isolated connector allow for smooth co...

Page 13: ... BP Intel Core i7 8665UE No Yes Table 1 1 Model Variations 1 3 Features The POCi W24C ULT5 features are listed below Fanless medical grade panel PC with anti bacteria rear cover FHD IPS panel with chemical etching AG coating and optional DICOM preset module Projected capacitive type touchscreen allows 10 point multi touch Intel Core i7 8665UE Core i5 8365UE processor Preinstalled with 4 GB of DDR4...

Page 14: ...nel The front side of the POCi W24C ULT5 is a flat bezel panel with a TFT LCD screen surrounded by an aluminum frame Figure 1 2 The bottom surface contains several backlit touch buttons a power indicator and an optional RFID reader Figure 1 2 Front View ...

Page 15: ...s to power on the system Long press the power button for 10 seconds to force shutdown the panel PC Reading light on off Brightness down minimum brightness 5 Brightness up maximum brightness 100 LCD touch lock on off Long press to turn on off the LCD and the touch function The touch buttons blink when the LCD is off and the touch function is locked Programmable button or DICOM mode button activated...

Page 16: ...Figure 1 4 1 x DC input jack standard Power inlet BP SKU 1 x HDMI output connector 2 x GbE RJ 45 1 5K isolated connectors 1 x RS 232 DB 9 serial port 1 5K isolated connector 4 x USB 3 2 Gen 2 connector 5V 1A 1 x Audio out and mic in combo connector 2 x 2 W speaker 2 x LED reading light Figure 1 4 Bottom Panel Figure 1 5 Bottom Panel BP SKU ...

Page 17: ...orts protected by a cover and a power button Figure 1 6 Side View 1 7 Rear Panel The rear panel contains the retention screw holes that support VESA 75 100 mounting Figure 1 7 HDD SSD and M 2 modules can also be installed by removing the HDD cover located on the rear panel Figure 1 7 Rear View ...

Page 18: ...USB interface Multi touch 10 point touch Touch Controller EETI 80H84 Surface Hardness 6H Coating Chemical etching AG System CPU Intel Core i7 8665UE code named Whiskey Lake Intel Core i5 8365UE code named Whiskey Lake Memory Preinstalled with 4 GB DDR4 SO DIMM system max 64 GB GbE Controller LAN1 Intel I219 Ethernet controller AMT 12 x supported by i7 i5 SKUs LAN2 Intel I211 Ethernet controller Wi...

Page 19: ...ptional Other Features 1 x Power on off 1 x Reading light on off Function Keys 1 x Brightness up 1 x Brightness down 1 x LCD touch lock on off 1 x Programmable button DICOM mode button optional LED 1 x Power indicator 2 x LED reading light 1 x RFID indicator optional Cooling Method Fanless Physical Construction Material Front bezel Aluminum die casting Rear cover ABS PC plastic with anti bacterial...

Page 20: ...ock Class I equipment EMC Safety CE FCC Class B Part 15 Part 18 EN 60601 1 2006 A1 2013 Edition 3 1 EN 60601 1 2 2015 Edition 4 0 Power for POCi W24C ULT5xxxxxxxxxxxxxxxxxxxx Power Input 19 V DC 7 89 A Power Adapter 150 W FSP FSP150M ABA medical grade power adapter P N 63040 010150 400 RS Input 100 V AC 240 V AC 50 Hz 60 Hz 2 A 0 85 A Output 19 V 7 89 A Battery Japone Technology Inc TC 202 Li ion ...

Page 21: ...surrounding environment that can result in an explosion or the leakage of flammable liquid or gas Laisser une batterie dans un environnement environnant à température extrêmement élevée qui peut entraîner une explosion ou une fuite de liquide ou de gaz inflammable A battery subjected to extremely low air pressure that may result in an explosion or the leakage of flammable liquid or gas Une batteri...

Page 22: ...V Charge voltage 12 6 V Continuous charge current 2 6 A Continuous discharge current 5 A Storage temperature 0ºC 40ºC To replace or remove the battery follow the steps below Step 1 Remove the two battery cover retention screws on the rear panel Figure 3 1 Figure 1 8 Battery Cover Retention Screws Step 2 Remove the battery cover Step 3 Remove the two battery holder retention screws Figure 3 2 and l...

Page 23: ...n on the battery to remove the battery Step 5 To replace the battery put a new battery in and connect it to the system Figure 1 10 Secure the battery with the battery holder previously removed Figure 1 10 Connect the Battery Pack Step 6 Re install the battery cover and secure it with two retention screws ...

Page 24: ...POCi W24C ULT5 Medical Panel PC Page 14 1 10 Dimensions The POCi W24C ULT5 dimensions are shown below Figure 1 11 Dimensions mm ...

Page 25: ...POCi W24C ULT5 Medical Panel PC Page 15 2 Unpacking Chapter 2 ...

Page 26: ...ercle en plastique uniquement une fois que le Panel PC médical a été correctement installé Cela garantit que l écran est protégé pendant le processus d installation Step 1 Use box cutters a knife or a sharp pair of scissors that seals the top side of the external second box Step 2 Open the external second box Step 3 Use box cutters a knife or a sharp pair of scissors that seals the top side of the...

Page 27: ...r or vendor the POCi W24C ULT5 was purchased from or contact an IEI sales representative directly by sending an email to 326H378Hsales ieiworld com The POCi W24C ULT5 medical panel PC is shipped with the following components Quantity Item Image 1 POCi W24C ULT5 medical panel PC 1 150 W FSP FSP150M ABA medical grade power adapter 1 Power cord EU 4 Round head screw M3 3 for HDD installation ...

Page 28: ...llowing are optional assemble to order components Item Part Number RFID reader MEDP MF RFID R11 DICOM module MEDP DICOM R10 PoE card 2 port 1000BASE T 802 3at GPoE 2P R20 Cable cover POCP CC06 R10 TPM module TPM IN03 R10 Li ion battery pack 3S3P 7800 mAh 31603 000069 RS ...

Page 29: ...POCi W24C ULT5 Medical Panel PC Page 19 3 Installation Chapter 3 ...

Page 30: ...ord from the ac outlet Refer servicing to qualified service personnel The AC outlet shall be readily available and accessible Users must not allow SIP SOPs and the patient to come into contact at the same time Grounding reliability can only be achieved when the equipment is connected to an equivalent receptacle marked Hospital Only or Hospital Grade Follow the electrostatic precautions outlined be...

Page 31: ...n off the power supply immediately unplug the power cord and contact the POCi W24C ULT5 vendor Never replace or repair any components on your own If the components of the POCi W24C ULT5 fails or malfunctions it must be shipped back to IEI to be repaired Please contact the system vendor reseller or an IEI sales person directly DO NOT o Drop the POCi W24C ULT5 against a hard surface o Strike or exer...

Page 32: ...c components including the POCi W24C ULT5 Dry climates are especially susceptible to ESD It is therefore critical that whenever the POCi W24C ULT5 is accessed internally or any other electrical component is handled the following anti static precautions are strictly adhered to Wear an anti static wristband Wearing a simple anti static wristband can help to prevent ESD from damaging the board Self g...

Page 33: ... plug in added peripheral devices ground themselves first and wear an anti static wristband AC power plug AC plug is used as a means and device to be separated from the mains and must be installed in a location where it can be easily unplugged WARNING AVERTISSEMENT DO NOT power up the POCi W24C ULT5 while the front panel is facing down on a sheet of conductive foam Doing so may cause the touch pan...

Page 34: ...et utilisé conformément aux instructions fournies et la ou les antennes utilisées pour cet émetteur doivent être installées pour fournir une distance de séparation d au moins 20 cm de toutes les personnes et ne doivent pas être co localisées ou fonctionner en conjonction avec toute autre antenne ou émetteur Les utilisateurs finaux et les installateurs doivent recevoir les instructions d installati...

Page 35: ...low the steps below Step 1 Remove the two HDD cover retention screws on the rear panel Figure 3 1 Figure 3 1 HDD Cover Retention Screws Step 2 Remove the HDD cover Step 3 Remove the two HDD bracket retention screws Figure 3 2 and lift the HDD bracket off the panel PC Figure 3 2 HDD Bracket Retention Screws ...

Page 36: ... bottom of the HDD Figure 3 3 Step 5 Insert four retention screws M3 3 into the bracket Figure 3 3 Figure 3 3 Secure HDD Step 6 Place the HDD and slide it to securely connect to the SATA connector of the POCi W24C ULT5 Figure 3 4 Step 7 Secure the HDD bracket by fastening the two retention screws previously removed Figure 3 4 Figure 3 4 HDD Installation Step 8 Re install the HDD cover Step 0 ...

Page 37: ...ease follow the steps below Step 1 Follow the Step 1 Step 3 instruction described in Section 3 5 to remove the HDD cover and the HDD bracket Step 2 Remove the three retention screws to lift the bracket off the panel PC Figure 3 5 Bracket Retention Screws Step 3 Locate the M 2 M key slot Figure 3 6 M 2 Slot Location ...

Page 38: ...ole that matches the size of the M 2 module and rotate the latch 90 to lock it Step 4 Line up the notch on the M 2 module with the notch on the slot Slide the M 2 module into the socket at an angle of about 20º Figure 3 7 Figure 3 7 Inserting the M 2 Module into the Slot at an Angle Step 5 Press the M 2 module down to secure it Figure 3 8 Figure 3 8 Securing the M 2 Module Step 6 Re install the br...

Page 39: ...nection The bottom panel of the POCi W24C ULT5 has one DB 9 male connector for RS 232 connection It is 1 5kV isolated The pinouts of the DB 9 connector are listed below Pin RS 232 1 DCD 2 RX 3 TX 4 DTR 5 GND 6 DSR 7 RTS 8 CTS 9 RI Table 3 1 RS 232 Serial Port Pinouts ...

Page 40: ... mounting the POCi W24C ULT5 flat panel PC it is better to have more than one person to help with the installation to make sure the POCi W24C ULT5 does not fall down and get damaged Lors du montage du PC à écran plat POCi W24C ULT5 il est préférable d avoir plus d une personne pour aider à l installation pour s assurer que le POCi W24C ULT5 ne tombe pas et ne soit pas endommagé 2 Use suitable moun...

Page 41: ...ower on the system follow the steps below Step 1 Standard SKU Connect the power cord to the power adapter Connect the other end of the power cord to a power source Connect the power adapter to the power connector of the POCi W24C ULT5 NOTE The FSP FSP150M ABA power adapter came with the POCi W24C ULT5 standard SKU is a forming part of the medical device Figure 3 10 Power Input Connector BP SKU Con...

Page 42: ...e right panel Figure 1 6 Step 3 Short press the power button to turn on the POCi W24C ULT5 Step 0 NOTE 1 The user can also long press the touch button on the front panel for 2 seconds to power on the system please refer to Section 1 4 1 2 Long press the power button for 10 seconds to force shutdown the panel PC ...

Page 43: ...POCi W24C ULT5 Medical Panel PC Page 33 4 BIOS Setup Chapter 4 ...

Page 44: ...s 1 Press the DEL key as soon as the system is turned on or 2 Press the DEL key when the Press DEL to enter SETUP message appears on the screen 0 If the message disappears before the DEL key is pressed restart the computer and try again 4 1 2 Using Setup Use the arrow keys to highlight items press ENTER to select use the PageUp and PageDown keys to change entries press F1 for help and press ESC to...

Page 45: ... a small help window describing the appropriate keys to use and the possible selections for the highlighted item appears To exit the Help Window press ESC or the F1 key again 4 1 4 BIOS Menu Bar The menu bar on top of the BIOS screen has the following main items Main Changes the basic system configuration Advanced Changes the advanced system settings Chipset Changes the chipset settings Security S...

Page 46: ...70GHz Speed 2000 MHz ID 0x806EC Stepping V0 Number of Processors 4Core s 8Thread s Microcode Revision D6 GT Info GT2 0x3EA0 IGF VBIOS Version 1017 Memory RC Version 0 7 1 95 Total Memory 4096 MB Memory Frequency 2133 MHz PCH Information Name CNL PCH LP PCH SKU U Premium SKU Stepping D0 ME FW Version 12 0 47 1524 ME Firmware SKU Corporate SKU Access Level Administrator System Date Thu 12 15 2020 Sy...

Page 47: ...s ci dessous peut entraî ner un dysfonctionnement du système Assurez vous que les paramètres définis sont compatibles avec le matériel Aptio Setup Utility Copyright C 2020 American Megatrends Inc Main Advanced Chipset Security Boot Save Exit CPU Configuration PCH FW Configuration Trusted Computing ACPI Settings RTC Wake Settings iWDD H M Monitor F81803 Super IO Configuration Serial Port Console Re...

Page 48: ...ed CPU C states Disabled Intel Trusted Execution Technology Disabled When enabled a VMM can utilize the additional hardware capabilities provided by Vanderpool Technology Select Screen Select Item Enter Select Change Opt F1 General Help F2 Previous Values F3 Optimized Defaults F4 Save Exit ESC Exit Version 2 20 1271 Copyright C 2020 American Megatrends Inc BIOS Menu 3 CPU Configuration Intel VMX V...

Page 49: ...g Enabled Use the Hyper Threading option to enable or disable the Intel Hyper Threading Technology Disabled Disable Intel Hyper Threading Technology Enabled DEFAULT Enable Intel Hyper Threading Technology Intel SpeedStep tm Enabled Use the Intel SpeedStep option to enable or disable the Intel SpeedStep Technology Disabled Disables the Intel SpeedStep Technology Enabled DEFAULT Enables the Intel Sp...

Page 50: ...s option does not disable Manageability Features in FW Select Screen Select Item EnterSelect F1 General Help F2 Previous Values F3 Optimized Defaults F4 Save ESC Exit Version 2 20 1271 Copyright C 2020 American Megatrends Inc BIOS Menu 4 PCH FW Configuration AMT BIOS Features Enabled Use AMT BIOS Features option to enable or disable the access to MEBx Setup Disabled Unable to access MEBx Setup Ena...

Page 51: ...e PTT or dTPM PTT Enables PTT in SkuMgr dTPM 1 2 Disables PTT in SkuMgr Warning PTT dTPM will be disabled and all data saved on it will be lost Select Screen Select Item EnterSelect F1 General Help F2 Previous Values F3 Optimized Defaults F4 Save ESC Exit Version 2 20 1271 Copyright C 2020 American Megatrends Inc BIOS Menu 5 PTT Configuration TPM Device Selection dTPM If supported Use the TPM Devi...

Page 52: ...les BIOS support for security device O S will not show Security Device TCG EFI protocol and INT1A interface will not be available Select Screen Select Item Enter Select Change Opt F1 General Help F2 Previous Values F3 Optimized Defaults F4 Save Exit ESC Exit Version 2 20 1271 Copyright C 2020 American Megatrends Inc BIOS Menu 6 Trusted Computing Security Device Support Disable Use the Security Dev...

Page 53: ... button is pressed Select Screen Select Item Enter Select Change Opt F1 General Help F2 Previous Values F3 Optimized Defaults F4 Save Exit ESC Exit Version 2 20 1271 Copyright C 2020 American Megatrends Inc BIOS Menu 7 ACPI Settings ACPI Sleep State S3 Suspend to RAM Use the ACPI Sleep State option to specify the sleep state the system enters when it is not being used S3 Suspend to RAM DEFAULT The...

Page 54: ...revious Values F3 Optimized Defaults F4 Save Exit ESC Exit Version 2 20 1271 Copyright C 2020 American Megatrends Inc BIOS Menu 8 RTC Wake Settings Wake System with Fixed Time Disabled Use the Wake System with Fixed Time option to specify the time the system should be roused from a suspended state Disabled DEFAULT The real time clock RTC cannot generate a wake event Enabled If selected the followi...

Page 55: ...96 V 3 3VSB 3 288 V 3 3V 3 277 V 5V 4 961 V DCIN BAT 11 912 V Select Screen Select Item Enter Select Change Opt F1 General Help F2 Previous Values F3 Optimized Defaults F4 Save Exit ESC Exit Version 2 20 1271 Copyright C 2020 American Megatrends Inc BIOS Menu 9 iWDD H W Monitor PC Health Status The following system parameters and values are shown The system parameters that are monitored are Temper...

Page 56: ...ed Defaults F4 Save Exit ESC Exit Version 2 20 1271 Copyright C 2020 American Megatrends Inc BIOS Menu 10 F81803 Super IO Configuration 4 3 7 1 Serial Port 1 Configuration Use the Serial Port 1 Configuration menu BIOS Menu 11 to configure the serial port 1 Aptio Setup Utility Copyright C 2020 American Megatrends Inc Advanced Serial Port 1 Configuration Serial Port Enabled Device Settings IO 3F8h I...

Page 57: ...rends Inc Advanced COM1 Console Redirection Disabled Console Redirection Settings iAMT SOL COM2 PCi Bus0 Dev22 Func3 Console Redirection Disabled Console Redirection Settings Legacy Console Redirection Legacy Console Redirection Settings Console Redirection Enable or Disable Select Screen Select Item Enter Select Change Opt F1 General Help F2 Previous Values F3 Optimized Defaults F4 Save Exit ESC ...

Page 58: ...or function keys etc VT UTF8 Uses UTF8 encoding to map Unicode chars onto 1 or more bytes Select Screen Select Item Enter Select Change Opt F1 General Help F2 Previous Values F3 Optimized Defaults F4 Save Exit ESC Exit Version 2 20 1271 Copyright C 2020 American Megatrends Inc BIOS Menu 13 Console Redirection Settings Terminal Type ANSI Use the Terminal Type option to specify the remote terminal t...

Page 59: ...nt with the data bits for detecting the transmission errors None DEFAULT No parity bit is sent with the data bits Even The parity bit is 0 if the number of ones in the data bits is even Odd The parity bit is 0 if the number of ones in the data bits is odd Mark The parity bit is always 1 This option does not provide error detection Space The parity bit is always 0 This option does not provide error...

Page 60: ... Select a COM port to display redirection of Legacy OS and Legacy OPROM Messages Select Screen Select Item Enter Select Change Opt F1 General Help F2 Previous Values F3 Optimized Defaults F4 Save Exit ESC Exit Version 2 20 1271 Copyright C 2020 American Megatrends Inc BIOS Menu 14 Legacy Console Redirection Settings Legacy Serial Redirection Port COM1 Use the Legacy Serial Redirection Port option ...

Page 61: ...ect Item Enter Select Change Opt F1 General Help F2 Previous Values F3 Optimized Defaults F4 Save Exit ESC Exit Version 2 20 1271 Copyright C 2020 American Megatrends Inc BIOS Menu 15 USB Configuration USB Devices The USB Devices Enabled field lists the USB devices that are enabled on the system Legacy USB Support Enabled Use the Legacy USB Support BIOS option to enable USB mouse and USB keyboard ...

Page 62: ... Setup Utility Copyright C 2020 American Megatrends Inc Advanced Compatibility Support Module Configuration CSM Support Enabled Enable Disable CSM Support Select Screen Select Item EnterSelect F1 General Help F2 Previous Values F3 Optimized Defaults F4 Save ESC Exit Version 2 20 1271 Copyright C 2020 American Megatrends Inc BIOS Menu 16 CSM Configuration CSM Support Enabled Use the CSM Support BIO...

Page 63: ...F4 Save Exit ESC Exit Version 2 20 1271 Copyright C 2020 American Megatrends Inc BIOS Menu 17 NVMe Configuration 4 4 Chipset Use the Chipset menu BIOS Menu 18 to configure the system chipset Aptio Setup Utility Copyright C 2020 American Megatrends Inc Main Advanced Chipset Security Boot Save Exit System Agent SA Configuration PCH IO Configuration System Agent SA Parameters Select Screen Select Ite...

Page 64: ...ion VT d Supported Memory Configuration Graphics Configuration VT d Disabled Memory Configuration Parameters Select Screen Select Item Enter Select Change Opt F1 General Help F2 Previous Values F3 Optimized Defaults F4 Save Exit ESC Exit Version 2 20 1271 Copyright C 2020 American Megatrends Inc BIOS Menu 19 System Agent SA Configuration VT d Disabled Use the VT d option to enable or disable VT d ...

Page 65: ...Copyright C 2020 American Megatrends Inc Chipset Memory Configuration Memory Frequency DIMM1 Populated Enabled Size 4096 MB DDR4 DIMM2 Not Populated Disabled Select Screen Select Item Enter Select Change Opt F1 General Help F2 Previous Values F3 Optimized Defaults F4 Save Exit ESC Exit Version 2 20 1271 Copyright C 2020 American Megatrends Inc BIOS Menu 20 Memory Configuration ...

Page 66: ...C Exit Version 2 20 1271 Copyright C 2020 American Megatrends Inc BIOS Menu 21 Graphics Configuration Internal Graphics Enabled Use the Internal Graphics option to enable or disable the internal graphics device Auto The internal graphics device is automatically detected and enabled Disabled Disable the internal graphics device Enabled DEFAULT Enable the internal graphics device DVMT Pre Allocated ...

Page 67: ...IO Configuration Use the PCH IO Configuration menu BIOS Menu 22 to configure the PCH IO chipset Aptio Setup Utility Copyright C 2020 American Megatrends Inc Chipset PCH IO Configuration Auto Power Button Status Enable AT Power Saving Function ERP Disabled USB Power SW 5V DUAL PCI Express Configuration SATA And RST Configuration HD Audio Enabled Enable to reduce power consumption in system off stat...

Page 68: ...configure whether to provide power to the external USB connectors when the system is in S3 S4 sleep state This option is valid only when the above Power Saving Function ERP BIOS option is disabled 5V DUAL DEFAULT Power is provided to the USB connectors when the system is in S3 S4 sleep state 5V Power is not provided to the USB connectors when the system is in S3 S4 sleep state HD Audio Enabled Use...

Page 69: ...er Select Change Opt F1 General Help F2 Previous Values F3 Optimized Defaults F4 Save Exit ESC Exit Version 2 20 1271 Copyright C 2020 American Megatrends Inc BIOS Menu 23 PCI Express Configuration The PCIe slot submenus all contain the following options PCIE1 M1 M2_M1 Enabled Use the PCIE1 M1 M2_M1 option to enable or disable the expansion slot Disabled Disables the expansion slot Enabled DEFAULT...

Page 70: ...nu BIOS Menu 24 to change and or set the configuration of the SATA devices installed in the system Aptio Setup Utility Copyright C 2020 American Megatrends Inc Advanced SATA And RST Configuration STAT Controller s Enabled SATA Mode Selection AHCI PCIe Storage Dev On Port M2_M1 Not RST Controlled SATA1 Empty Enable Disable SATA Device Select Screen Select Item EnterSelect F1 General Help F2 Previou...

Page 71: ...o set the Option ROM Messages BIOS option in the Boot menu to Force BIOS This is to allow the Press CTRL I to enter Configuration Utility message to appear during POST Press Ctrl I when prompted to enter the RAID configuration utility PCIe Storage Dev On Port M2_M1 Not RST Controlled Use the PCIe Storage Dev On Port M2_M1 option to enable or disable RST PCIe storage remapping for the M 2 M key slo...

Page 72: ... password and must be entered to boot or enter Setup In Setup the User will have Administrator rights The password must be In the following range Maximum length 3 Minimum length 20 Administrator Password User Password Set Administrator Password Select Screen Select Item Enter Select Change Opt F1 General Help F2 Previous Values F3 Optimized Defaults F4 Save Exit ESC Exit Version 2 20 1271 Copyrigh...

Page 73: ... Version 2 20 1271 Copyright C 2020 American Megatrends Inc BIOS Menu 26 Boot Bootup NumLock State On Use the Bootup NumLock State BIOS option to specify if the number lock setting must be modified during boot up On DEFAULT Allows the Number Lock on the keyboard to be enabled automatically when the computer system boots up This allows the immediate use of the 10 key numeric keypad located on the r...

Page 74: ...ed Load PXE Option ROMs Option ROM Messages Force BIOS Use the Option ROM Messages option to set the Option ROM display mode Force BIOS DEFAULT Sets display mode to force BIOS Keep Current Sets display mode to current UEFI Boot Disabled Use the UEFI Boot option to enable or disable to boot from the UEFI devices Disabled DEFAULT Boot from UEFI devices is disabled Enabled Boot from UEFI devices is e...

Page 75: ... Select Item Enter Select Change Opt F1 General Help F2 Previous Values F3 Optimized Defaults F4 Save Exit ESC Exit Version 2 20 1271 Copyright C 2020 American Megatrends Inc BIOS Menu 27 Save Exit Save Changes and Reset Use the Save Changes and Reset option to save the changes made to the BIOS options and reset the system Discard Changes and Reset Use the Discard Changes and Reset option to exit ...

Page 76: ...PC Page 66 Save as User Defaults Use the Save as User Defaults option to save the changes done so far as user defaults Restore User Defaults Use the Restore User Defaults option to restore the user defaults to all the setup options ...

Page 77: ...POCi W24C ULT5 Medical Panel PC Page 67 Chapter 5 5 Driver Installation ...

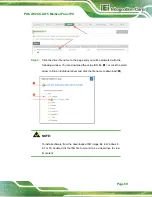
Page 78: ...s Enter to find all the relevant software utilities and documentation Figure 5 1 IEI Resource Download Center 5 2 Driver Download To download drivers from IEI Resource Download Center follow the steps below Step 1 Go to https download ieiworld com Type POCi W24C ULT5 and press Enter Step 2 All product related software utilities and documentation will be listed You can choose Driver to filter the r...

Page 79: ...with the following window You can download the entire ISO file or click the small arrow to find an individual driver and click the file name to download NOTE To install software from the downloaded ISO image file in Windows 8 8 1 or 10 double click the ISO file to mount it as a virtual drive to view its content ...

Page 80: ...POCi W24C ULT5 Medical Panel PC Page 70 Appendix A A Regulatory Compliance ...

Page 81: ...other relevant provisions of Directive 2014 53 EU Български Bulgarian IEI Integration Corp декларира че този оборудване е в съответствие със съществените изисквания и другите приложими правила на Директива 2014 53 EU Česky Czech IEI Integration Corp tímto prohlašuje že tento zařízení je ve shodě se základními požadavky a dalšími příslušnými ustanoveními směrnice 2014 53 EU Dansk Danish IEI Integra...

Page 82: ...ām un citiem ar to saistītajiem noteikumiem Direktīvas 2014 53 EU Lietuvių Lithuanian IEI Integration Corp deklaruoja kad šis įranga atitinka esminius reikalavimus ir kitas 2014 53 EU Direktyvos nuostatas Nederlands Dutch IEI Integr tion Corp dat et toestel toestel in overeenstemming is met de essentiële eisen en de andere relevante bepalingen van richtlijn 2014 53 EU Malti Maltese IEI Integration...

Page 83: ...enia Smernice 2014 53 EU Suomi Finnish IEI Integration Corp vakuuttaa täten että laitteet on direktiivin 2014 53 EU oleellisten vaatimusten ja sitä koskevien direktiivin muiden ehtojen mukainen Svenska Swedish IEI Integration Corp förklarar att denna utrustnin styp står I överensstämmelse med de väsentliga egenskapskrav och övriga relevanta bestämmelser som framgår av direktiv 2014 53 EU UL CLASSI...

Page 84: ...to cause harmful interference in which case the user will be required to correct the interference at his own expense Any changes or modifications not expressly approved by the party responsible for compliance could void the user s authority to operate the equipment This equipment complies with FCC radiation exposure limits set forth for an uncontrolled environment This equipment should be installe...

Page 85: ...ropean EU Restriction of Hazardous Substances RoHS that set maximum concentration limits on hazardous materials used in electrical and electronic equipment CHINA ROHS The label on the product indicates the estimated Environmentally Friendly Use Period EFUP This is an estimate of the number of years that these substances would not leak out or undergo abrupt change This product may contain replaceab...

Page 86: ...POCi W24C ULT5 Medical Panel PC Page 76 B Product Disposal Appendix B ...

Page 87: ... correct disposal method Within the European Union The device that produces less waste and is easier to recycle is classified as electronic device in terms of the European Directive 2012 19 EU WEEE and must not be disposed of as domestic garbage EU wide legislation as implemented in each Member State requires that waste electrical and electronic products carrying the mark left must be disposed of ...

Page 88: ...POCi W24C ULT5 Medical Panel PC Page 78 C Maintenance and Cleaning Precautions Appendix C ...

Page 89: ...sont sèches lorsque vous débranchez le câble d alimentation CAUTION ATTENTION For safety reasons turn off the power switch and unplug the panel PC before cleaning Pour des raisons de sécurité éteignez l interrupteur d alimentation et débranchez le Panel PC avant de le nettoyer Do not scratch or rub the screen with a hard object Ne rayez pas et ne frottez pas l écran avec un objet dur Never use any...

Page 90: ...he openings of the POCi W24C ULT5 C 1 2 Cleaning Tools Some components in the POCi W24C ULT5 may only be cleaned using a product specifically designed for the purpose In such case the product will be explicitly mentioned in the cleaning tips Below is a list of items to use when cleaning the POCi W24C ULT5 Cloth Although paper towels or tissues can be used a soft clean piece of cloth is recommended...

Page 91: ...POCi W24C ULT5 Medical Panel PC Page 81 Appendix D D Symbol Definitions ...

Page 92: ... Refer to instruction manual Indicates proof of conformity to applicable European Economic Community Council directives and to harmonized standards published in the official journal of the European Communities Tested to comply with FCC Class B standard This symbol indicates that the waste of electronic equipment must not be disposed as unsorted municipal waste and must be collected separately Plea...

Page 93: ...POCi W24C ULT5 Medical Panel PC Page 83 E BIOS Menu Options Appendix E ...

Page 94: ... Suspend to RAM 43 Wake System with Fixed Time Disabled 44 PC Health Status 45 Serial Port Enabled 47 Console Redirection Disabled 47 Terminal Type ANSI 48 Bits per second 115200 48 Data Bits 8 49 Parity None 49 Stop Bits 1 49 Legacy Serial Redirection Port COM1 50 USB Devices 51 Legacy USB Support Enabled 51 CSM Support Enabled 52 VT d Disabled 54 Internal Graphics Enabled 56 DVMT Pre Allocated 3...

Page 95: ... Port M2_M1 Not RST Controlled 61 Administrator Password 62 User Password 62 Bootup NumLock State On 63 Quiet Boot Enabled 64 Launch PXE OpROM Disabled 64 Option ROM Messages Force BIOS 64 UEFI Boot Disabled 64 Boot Option Priority 64 Save Changes and Reset 65 Discard Changes and Reset 65 Restore Defaults 65 Save as User Defaults 66 Restore User Defaults 66 ...

Page 96: ...POCi W24C ULT5 Medical Panel PC Page 86 Appendix F F Watchdog Timer ...

Page 97: ...INT 15H AH 6FH Sub function AL 2 Sets the Watchdog Timer s period BL Time out value Its unit second is dependent on the item Watchdog Timer unit select in CMOS setup Table F 1 AH 6FH Sub function Call sub function 2 to set the time out period of Watchdog Timer first If the time out value is not zero the Watchdog Timer starts counting down When the timer value reaches zero the system resets To ensu...

Page 98: ...mer is not deactivated the system will automatically restart after the Timer has finished its countdown EXAMPLE PROGRAM INITIAL TIMER PERIOD COUNTER W_LOOP MOV AX 6F02H setting the time out value MOV BL 30 time out value is 48 seconds INT 15H ADD THE APPLICATION PROGRAM HERE CMP EXIT_AP 1 is the application over JNE W_LOOP No restart the application MOV AX 6F02H disable Watchdog Timer MOV BL 0 INT...

Page 99: ...POCi W24C ULT5 Medical Panel PC Page 89 Appendix G G Hazardous Materials Disclosure ...

Page 100: ...mina ted Diphenyl Ethers PBDE Bis 2 ethylh exyl phthalate DEHP Butyl benzyl phthalate BBP Dibutyl phthalate DBP Diisobutyl phthalate DIBP Housing O O O O O O O O O O Display O O O O O O O O O O Printed Circuit Board O O O O O O O O O O Metal Fasteners O O O O O O O O O O Cable Assembly O O O O O O O O O O Fan Assembly O O O O O O O O O O Power Supply Assemblies O O O O O O O O O O Battery O O O O ...

Page 101: ...短的环境友好使用期限的可替换元件 像是电池或灯管 这些 元件将会单独标示出来 部件名称 有毒有害物质或元素 铅 Pb 汞 Hg 镉 Cd 六价铬 CR VI 多溴联苯 PBB 多溴二苯醚 PBDE 壳体 O O O O O O 显示 O O O O O O 印刷电路板 O O O O O O 金属螺帽 O O O O O O 电缆组装 O O O O O O 风扇组装 O O O O O O 电力供应组装 O O O O O O 电池 O O O O O O O 表示该有毒有害物质在该部件所有物质材料中的含量均在SJ T11364 2014與GB T26572 2011 标准规定的限量要求以下 X 表示该有毒有害物质至少在该部件的某一均质材料中的含量超出 SJ T11364 2014 與 GB T26572 2011 标准规定的限量要求 ...

Reviews: