PPC-37xxA-N26 Panel PC
Page 31
3.8.2 PPC-3710A-N26 HDD Installation
To install the HDD into the PPC-3710A-N26, please follow the steps below:
Step 1:
Remove the back cover
. See
Section 3.5.
Step 2:
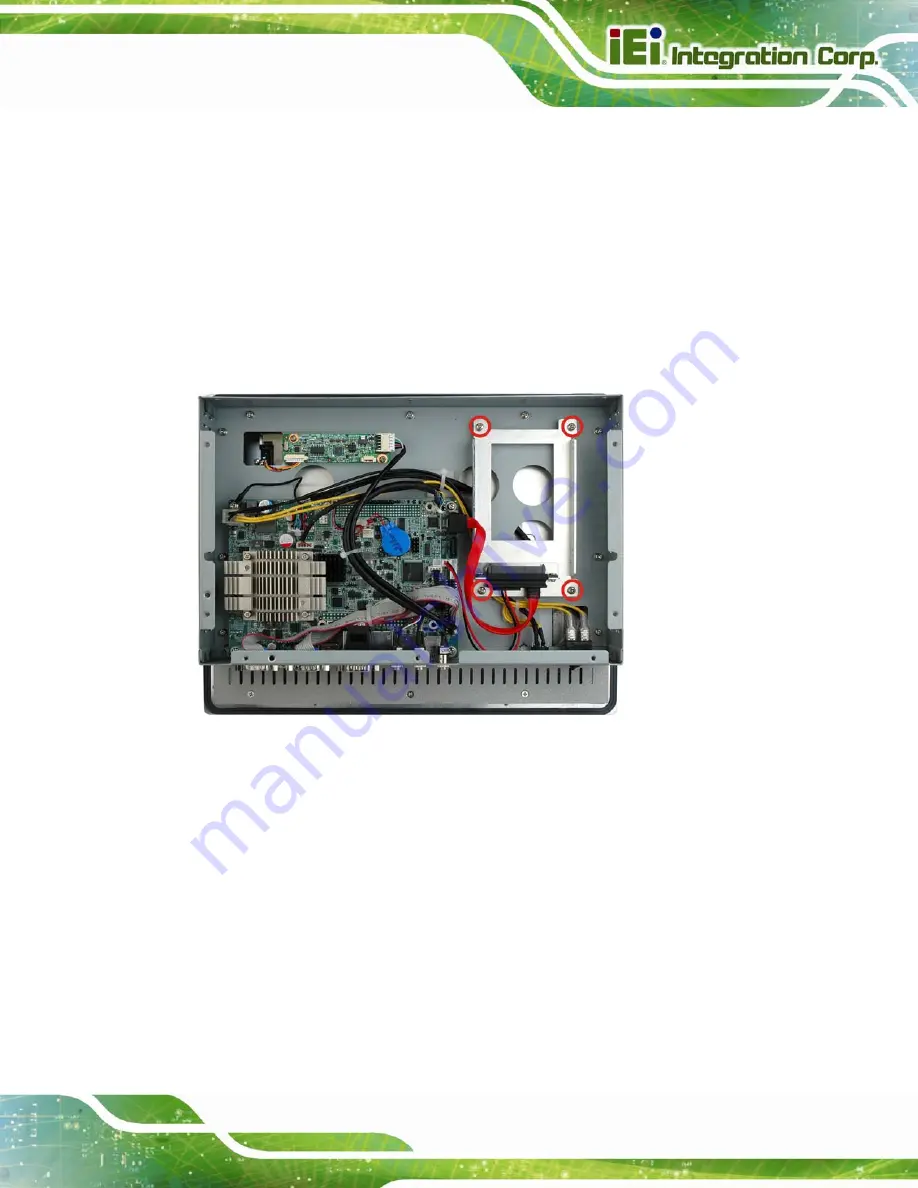
Remove the HDD bracket from the PPC-3710A-N26
. The HDD bracket is
attached on the panel PC with four retention screws inside the chassis
(
). Remove the four retention screws and lift the bracket off the
panel PC.
Figure 3-16: PPC-3710A-N26 HDD Bracket Retention Screws
Step 3:
Attach the hard drive in the bracket
. To do this, slide the hard drive onto the
bracket until it connects with the SATA connector at the back. Fasten the four
retention screws on the sides (
).
Summary of Contents for PPC-37 A-N26 Series
Page 17: ...PPC 37xxA N26 Panel PC Page 1 1 Introduction Chapter 1 ...
Page 29: ...PPC 37xxA N26 Panel PC Page 13 2 Unpacking Chapter 2 ...
Page 34: ...PPC 37xxA N26 Panel PC Page 18 3 Installation Chapter 3 ...
Page 72: ...PPC 37xxA N26 Panel PC Page 56 Chapter 4 4 System Maintenance ...
Page 76: ...PPC 37xxA N26 Panel PC Page 60 5 BIOS Setup Chapter 5 ...
Page 106: ...PPC 37xxA N26 Panel PC Page 90 6 Driver Installation Chapter 6 ...
Page 133: ...PPC 37xxA N26 Panel PC Page 117 7 Interface Connectors Chapter 7 ...
Page 145: ...PPC 37xxA N26 Panel PC Page 129 A BIOS Configuration Options Appendix A ...
Page 148: ...PPC 37xxA N26 Panel PC Page 132 Appendix B B One Key Recovery ...
Page 156: ...PPC 37xxA N26 Panel PC Page 140 Figure B 5 Partition Creation Commands ...
Page 189: ...PPC 37xxA N26 Panel PC Page 173 C Safety Precautions Appendix C ...
Page 194: ...PPC 37xxA N26 Panel PC Page 178 D Watchdog Timer Appendix D ...
Page 197: ...PPC 37xxA N26 Panel PC Page 181 E Hazardous Materials Disclosure Appendix E ...


