


PPC-37xx-N270 Panel PC
Page 35
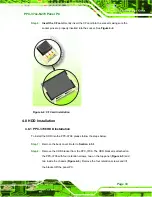
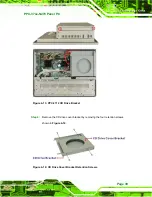
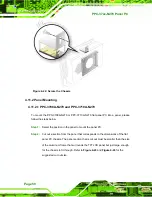
Step 5:
Connect the SATA cable from the motherboard to the rear of the HDD.
Step 0:
4.8.2 PPC-3710 HDD Installation
To install the HDD into the PPC-3710, please follow the steps below:
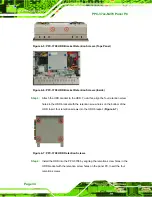
Step 1:
Remove the back cover. See
Section 4.5.2
above.
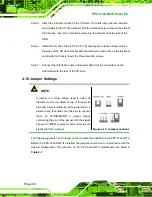
Step 2:
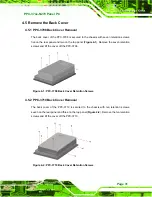
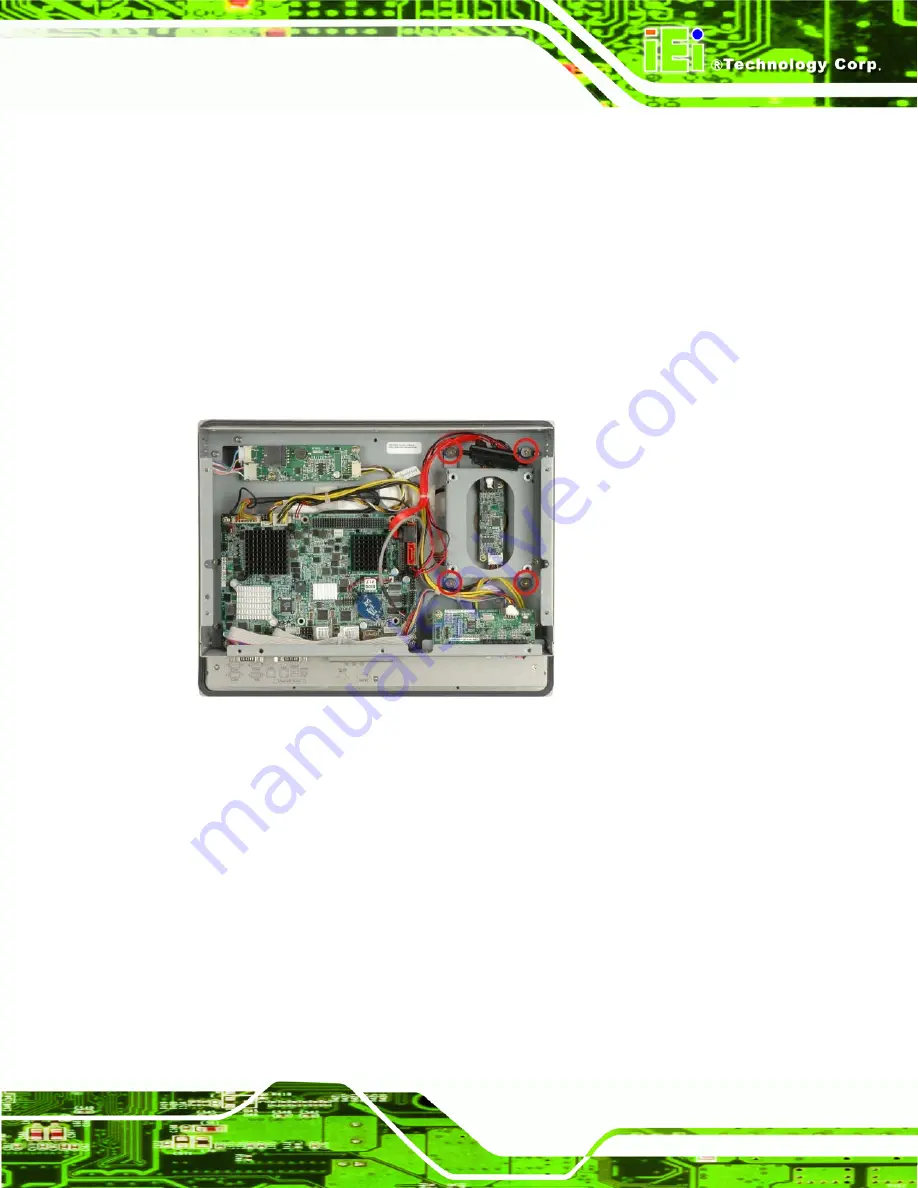
Remove the HDD bracket from the PPC-3710. The HDD bracket is attached on
the PPC-3710 with four retention screws inside the chassis (
Remove the four retention screws and lift the bracket off the panel PC.
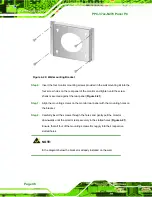
Figure 4-8: PPC-3710 HDD Bracket Retention Screws
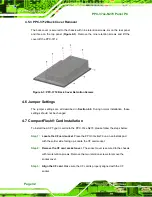
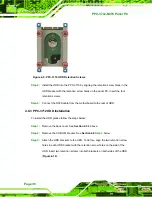
Step 3:
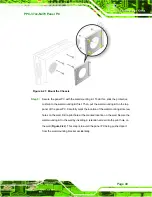
Attach the HDD bracket to the HDD. To do this, align the four retention screw
holes in the HDD bracket with the retention screw holes on the bottom of the
HDD. Insert four retention screws into the HDD bracket. (
Summary of Contents for PPC-3708A-N270
Page 14: ......
Page 15: ...PPC 37xx N270 Panel PC Page 1 Chapter 1 1 Introduction ...
Page 24: ...PPC 37xx N270 Panel PC Page 10 Chapter 2 2 Detailed Specifications ...
Page 38: ...PPC 37xx N270 Panel PC Page 24 3 Unpacking Chapter 3 ...
Page 42: ...PPC 37xx N270 Panel PC Page 28 4 Installation Chapter 4 ...
Page 77: ...PPC 37xx N270 Panel PC Page 63 5 BIOS Screens Chapter 5 ...
Page 123: ...PPC 37xx N270 Panel PC Page 109 Chapter 6 6 Driver Installation ...
Page 140: ...PPC 37xx N270 Panel PC Page 126 A Safety Precautions Appendix A ...
Page 145: ...PPC 37xx N270 Panel PC Page 131 Appendix B B BIOS Options ...
Page 149: ...PPC 37xx N270 Panel PC Page 135 Appendix C C Watchdog Timer ...
Page 152: ...PPC 37xx N270 Panel PC Page 138 Appendix D D Hazardous Materials Disclosure ...


