PPC-FxxD-ULT5
Page 23
Step 3:
Remove the on-board PoE card retention screw.
Step 4:
Line up the notch on the PoE module with the notch on the connector. Slide the
PoE module into the socket at an angle of about 20º.
Step 5:
Push the other end of the PoE module down and secure the module with the
retention screw previously removed.
Step 6:
Re-install the PoE card cover.
Step 0:
3.6 M.2 SSD Installation (Optional)
The M.2 M-key slot allows installation of M.2 2280 cards. To install an M.2 card, please
follow the steps below.
Step 1:
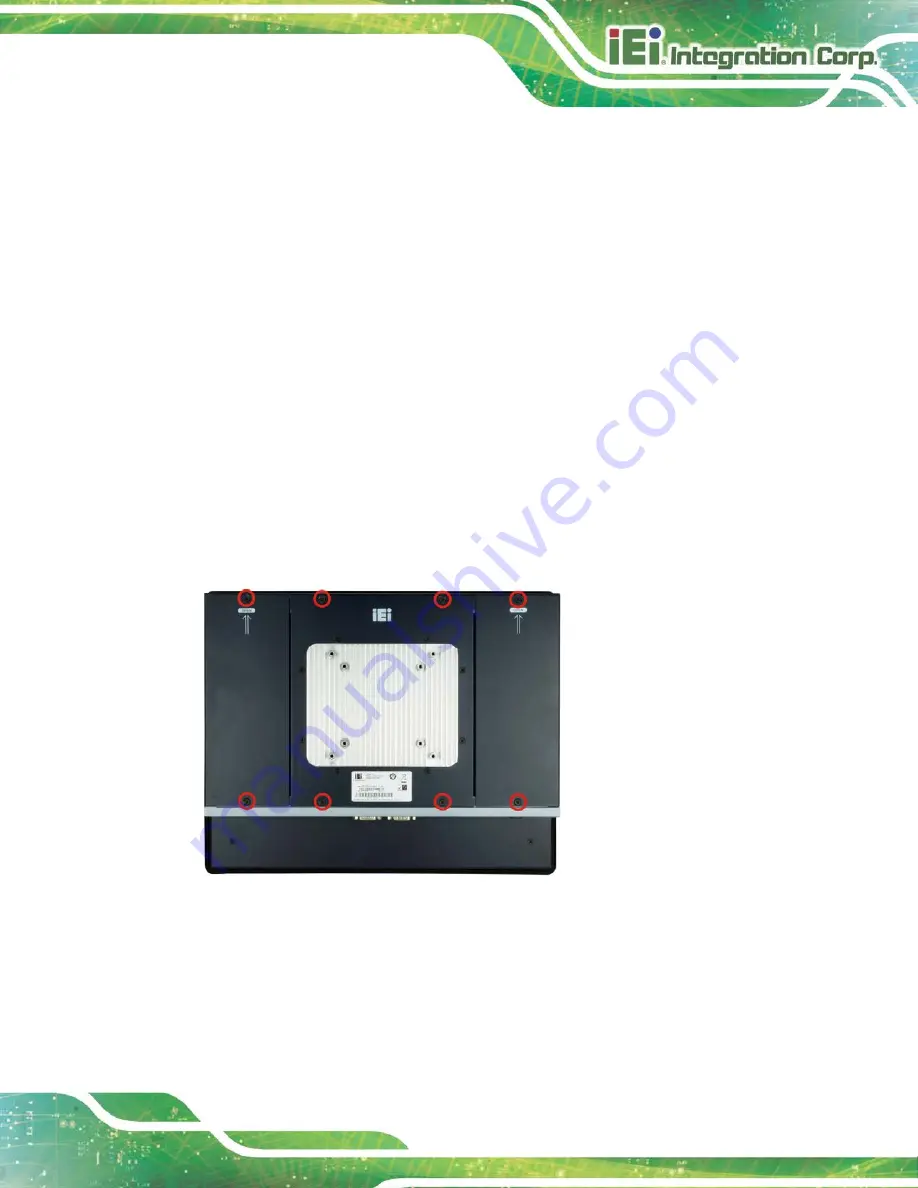
Remove the eight retention screws from the rear panel. Slide the two side
covers upwards to remove them. And then, lift the center piece off the system.
Figure 3-7: Rear Cover Retention Screws
Step 2:
Locate the M.2 slot as shown in Figure 3-8.
Summary of Contents for PPC-F D-ULT5 Series
Page 2: ...PPC FxxD ULT5 Page ii Revision Date Version Changes December 1 2020 1 00 Initial release ...
Page 15: ...PPC FxxD ULT5 Page 1 Chapter 1 1 Introduction ...
Page 28: ...PPC FxxD ULT5 Page 14 Chapter 2 2 Unpacking ...
Page 31: ...PPC FxxD ULT5 Page 17 Chapter 3 3 Installation ...
Page 47: ...PPC FxxD ULT5 Page 33 Figure 3 24 Tighten the Mounting Clamp Screws ...
Page 59: ...PPC FxxD ULT5 Page 45 Chapter 4 4 BIOS ...
Page 94: ...PPC FxxD ULT5 Page 80 5 Interface Connectors Chapter 5 ...
Page 108: ...PPC FxxD ULT5 Page 94 Appendix A A Regulatory Compliance ...
Page 113: ...PPC FxxD ULT5 Page 99 B Safety Precautions Appendix B ...
Page 119: ...PPC FxxD ULT5 Page 105 Appendix C C BIOS Menu Options ...
Page 122: ...PPC FxxD ULT5 Page 108 Appendix D D Watchdog Timer ...
Page 125: ...PPC FxxD ULT5 Page 111 Appendix E E Error Beep Code ...
Page 127: ...PPC FxxD ULT5 Page 113 Appendix F F Hazardous Materials Disclosure ...


