PPC-F08B/F10B-BT Panel PC
Page 22
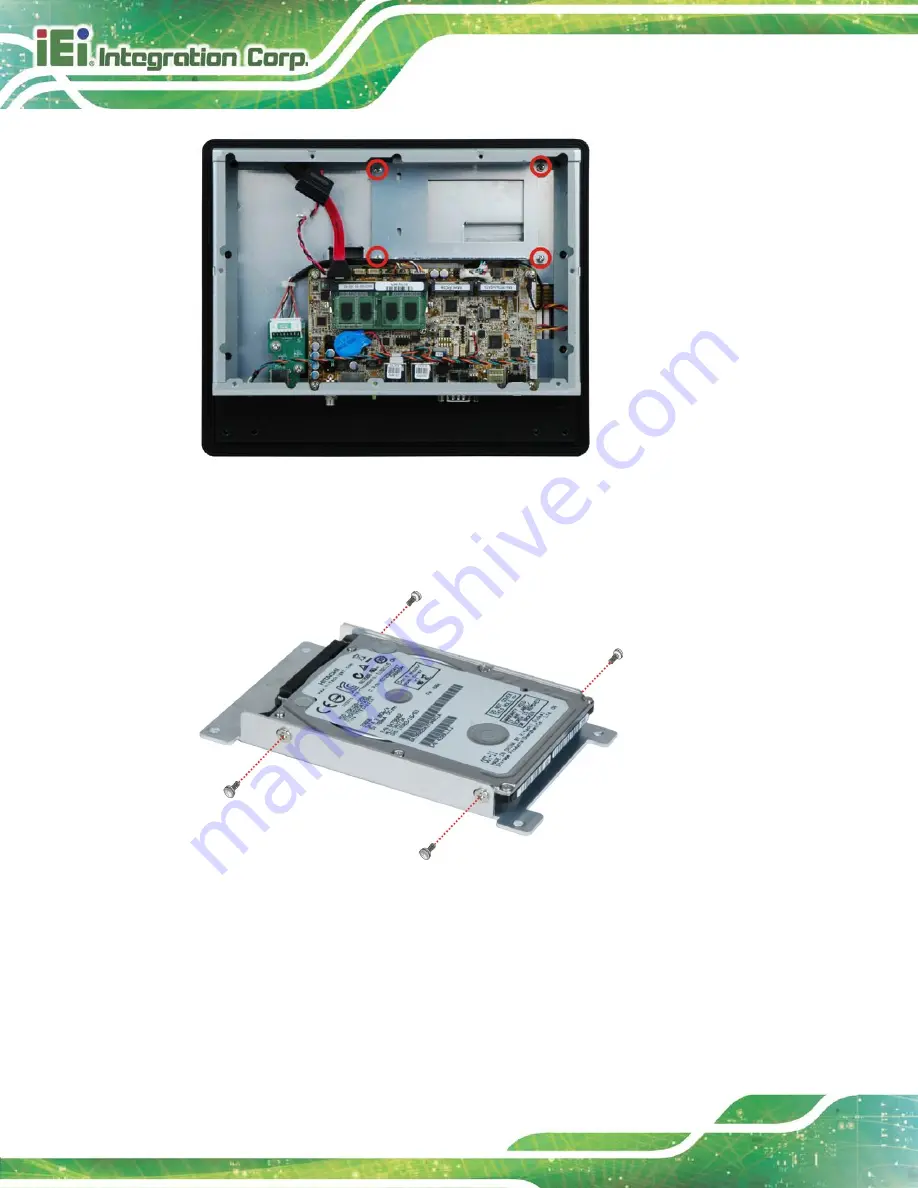
Figure 3-5:
PPC-F10B-BT HDD Bracket Retention Screws
Step 3:
Attach the hard drive to the bracket and secure the hard drive to the bracket with
four retention screws (
).
Figure 3-6: HDD Retention Screws
Step 4:
Connect the SATA cable and the SATA power cable to the rear of the HDD.
Step 5:
Reinstall the HDD bracket into the PPC-F10B-BT and fasten the four hard drive
bracket screws (
Summary of Contents for PPC-F08B
Page 14: ......
Page 15: ...PPC F08B F10B BT Panel PC Page 1 1 Introduction Chapter 1...
Page 25: ...PPC F08B F10B BT Panel PC Page 11 2 Unpacking Chapter 2...
Page 30: ...PPC F08B F10B BT Panel PC Page 16 3 Installation Chapter 3...
Page 60: ...PPC F08B F10B BT Panel PC Page 46 Chapter 4 4 System Maintenance...
Page 64: ...PPC F08B F10B BT Panel PC Page 50 5 BIOS Setup Chapter 5...
Page 97: ...PPC F08B F10B BT Panel PC Page 83 6 Interface Connectors Chapter 6...
Page 112: ...PPC F08B F10B BT Panel PC Page 98 Appendix A A Regulatory Compliance...
Page 118: ...PPC F08B F10B BT Panel PC Page 104 B BIOS Configuration Options Appendix B...
Page 121: ...PPC F08B F10B BT Panel PC Page 107 C Safety Precautions Appendix C...
Page 127: ...PPC F08B F10B BT Panel PC Page 113 D Watchdog Timer Appendix D...
Page 130: ...PPC F08B F10B BT Panel PC Page 116 Appendix E E Hazardous Materials Disclosure...

