SBOX-100-QM87i Fanless Marine Computer
Page 67
Step 3:
Remove the cable tie that secures the heatsink with the SO-DIMM. Then,
remove the heatsink.
Step 4:
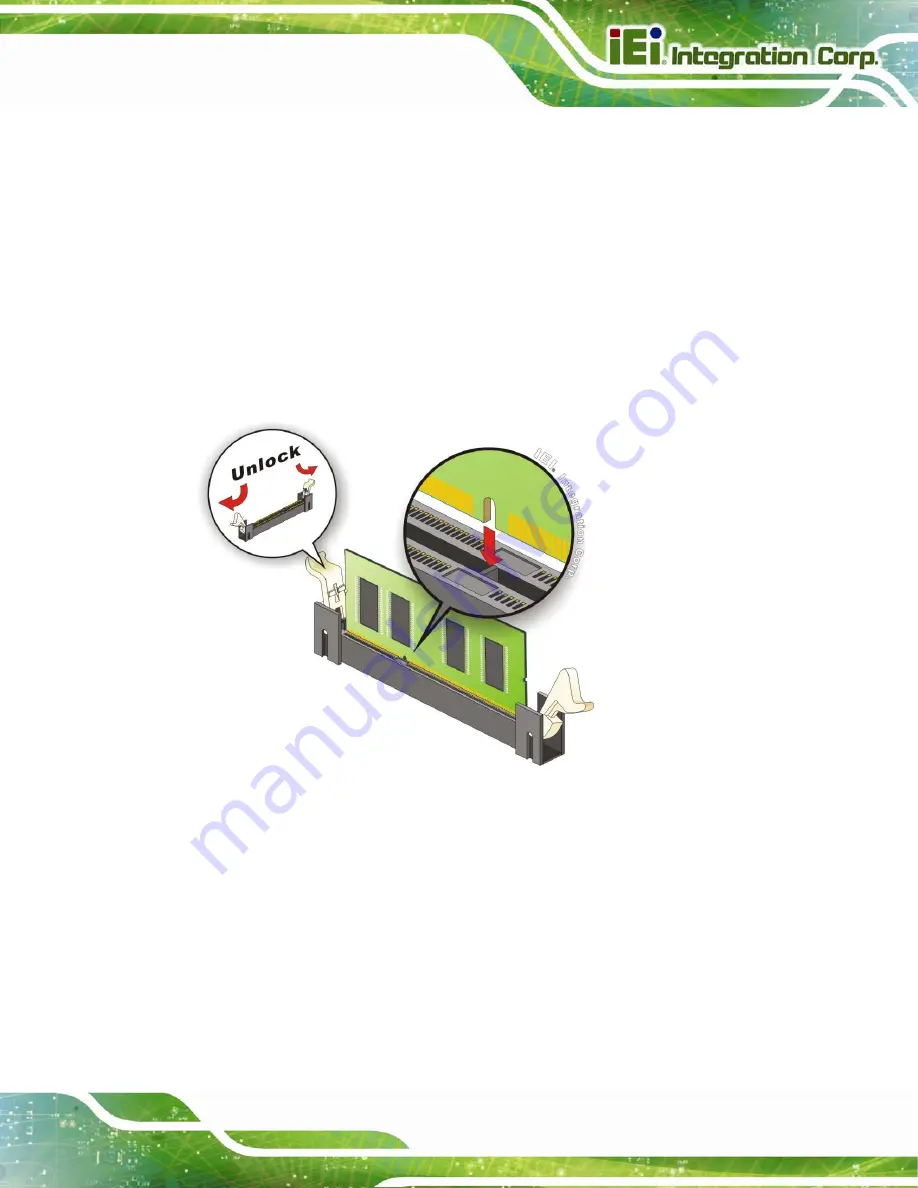
Release the arms on the SO-DIMM socket to remove the SO-DIMM.
Step 5:
Align the new SO-DIMM with the socket. The SO-DIMM must be oriented in
such a way that the notch in the middle of the SO-DIMM must be aligned with
the plastic bridge in the socket (
Step 6:
Press the SO-DIMM down until the arms of the SO-DIMM socket clip into place
and secure the SO-DIMM in the socket (
Figure 5-3: SO-DIMM Installation
Step 7:
Place the heatsink and use a cable tie to secure the heatsink with the SO-DIMM.
Step 8:
Reinstall the bottom cover.
Step 0:
Summary of Contents for SBOX-100-QM87i
Page 12: ......
Page 13: ...SBOX 100 QM87i Fanless Marine Computer Page 1 Chapter 1 1 Introduction ...
Page 20: ...SBOX 100 QM87i Fanless Marine Computer Page 8 Chapter 2 2 Unpacking ...
Page 24: ...SBOX 100 QM87i Fanless Marine Computer Page 12 Chapter 3 3 Installation ...
Page 38: ...SBOX 100 QM87i Fanless Marine Computer Page 26 Chapter 4 4 BIOS Setup ...
Page 76: ...SBOX 100 QM87i Fanless Marine Computer Page 64 Chapter 5 5 Maintenance ...
Page 80: ...SBOX 100 QM87i Fanless Marine Computer Page 68 Chapter 6 6 Interface Connectors ...
Page 96: ...SBOX 100 QM87i Fanless Marine Computer Page 84 Appendix A A Regulatory Compliance ...
Page 101: ...SBOX 100 QM87i Fanless Marine Computer Page 89 Appendix B B Safety Precautions ...
Page 106: ...SBOX 100 QM87i Fanless Marine Computer Page 94 Appendix C C BIOS Menu Options ...
Page 109: ...SBOX 100 QM87i Fanless Marine Computer Page 97 Appendix D D Watchdog Timer ...
Page 112: ...SBOX 100 QM87i Fanless Marine Computer Page 100 E Hazardous Materials Disclosure Appendix E ...


