uIB X-210-C V-N2600 E mbedded S ys tem
P age 14
S tep 2:
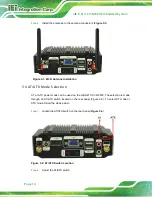
Install the antennas to the antenna connectors (
Figure 3-1: Wi-Fi Antenna Installation
3.4
AT/ATX Mode S election
AT or ATX power mode can be used on the uIBX-210-CV-N2600. The selection is made
through an AT/ATX switch located on the rear panel (Figure 3-2). To select AT mode or
ATX mode, follow the steps below.
S tep 1:
Locate the AT/ATX switch on the rear panel (
).
Figure 3-2: AT/ATX Switch Location
S tep 2:
Adjust the AT/ATX switch.
S tep 0:
Summary of Contents for uIBX-210-CV-N2600 Series
Page 13: ...uIB X 210 CV N2600 E mbedded S ys tem Page 2 Chapter 1 1 Introduction ...
Page 20: ...uIB X 210 CV N2600 E mbedded S ys tem Page 9 Chapter 2 2 Unpacking ...
Page 23: ...uIB X 210 CV N2600 E mbedded S ys tem Page 12 Chapter 3 3 Ins tallation ...
Page 47: ...uIB X 210 CV N2600 E mbedded S ys tem Page 36 4 S ys tem Motherboard Chapter 4 ...
Page 56: ...uIB X 210 CV N2600 E mbedded S ys tem Page 45 Chapter 5 5 S ys tem Maintenance ...
Page 65: ...uIB X 210 CV N2600 E mbedded S ys tem Page 54 Chapter 6 6 B IOS ...
Page 94: ...uIB X 210 CV N2600 E mbedded S ys tem Page 83 Appendix A A R egulatory Compliance ...
Page 100: ...uIB X 210 CV N2600 E mbedded S ys tem Page 89 B S afety Precautions Appendix A ...
Page 105: ...uIB X 210 CV N2600 E mbedded S ys tem Page 94 C B IOS Menu Options Appendix B ...
Page 108: ...uIB X 210 CV N2600 E mbedded S ys tem Page 97 D Watchdog Timer Appendix D ...
Page 111: ...uIB X 210 CV N2600 E mbedded S ys tem Page 100 Appendix E E Hazardous Materials Dis clos ure ...


