uIB X-210-C V-N2600 E mbedded S ys tem
P age 49
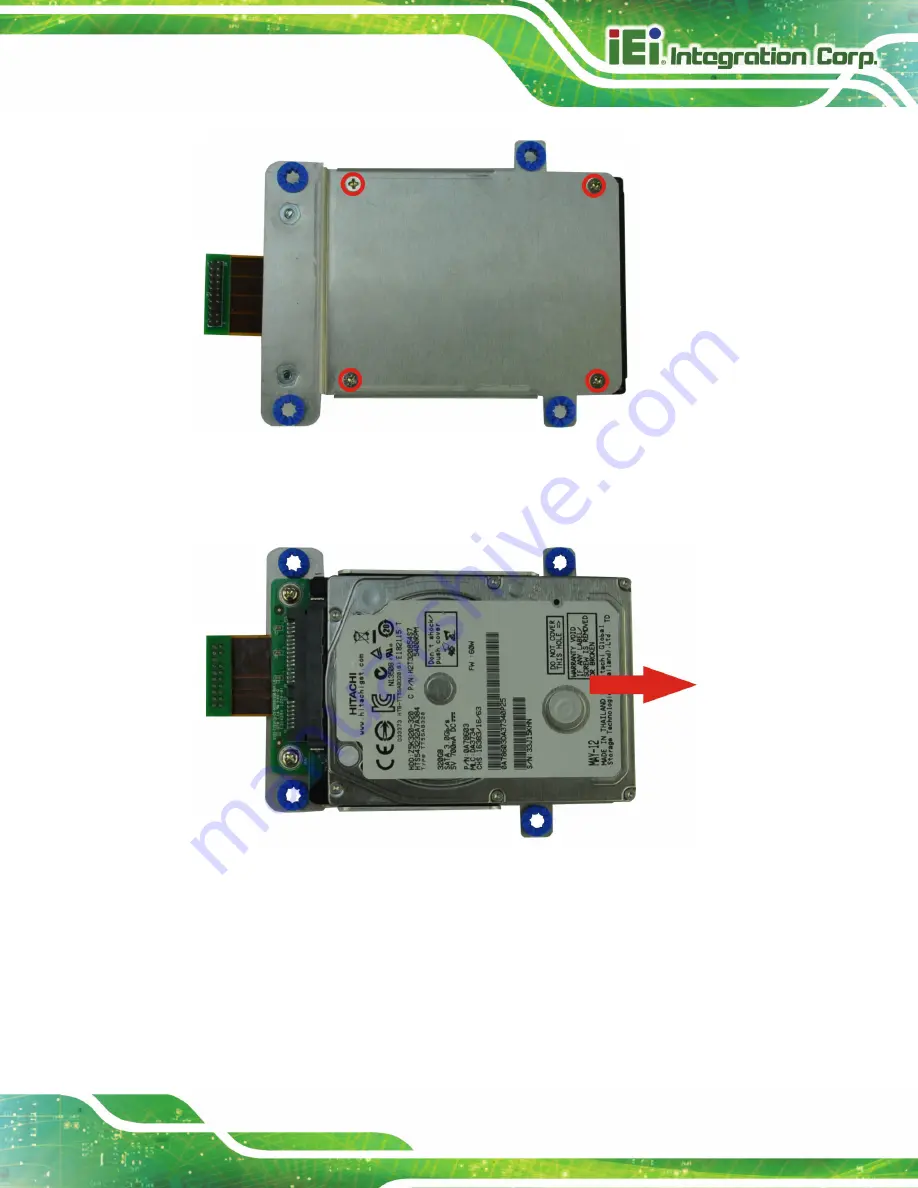
Figure 5-4: HDD Retention Screws
S tep 6:
Remove the old HDD from the HDD bracket (
)..
Figure 5-5: Remove the old HDD
S tep 7:
Slide the new HDD to the HDD bracket. Secure the HDD with the HDD bracket
by four HDD retention screws.
S tep 8:
Correctly align the four retention screw holes on the HDD bracket with the
retention screw holes on the chassis. Insert four previously removed retention
screws to secure the HDD bracket to the chassis.
Summary of Contents for uIBX-210-CV-N2600 Series
Page 13: ...uIB X 210 CV N2600 E mbedded S ys tem Page 2 Chapter 1 1 Introduction ...
Page 20: ...uIB X 210 CV N2600 E mbedded S ys tem Page 9 Chapter 2 2 Unpacking ...
Page 23: ...uIB X 210 CV N2600 E mbedded S ys tem Page 12 Chapter 3 3 Ins tallation ...
Page 47: ...uIB X 210 CV N2600 E mbedded S ys tem Page 36 4 S ys tem Motherboard Chapter 4 ...
Page 56: ...uIB X 210 CV N2600 E mbedded S ys tem Page 45 Chapter 5 5 S ys tem Maintenance ...
Page 65: ...uIB X 210 CV N2600 E mbedded S ys tem Page 54 Chapter 6 6 B IOS ...
Page 94: ...uIB X 210 CV N2600 E mbedded S ys tem Page 83 Appendix A A R egulatory Compliance ...
Page 100: ...uIB X 210 CV N2600 E mbedded S ys tem Page 89 B S afety Precautions Appendix A ...
Page 105: ...uIB X 210 CV N2600 E mbedded S ys tem Page 94 C B IOS Menu Options Appendix B ...
Page 108: ...uIB X 210 CV N2600 E mbedded S ys tem Page 97 D Watchdog Timer Appendix D ...
Page 111: ...uIB X 210 CV N2600 E mbedded S ys tem Page 100 Appendix E E Hazardous Materials Dis clos ure ...


