UPC-12A/GM45 Panel PC
Page 37
Step 7:
Reinstall the bottom panels
. Make sure the bottom panels are properly
secured with the previously removed retention screws.
Step 0:
4.7 Battery Installation
The UPC-12A/GM45 is come with a battery for system backup power. To install the
battery, follow the steps below.
Step 1:
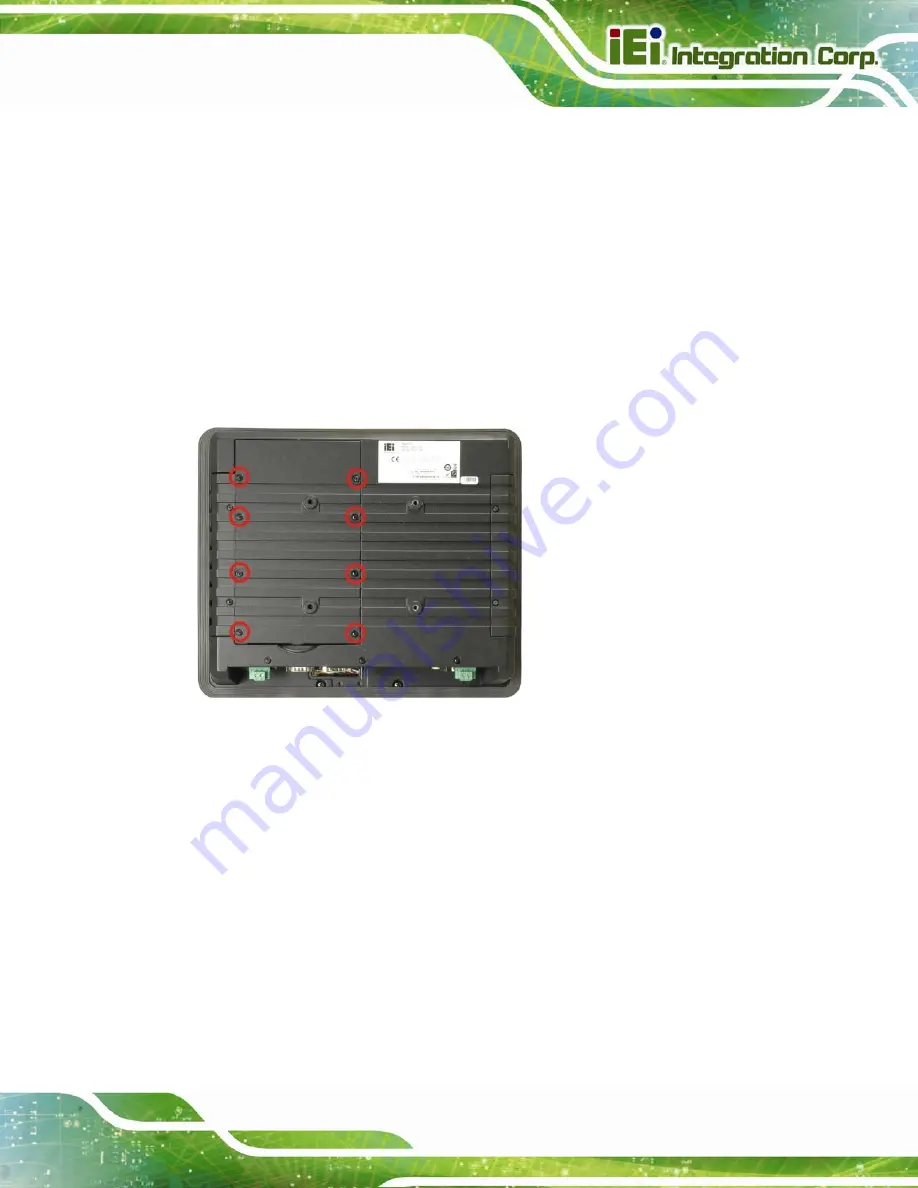
Remove the HDD/battery access panel
. The HDD/battery access panel is
secured to the rear panel with eight retention screws. Remove the retention
screws to remove the HDD/battery access panel.
Figure 4-6: HDD/Battery Access Panel Retention Screws
Step 2:
Connect the battery to the battery connector.
Step 3:
Secure the battery to the chassis with two retention screws.
Summary of Contents for UPC-12A/GM45
Page 13: ...UPC 12A GM45 Panel PC Page 1 1 Introduction Chapter 1 ...
Page 24: ...UPC 12A GM45 Panel PC Page 12 2 Detailed Specifications Chapter 2 ...
Page 39: ...UPC 12A GM45 Panel PC Page 27 3 Unpacking Chapter 3 ...
Page 43: ...UPC 12A GM45 Panel PC Page 31 4 Installation Chapter 4 ...
Page 68: ...UPC 12A GM45 Panel PC Page 56 5 System Maintenance Chapter 5 ...
Page 76: ...UPC 12A GM45 Panel PC Page 64 6 AMI BIOS Setup Chapter 6 ...
Page 111: ...UPC 12A GM45 Panel PC Page 99 7 Battery Monitoring and Remote Control Chapter 7 ...
Page 127: ...UPC 12A GM45 Panel PC Page 115 A External Connector Pinouts Appendix A ...
Page 131: ...UPC 12A GM45 Panel PC Page 119 B Safety Precautions Appendix B ...
Page 136: ...UPC 12A GM45 Panel PC Page 124 C BIOS Configuration Options Appendix C ...
Page 139: ...UPC 12A GM45 Panel PC Page 127 D Watchdog Timer Appendix D ...
Page 142: ...UPC 12A GM45 Panel PC Page 130 E Hazardous Materials Disclosure Appendix E ...


