


12
13
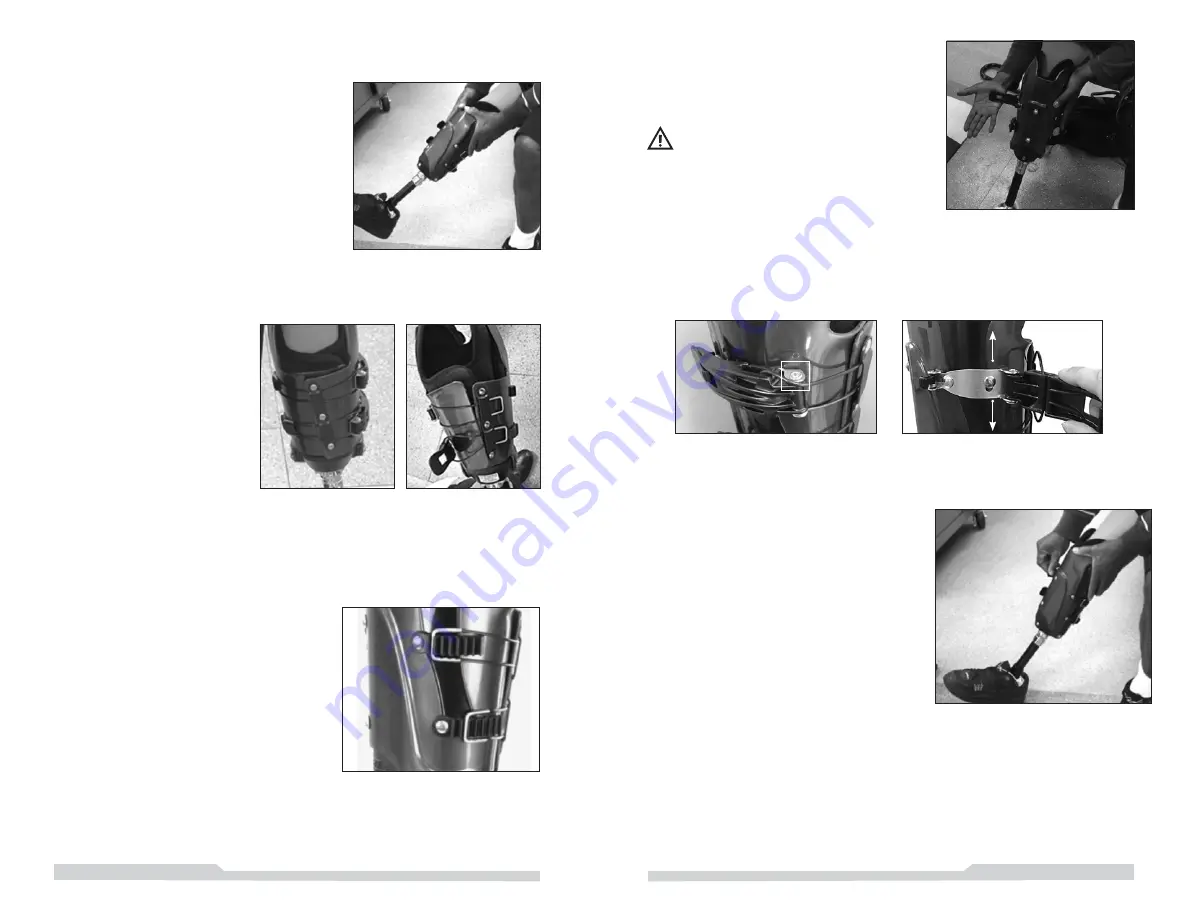
1) Place your residual limb in the prosthe-
sis so that the pin goes through the hole
in the bottom.
Make sure the pin engages
the lock.
You will hear a clicking noise
when the pin engages.
You should ensure that the pin is firmly
engaged by trying to push the prosthesis
off your leg. If it is properly engaged, the
prosthesis will not pull off.
Do not
use the
prosthesis if it is not firmly attached.
4) With your hands outside of the buckle
lever, pull closed until the safety is latched.
Begin at the top and then repeat on
the bottom.
Do not stand before fully buckling
both buckles and checking to be sure they
are locked and cannot be accidentally
opened.
3) Secure the prosthesis by placing the
end of the top cable into one of the top
hooks of the prosthesis (this should be
marked off by the healthcare provider).
You may need to start looser and then
gradually tighten the cables by buckling
and re-buckling until the optimal hook is
reached.
The prosthesis can be loosened or tightened anytime by moving the
cable 1 hook at a time.
Always make adjustments while seated.
STEP B: PUTTING ON THE DEVICE
2) Make sure the inner
flap is under the outer flap
which has the cable guide,
or the prosthesis will not
buckle correctly. Doing so
may also cause breakage.
Also, make sure the inner
neoprene liner stays in
place and does not wrinkle
or fold into the prosthesis
when putting it on, this may
cause discomfort.
Correct
X
Incorrect
5) Make sure the cable is not hooked over the buckle as shown in picture
A. This can cause excess wear on the cable. To prevent the cable from
catching, the buckle can be shifted up or down as shown in picutre
B.
A.
B.
6) Always check that the buckles are
securely fastened by checking that
the safety latch is engaged.


