background image

24

11  Maintenance 


Keep the process connection free of deposits and foreign bodies� 


In case of heavy soiling: clean the process connection and the probe at regular 

intervals�

In case of longer operation separation layers can form in the medium (e�g� oil on 

water)� This applies especially to still pipes or bypasses�


Remove separation layers at regular intervals�


Ensure that the vent hole (at the upper end of the coaxial pipe) remains free� 


Keep the interior of the coaxial pipe free from foreign bodies and soiling�

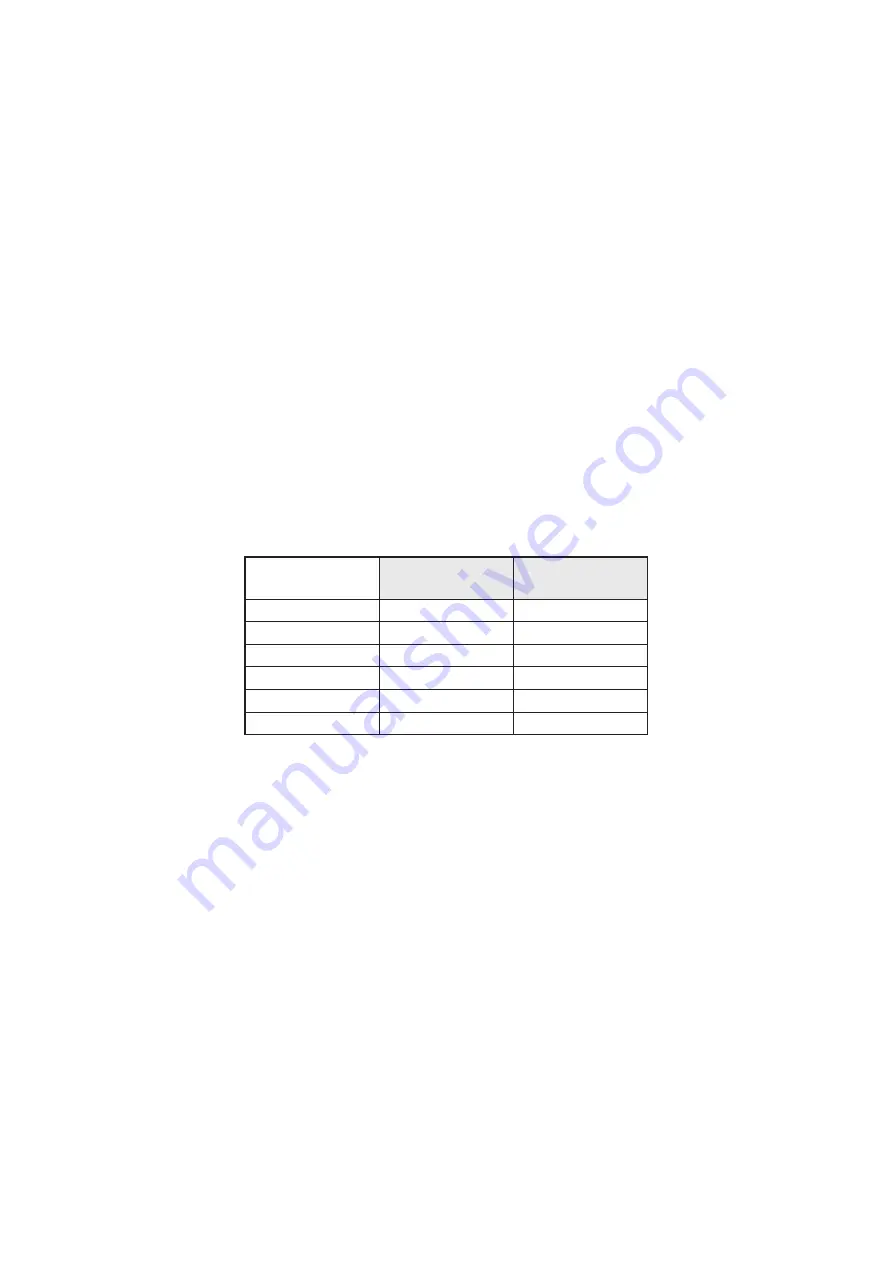
12  Factory setting

(Special units LXxxxx*

)

 not taken into account)

Factory setting

LR9020

User setting

OU2

I

FOU2

OFF

dFo

0

LEnG

450

MEdI

HIGH

Prob

rod

*

)

 Settings of the special units LXxxxx → Technical data sheet.

Summary of Contents for LX Series

Page 1: ...Operating instructions Electronic level sensor LR9020 LXxxxx 80227276 00 01 2022 UK...

Page 2: ...ase of a fault 10 5 2 5 IO Link 10 6 Installation 11 6 1 Installation location environment 11 6 1 1 Unit with single probe 11 6 1 2 Unit with coaxial probe 14 6 2 Installation of the probe 14 6 2 1 In...

Page 3: ...Electrical connection 21 8 Operating and display elements 21 9 Parameter setting 22 9 1 Parameter setting via PC 22 9 2 Parameter setting via the memory plug 23 10 Operation 23 10 1 Operating and diag...

Page 4: ...he user and if applicable for any service personnel authorised by the manufacturer of the system Read this document before setting up the product and keep it during the entire service life The product...

Page 5: ...cessories www ifm com Set up requires a PC with IO Link compatible software or a memory plug with corresponding programming More information 5 2 5 and 9 4 Functions and features The unit continuously...

Page 6: ...ciently large fixing plate a metal plate or similar must be used 6 4 3 6 4 4 For operation with single probe minimum distances to tank walls objects in the tank bottom of the tank and further level se...

Page 7: ...ogeneous separate from each other thus forming separation layers e g oil layer on water Check the function with an application test The unit reports any signal loss via IO Link and provides a defined...

Page 8: ...coaxial pipe Accessories 5 Function 5 1 Measuring principle fig 5 1 fig 5 2 D The unit operates to the principle of guided wave radar It measures the level using electromagnetic pulses in the nanoseco...

Page 9: ...utput function of the analogue output OU2 I the measuring range is provided as 4 20 mA OU2 InEG the measuring range is provided as 20 4 mA OU2 U the measuring range is provided as 0 10 V OU2 U the mea...

Page 10: ...sufficient strength within the delay time the unit continues to work in normal operation If however it is not received again in sufficient strength within the delay time the output passes into the def...

Page 11: ...tructures in the tank a distance of 50 mm to the tank wall must be adhered to When operating the unit in small tanks probe lengths shorter than 200 mm and less than 300 mm distance to the tank wall mo...

Page 12: ...all the unit in metal pipes For installation in connection pieces The diameter of the boss d must be at least 60 mm fig 6 2 The height of the boss h must not exceed 40 mm fig 6 2 Although the unit can...

Page 13: ...e a coaxial probe install a still pipe or bypass Note minimum diameter d 100 mm The upper access to the bypass A and the fill openings of the still pipe B must be above the maximum level The lower edg...

Page 14: ...he lower edge of the coaxial pipe must be below the minimum level 6 2 Installation of the probe Rod and coaxial pipe are not included in the scope of delivery They must be ordered separately 3 Items s...

Page 15: ...gth The coaxial pipe can be shortened 6 3 2 Screw the rod to the unit and tighten it Recommended tightening torque 4 Nm Slide the sensor seal A onto the thread Slide the coaxial pipe B onto the rod Ca...

Page 16: ...n occur Proceed as follows Screw the probe to the unit Mark the desired length L on the rod The reference point is the lower edge of the process connection Remove the rod from the unit Shorten rod at...

Page 17: ...m from the total length of the coaxial pipe L LK 9 mm Note down L Value L must be entered when setting the parameters of the device 9 1 Parameter setting via PC 6 4 Installation of the unit with singl...

Page 18: ...quired height For tanks with thick walls arrange for sufficiently deep recesses to ensure flush installation 6 4 2 Installation in closed metal tanks with flange plate Flange plates are not supplied T...

Page 19: ...rmly Make sure that the supplied sensor seal A in fig 6 11 is correctly positioned 6 4 3 Installation in open tanks For installation in open tanks use a metal fixture to install the unit It serves as...

Page 20: ...led in plastic tanks there may be deterioration caused by electromagnetic interference Corrective measures Apply a metal foil to the outside of the tank Apply a shielding screen between the level sens...

Page 21: ...Pin Connection Core colours for ifm sockets 1 Ub brown 3 Ub blue 2 OUT2 analogue output white 4 OUT1 IO Link black When the unit is supplied with operating voltage for the first time the parameters f...

Page 22: ...rface of a computer The catalogue of the available DTM objects the IO Link Device Description IODD and the FDT service program ifm Container can be downloaded at www ifm com Service Download Adjustabl...

Page 23: ...e memory plug in the technical documentation for the article E30398 available free of charge at www ifm com 10 Operation After power on the unit is in the Run mode normal operating mode It carries out...

Page 24: ...r This applies especially to still pipes or bypasses Remove separation layers at regular intervals Ensure that the vent hole at the upper end of the coaxial pipe remains free Keep the interior of the...

Page 25: ...25 UK More information at www ifm com...

Reviews: