P/N 1073538-EN
• REV
C
• ISS
19FEB21
3 / 4
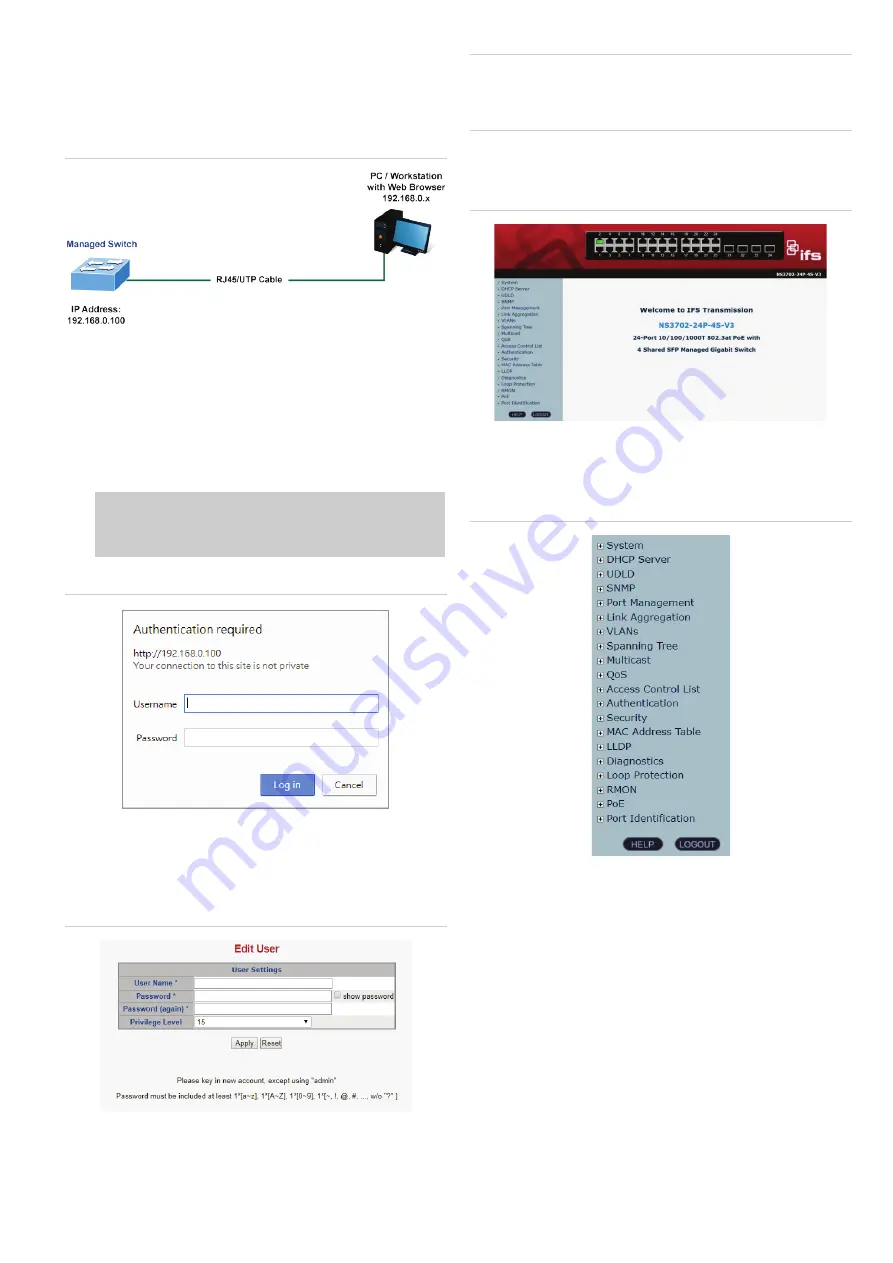
For example, if
the default IP address of the
managed switch is
192.168.0.100, then the computer should be set to 192.168.0.x
(where x is a number between 1 and 254, except 100), and the
default subnet mask is 255.255.255.0.
Figure 7: IP management diagram
Logging in to the managed switch
1. Use the
Internet Explor
er 8.0 or above
web browser and
enter the
IP address
http://192.168.0.100
(the factory
-
default IP addres
s
) to access the
web interface.
2.
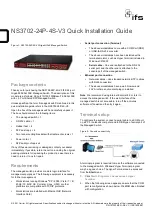
If logging in for the first time,
enter the default user name
“admin” and password “admin” in the dialog box, as shown
in Figure 8 below.
Default IP Address:
192.168.0.100
Default User
Name:
admin
Default P
assword:
admin
Figure 8: Login screen
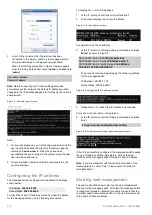
3. A warning message will appear to notify that you must
change the user name and password. Enter a new user
name and password in the Edit User page, following the
guidelines as shown in Figure 9 below. Click
Apply
.
Figure 9:Change user name and password
Note
: Before connecting to a TruVision Navigator video
surveillance system network, the default IP address must be
changed to the IP address a
ssigned for TruNav by the network
administrator.
4. After entering the user name and password, the main
screen appears, as shown in Figure 10 below.
Figure 10: Main web interface screen
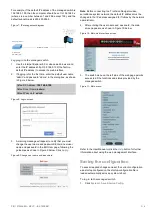
5. The switch menu on the left side of the web page permits
access to all the functions and status provided by the
managed switch.
Figure 11: Main menu
R
efer to the User Manual or click the
Help
button for further
information about using the web management interface.
Saving the configuration
To save all applied changes and set the current configuration
as a startup configuration, the startup-configuration file is
loaded automatically across a system reboot.
To log in to the managed switch
1. Click
System
>
Save Startup Config
.


