16
13
16
13
Adjustable Features
(continued)
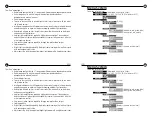
Turning IR off at start-up
The default setting of the IR is AUTO. When the iGen
®
powers on, it re-sets to AUTO
regardless of the mode it was set to before the prior power-down.
In order for the IR to be off upon power-up, set the IR-Start function to OFF with the
following menu choices: SYSTEM/IR START/OFF
4. Gain
The Triple Action switch adjusts the internal or electronic gain. There are a total of 10
different gain settings. These settings are preprogrammed and cannot be changed. Push to
the right and the image becomes brighter. At the highest gain settings, you will notice a
“noisy” or “snowy” image. As is the case with any night vision device, in very low light
conditions users will sacrifice image quality for light amplification. In order to recognize an
object or target under the very darkest condition, it is usually preferable to see a lower
quality image than to see no image at all.
The two highest gain settings may appear too noisy for many viewing environments, but can be
useful at long distances or in the very darkest environments with the use of the infrared
illuminator.
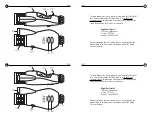
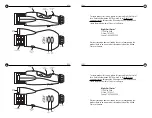
3. Triple Action Switch
Located on the underside of unit, rear of battery door, near your thumb as you hold
the device.
Push left
to decrease electronic gain.
The image will darken with each press of the switch.
Push right
to increase electronic gain.
The image will brighten with each press of the switch
Push up
to activate the
menu
and program the
iGen
®
.
The programming function works as follows:
1. After menu activation, the menu will
time-out
in ten seconds if you do not make
a selection.
2. To
move through
the menu selections, push the Triple Action switch
left or right.
3. To
choose
a menu selection for programming,
push up
on the Triple Action switch.
You will choose the selection indicated by the arrow.
4. To
program
a setting, move the Triple Action switch
left or right.
See the settings change.
5. To
accept a setting
after programming,
push
the Triple Action switch
up.
6. When a setting is entered using the left/right control, the setting becomes active
immediately, but you must
push
the Triple Action switch
up
to permanently accept
the setting. If you do not accept a setting after 10 seconds, the menu will time-
out and the previous setting will return as the permanent setting.
3. Triple Action Switch
Located on the underside of unit, rear of battery door, near your thumb as you hold
the device
Push left
to decrease electronic gain
The image will darken with each press of the switch
Push right
to increase electronic gain
The image will brighten with each press of the switch
Push up
to activate the
menu
and program the
iGen
®
.
The programming function works as follows:
1. After menu activation, the menu will
time-out
in ten seconds if you do not make
a selection.
2. To
move through
the menu selections, push the Triple Action switch
left or right.
3. To
choose
a menu selection for programming,
push up
on the Triple Action switch.
You will choose the selection indicated by the arrow.
4. To
program
a setting, move the Triple Action switch
left or right.
See the settings change.
5. To
accept a setting
after programming,
push
the Triple Action switch
up.
6. When a setting is entered using the left/right control, the setting becomes active
immediately, but you must
push
the Triple Action switch
up
to permanently accept
the setting. If you do not accept a setting after 10 seconds, the menu will time-
out and the previous setting will return as the permanent setting.


