background image

20

9

20

9

Adjustable Features 

(continued)

Exposure 

(continued)

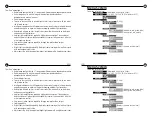
At very long exposure times, down to 2fps, the light-gathering capability of the iGen

®

is

truly remarkable.  However, to be useful at such long exposure times the device must be
positioned on a stable surface.  You may rest it on a flat surface suitable for viewing, or
connect to a tripod mount. The tripod adaptor fitting located at the base of the device will
connect to all standard tripod mounts, with a fitting size of 1/4 - 20.

8. Video Format

When recording on an external device using the Video Composite Output, select the format
compatible to your recording device.

Selections are:

NTSC (for devices sold in the U.S. This is the default setting)
PAL (European standard)

To record to an external device, remove the rubber plug on the left side of the device, and
connect with a composite video cable (RCA cable).  The recording device you use must have
a composite video input jack (yellow color). With the iGen

®

powered on and focused, no

other iGen

®

settings are necessary. If use of the eyepiece display is not required, extend

battery life by turning off the display with the “display on/off” function.

As you push the switch left or right (but not up), you are manually adjusting the electronic
gain (light amplification) of the internal computer circuit.
Notice the following as you increase gain (push to the right):

1. At very high gain settings, the image gets “noisier”.

Notice a “snowy” image at high gain settings.

2. As you increase the gain quickly, you may notice a momentary very bright image

which quickly darkens itself back to normal intensity. This behavior is the device
sensing that the image is overexposed, and automatically reducing internal gain
and/or exposure to compensate. In an actual dark environment, iGen

®

would not

throttle back the gain in this manner.
If the “overexposed image” message appears, it is prompting you to reduce gain.
If this message disappears automatically, then the internal processor was able to
automatically reduce the gain or exposure.

Notice that rotating the objective lens (large lens on front of iGen

®

) has little effect on the

focus of the image. The pin-hole on the lens cap lets in only a narrow beam of light which
requires little mechanical focusing to align. If the scene is out of focus, you may need to rotate
the lens many degrees to achieve a small amount of optical focusing. This characteristic will
not be apparent when using the iGen

®

with the lens cap removed.

Press the 

IR Button 

several times.

Notice that it has 3 different modes: AUTOMATIC, OFF, and MAXIMUM
Summary of Contents for NV20/20

Page 1: ...tripod to a car window with the Window Mount Keep your pictures focused with this practical easy to carry iGen Tripod iGen unit not included Image for illustration purpose only COMPLEMENT YOUR PURCHAS...

Page 2: ...a BRIGHT although invisible beam of light As with any bright light do not point into the eye 2 27 CAUTION Do not point Infrared Emitter directly into eye at close range Keep out of reach of children...

Page 3: ...r this warranty Liability under this Warranty is limited to replacing or repairing at our option the product returned shipping cost prepaid to Night Owl Optics Shipping cost to Night Owl Optics is the...

Page 4: ...hin 15 days of calling to Night Owl Optics 1465 Henry Brennan Dr El Paso TX 79936 Phone 1 800 444 5994 Warranty coverage does not include the cost of transporting the product back to an owner who is l...

Page 5: ...the essential requirements and other relevant requirements of the EMC Directive 2004 104 EC The product is compliant with the following standards and or other normative documents Emissions Annex11a E...

Page 6: ...ght amplification capability higher than Generation 1 technology at default exposure Light amplification capability superior to Generation 2 with the use of exposure control Easy connect video capture...

Page 7: ...IR will shut off first and the device will then power off after the main time has elapsed 11 Reset Feature The Reset feature allows the user to restore all factory defaults in the device with the exc...

Page 8: ...use test the device in a lighted room with the lens cap attached The small amount of light entering through the pin hole in the lens cap will simulate a night time environment Press and hold the powe...

Page 9: ...e following as you increase gain push to the right 1 At very high gain settings the image gets noisier Notice a snowy image at high gain settings 2 As you increase the gain quickly you may notice a mo...

Page 10: ...collection of frames repeated at 30 frames per second Below 15fps a moving image may appear to move unevenly Likewise below 12fps the image may shake as a person is unable to hold the iGen completely...

Page 11: ...Vision technology works by amplifying the small amounts of light energy available in most dark environments If you are in an environment where there is NO LIGHT available to amplify then the mathemati...

Page 12: ...color of the menu text can be changed Image color choices are black white red green and blue Text color choices are white green red and amber The color green is typically used in night vision applicat...

Page 13: ...with the use of the infrared illuminator 3 Triple Action Switch Located on the underside of unit rear of battery door near your thumb as you hold the device Push left to decrease electronic gain The...

Page 14: ...vice is very sensitive to infrared light high intensity infrared at close range causes the device to reduce internal gain and increase exposure time Use of the IR MAX settings is only recommended in a...

Page 15: ...vice is very sensitive to infrared light high intensity infrared at close range causes the device to reduce internal gain and increase exposure time Use of the IR MAX settings is only recommended in a...

Page 16: ...with the use of the infrared illuminator 3 Triple Action Switch Located on the underside of unit rear of battery door near your thumb as you hold the device Push left to decrease electronic gain The...

Page 17: ...color of the menu text can be changed Image color choices are black white red green and blue Text color choices are white green red and amber The color green is typically used in night vision applicat...

Page 18: ...Vision technology works by amplifying the small amounts of light energy available in most dark environments If you are in an environment where there is NO LIGHT available to amplify then the mathemati...

Page 19: ...xposure settings In the U S or other countries with 60hertz electrical systems exposure rates other than 30fps and 15fps will be unsynchronized with the lighting system The iGen is designed for outdoo...

Page 20: ...e following as you increase gain push to the right 1 At very high gain settings the image gets noisier Notice a snowy image at high gain settings 2 As you increase the gain quickly you may notice a mo...

Page 21: ...erstand operation for first time use test the device in a lighted room with the lens cap attached The small amount of light entering through the pin hole in the lens cap will simulate a night time env...

Page 22: ...IR will shut off first and the device will then power off after the main time has elapsed 11 Reset Feature The Reset feature allows the user to restore all factory defaults in the device with the exc...

Page 23: ...ght amplification capability higher than Generation 1 technology at default exposure Light amplification capability superior to Generation 2 with the use of exposure control Easy connect video capture...

Page 24: ...the essential requirements and other relevant requirements of the EMC Directive 2004 104 EC The product is compliant with the following standards and or other normative documents Emissions Annex11a E...

Page 25: ...return the product within 15 days of calling to Night Owl Optics 1120 Alza Drive El Paso TX 79907 Phone 1 800 444 5994 Warranty coverage does not include the cost of transporting the product back to...

Page 26: ...r this warranty Liability under this Warranty is limited to replacing or repairing at our option the product returned shipping cost prepaid to Night Owl Optics Shipping cost to Night Owl Optics is the...

Page 27: ...a BRIGHT although invisible beam of light As with any bright light do not point into the eye 2 27 CAUTION Do not point Infrared Emitter directly into eye at close range Keep out of reach of children...

Page 28: ...tripod to a car window with the Window Mount Keep your pictures focused with this practical easy to carry iGen Tripod iGen unit not included Image for illustration purpose only COMPLEMENT YOUR PURCHAS...

Reviews: