8
21
8
21
Adjustable Features
(continued)
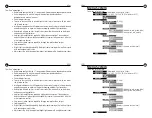
9. Display Off
When using the iGen
®
connected to an external recording device, and you do not
need to view the scene through the eyepiece, you may turn the display off. This will
greatly improve battery life.
To turn the display off, choose “Display”, then “On-Off”. When you toggle down to
the “Off” setting, the display will immediately turn off. After the display turns off, you
must then push the 3-way switch up to save this setting. If you do not accept the off-
setting by pushing up after the display turns off, the display will turn back on after ten
seconds.
To turn the display back on, turn power off and then turn power back on with the
On/Off Button.
10. Auto-Off
The menu selection “Auto Off” allows you to program the time interval after which
the device, or the IR, automatically turns off. Each user input (press of a button)
resets the auto-off timer.
First Time Operation
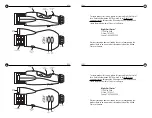
To best understand operation, for first-time use, test the device in a lighted room
with the
lens cap attached.
The small amount of light entering through the pin-hole in the lens cap will simulate a
night-time environment.
Press-and-hold the
power button
to turn on.
Press-and-hold the
power button
to turn off.
Focus eyepiece.
1.
Push up
on the
Triple Action switch
located on the bottom.
2. A menu will appear. Use this menu to focus the eye piece.
3. Rotate the eyepiece rubber cup until the menu letters are sharp and in focus.
If the menu disappears, push up again to see the menu again.
4. Use the menu as a focusing target. This adjustment focuses your individual eye
sight on to the display screen.
5. After the eyepiece focus (technically called the diopter lens) is adjusted, do not
change this adjustment. After you set the eyepiece adjustment, use the front lens
to focus on objects in the distance.
Get comfortable with the
gain control.
Push the
Triple Action switch
to the left and to the right.

