


3
Blade and Guard Assembly
1. Unscrew the spinner clockwise and the plastic nut anti-clockwise and remove both.
2. Set the rear guard into the correct position with the handle up.
3. Screw the plastic nut tightly to attach the guard.
4. Discard plastic sleeve on motor shaft.
5. Place the blade onto the motor shaft until the retaining pin fits into the notch on the blade.
6. Screw the spinner onto the motor shaft anti-clockwise.
7. Mount the front guard and join both guards together using the clips.
Operating Instructions
1. Check that the mains voltage complies with the voltage stated on this product.
2. To control the speed of the fan press the L, M or H buttons on the base of the fan.
1. L = Low Speed
2. M = Medium Speed
3. H = High Speed
3. Push the Oscillation control at top of the motor housing to turn on the oscillating function. Pull the
oscillation control up to turn it off.
Warning
•
The fan must be placed on a flat even surface.
•
When you turn off the fan, press the OFF button on the base. Switch off at the mains and
removed the plug.
•
Ensure that the fan will not be obstructed when oscillating.
Cleaning and Care
1. Turn off the fan and remove the power plug from the wall socket before cleaning.
2. Use a dry soft cloth to remove any dust from the fan.
3. If the fan is particularly dirty use a soft damp cloth and wipe dry.
4. Do not use any chemicals or detergents as they will damage the fan.
5. Ensure that water does not drip into the motor housing.
6. Store the fan in a ventilated and dry area.
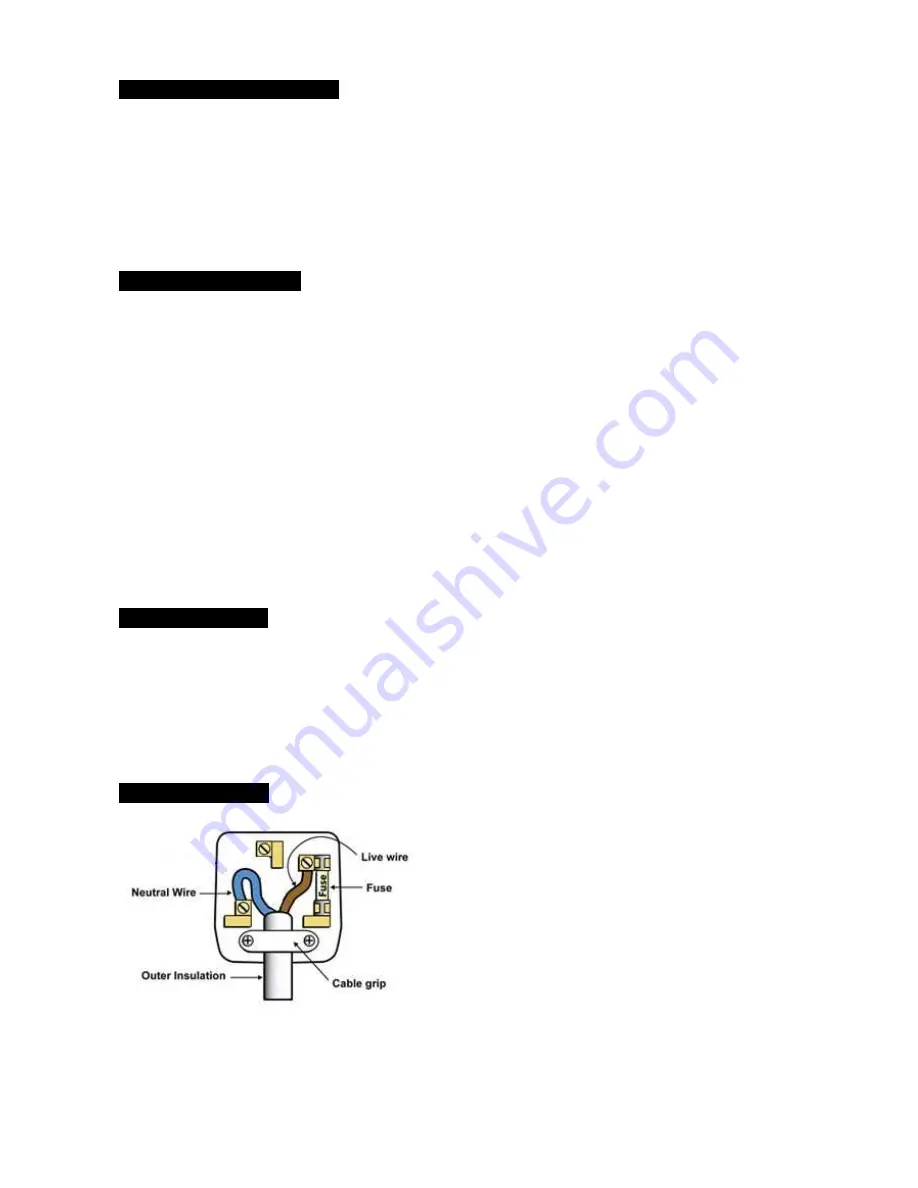
Changing the Plug
This product is double insulated and so does not require an
earth. Fit a 3A fuse in a 13A BS1363 plug. Fit the blue wire
to N and the brown wire to L. Fit the cord grip. If in doubt,
call an electrician. Don’t use a non-rewireable plug unless
the fuse cover is fitted. If you remove the plug, dispose of it.


