en
22
User manual Basia 2, Tobi
www.igloo.pl
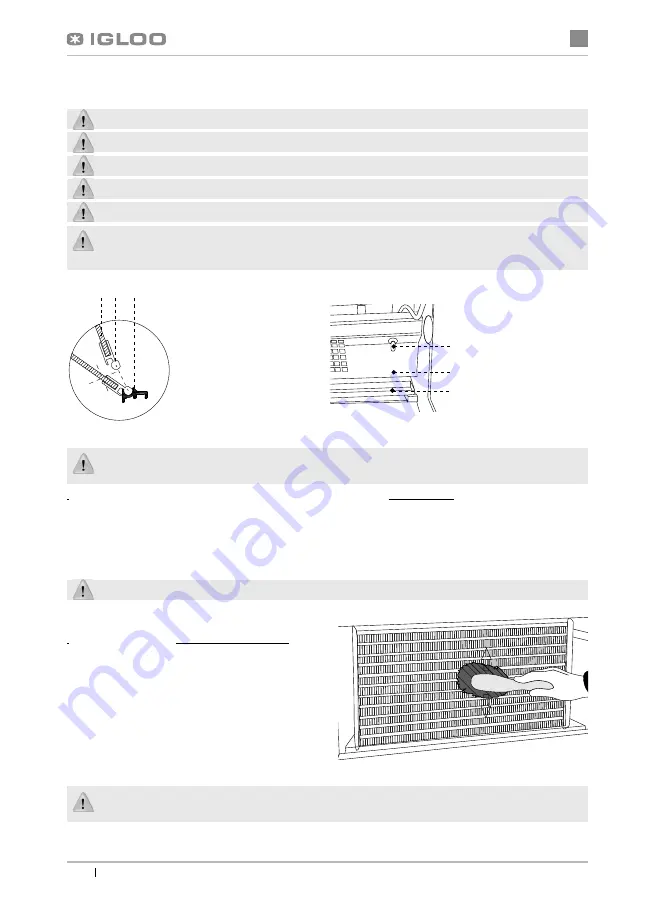
When using the display cabinet, as well as during maintenance works, pay attention not to destroy the
temperature sensor in the evaporator screen!
It is recommended to make a break in the exploitation of the device once a month in order to clean its interior,
naturally defrost the evaporator, clean the condenser and verify the condition of door seals.
If the device is not equipped with automatic condensate evaporation, it is essential to remove the condensate from the
container when
fi
lling the container Fig.8 (p.20). The number (frequency) of condensate removal depends on device
exploitation conditions (f. ex. air humidity, door opening frequency, the amount and temperature of products entered for
storage).
Do not use mechanical agents in order to fasten the defrosting process!
I
t is essential to keep the
condenser of the device
cle-
an. Dirt may hinder the heat exchange, causing mainly
increase in electric energy consumption and may cause
damage of aggregate compressor.
In order to clean the condenser it is necessary to
unscrew the
fi
xing sheet metal screws and pull the wind
brace out. Clean condenser lamellas with help of soft
brush or paint brush. If the condenser is extremely dirty
(blocked lamellas) it is indicated to use vacuum cleaner
or compressed nitrogen to suck / blow the dirt from be-
tween lamellas.
The producer shall not be held responsible for damages of the condenser aggregate resulting from non-
observance of condenser cleanliness!
5. MAINTENANCE
5.1. Cleaning and maintenance
All maintenance services need to be performed after disconnecting the device from power supply!
Protect electric installation against any damage or water spillage
Do not use water stream to clean the device, only a wet cloth
Do not use any sharp objects to remove dirt!
Devices with wheels cannot be used on uneven surfaces!
During cleaning the inside of the device do not leave the front glass freely lifted in the aluminium pro
fi
le. This may
cause the damage of the glass and is not covered by warranty. Please remove the glass with pro
fi
le for the time of
cleaning Fig. 11 (p.22).
3
2
1
Fig.11 Front glass disassembly
1 - Front glass
2 - Upper aluminium pro
fi
le of the
glass (lifted guide)
3 - Lower aluminium pro
fi
le of the
glass (catch)
Fig.12 Temperature sensor
inside the device
1 – Temperature sensor
2 – Evaporator screen
3 – Evaporator drip rail
Fig.13 Cleaning the condenser
1
2 3


