background image

-6-

www.igmtools.com

Pic. 18

5. Receiving your machine 

5.1 Unpacking and transport

To unpack your machine you will need tin snips, 

a knife, and a wrench.


1. Using the tin snips, cut the banding that is 

securing the packing box (If fitted).


Extreme caution must be used, because the 

banding will spring and could cause injury. 

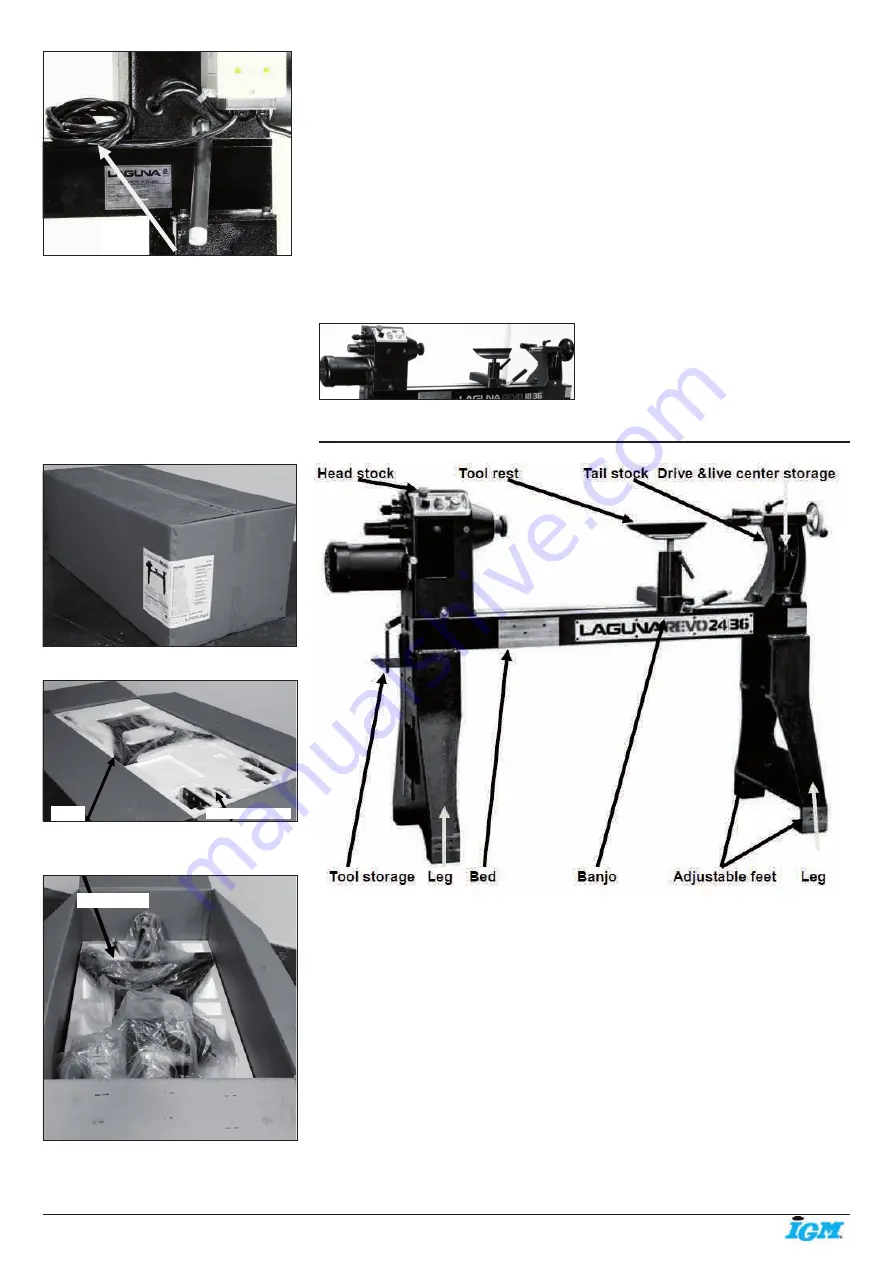
Lathe in packaging

Pic. 19

Pic. 20

Top packaging removed

Pic. 21


2. Open the box and remove the parts sent with 

the lathe including the first leg.

Note:

 The legs are heavy and caution must be 

exercised. They are cast iron and if dropped

they will break.

3. Remove the top packaging and remove the 

second leg.

4. Remove the lathe bed. It is recommended 

that it be lifted with a hoist or forklift using a

„sling“ as it is very heavy.


Note:

 The machine is heavy. Ensure that you 

have enough people to do the job safely. Do not 

attempt any procedure that you feel is unsafe, 

or that you do not have the physical capability 

of achieving.

5. Lower the bed of the lathe onto 2 stacks of 

wood. This will allow access to the underside of

the bed.


Pic. 22

5.2 Receiving the lathe 

Before you unpack your new machine you will 

need to first inspect the packing, invoice and 

shipping documents supplied by the driver.

Insure that there is no visible damage to the 

packing or the machine. You need to do this 

prior to the driver leaving. All damage must be 

noted on the delivery documents and signed 

by you and the delivery driver. You must then 

contact the seller (Laguna Tools) as soon as 

practical. If damage is found after delivery, 

contact the seller as soon as is practical.

Note: 

It is probable that you will find sawdust 

within your machine. This is because the

machine has been tested prior to shipment 

from the factory. It must be noted that additional 

machine movement can take place between 

Laguna Tools and the end user and some 

adjustments may have to be undertaken by the 

customer. These adjustments are covered in 

the various sections of this manual.


Parts of the lathe 

Supplied with: 


Leg

Parts

druhá noha


Power 

cord

Second leg

Summary of Contents for LAGUNA 2436

Page 1: ...unatools com Distributor IGM n stroje a stroje s r o Ke Kopanin 560 252 67 Tuchom ice Czech Republic EU Phone 420 220 950 910 E mail sales igmtools com Website www igmtools com 2022 04 26 151 2436 LAG...

Page 2: ...2 www igmtools com...

Page 3: ...e tool rest and hand held cutting tools 3 1 Parts of the machine The lathe consists of a number of major parts which are discussed in this manual Take the time to read this section and become familiar...

Page 4: ...will enable the user of the machine to make a better evaluation of the hazard and risk Pic 13 4 General safety WARNING For Your Own Safety Read Instruction Manual before Operating Lathe 4 1 Safety Ru...

Page 5: ...he owner s manual for recommended accessories The use of improper accessories may cause risk of injury to persons Never stand on tool serious injury could occur if the tool is tipped or if the cutting...

Page 6: ...l capability of achieving 5 Lower the bed of the lathe onto 2 stacks of wood This will allow access to the underside of the bed Pic 22 5 2 Receiving the lathe Before you unpack your new machine you wi...

Page 7: ...semble the legs headstock tail stock tool storage and the tool rest to the bed of the machine Note It is recommended that the head stock tool rest and tail stock be removed from the bed of the lathe t...

Page 8: ...left hand thread Removal tool Pic 39 described procedure seek professional assistance Fit the 4 levelling feet to the lathe legs with the lock nut on the underside of the leg Once both legs have been...

Page 9: ...Stop The start stop buttons start the motor and the rotation of the spindle Speed display The speed display shows the RPM of the spindle Variable speed adjustment knob The Variable speed adjustment k...

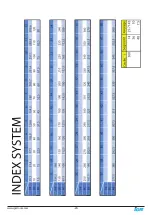
Page 10: ...3 sets of indexing holes 14 36 48 The selection plunger is located at the end of the head stock To move between the 3 sets of holes loosen the clamp knobs and slide the indexing plunger assembly to al...

Page 11: ...pindle is extended or retracted 1 Loosen the clamp screw that is accessible from the top on the head stock 2 Tap the side of the headstock with a rubber mallet close to the base in the direction requi...

Page 12: ...12 www igmtools com Electrical drawing Wiring diagram for control panel on headstock...

Page 13: ...13 www igmtools com Exploded view drawings and parts list Wiring diagram for remote control...

Page 14: ...14 www igmtools com...

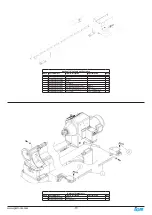
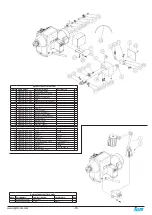
Page 15: ...191 C Ring R22 1 92 PLAREVO1836 192 Socket Head Cap Screw 1 4 20UNCx1 1 93 PLAREVO1836 193 Hex Cap Screw 3 8 16UNCx1 2 1 94 PLAREVO1836 194 Socket Head Button Screw M8x20 2 95 PLAREVO1836 195 Socket H...

Page 16: ...Rubber Sleeve 1 11 PLAREVO1836 1145 Cap 1 12 MPAREVO1836 189 E Ring E15 4 13 PLAREVO1836 185 Key 6x6x30 1 14 PLAREVO1836 194 Socket Head Button Screw M8x20 1 15 PLAREVO1836 315 Socket Head Button Scr...

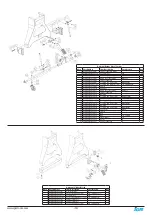
Page 17: ...3 Hinge 1 4 PLAREVO1836 404 Pin 2 5 PLAREVO1836 147 Stop Bolt 1 6 PLAREVO1836 406 Socket Head Cap Screw M6x12 4 7 PLAREVO1836 407 Phillips Flat Head Screw M5x12 5 8 PLAREVO1836 320 Socket Head Button...

Page 18: ...VO1836 811 L Type Fitting 1 12 PLAREVO1836 812 Air Flow Regulator 1 13 PLAREVO1836 813 Quick Release Fitting 1 14 PLAREVO1836 814 Pressure Vacuum Gauge 1 15 PLAREVO1836 815 Gauge Fitting 1 16 PLAREVO1...

Page 19: ...PLAREVO1836 905 Nylon Insert Lock Nut M8x1 25 6 6 PLAREVO1836 906 Support Bracket 2 7 PLAREVO1836 907 Socket Head Cap Screw M8X45mm 2 8 PLAREVO1836 1146 Socket Head Button Screw 1 4 20UNCx3 8 8 9 PLAR...

Page 20: ...20 www igmtools com...

Page 21: ...21 www igmtools com...

Page 22: ...IGM n stroje a stroje s r o Ke kopanin 560 Tuchom ice 252 67 Czech Republic E U 420 220 950 910 www igm cz 2022 IGM n stroje a stroje s r o...

Reviews: