-12-
www.igmtools.com
1. Raise the drum foot peddle bar to lower the drum to the floor.
2. Roll it away from the machine, inspect and empty as needed.
ROUTINE INSPECTION
It is a good idea to routinely inspect any quality woodworking tool in order
to keep it in optimum condition. This includes inspecting all hardware for
tightness, ensuring the filter is clean, and cleaning debris and grime from
any surfaces and moving parts.
HEPA FILTER REPLACMENT
To maintain safe, clean air quality, the HEPA filter should be replaced after
2000 hours of operation (e.g., 8 hours/day x 250 days = 2,000 hours).
Contact your dealer or Laguna Tools for a replacement HEPA filter. If
your model has a “change filter indicator light” it will flash at 2,000 hours.
Replace HEPA filter. To reset flashing light, press the “Remote” button on
the Control Panel 5 times.
CAUTION
DISCONNECT MACHINE FROM POWER!
REMOVING THE CANISTER FILTER
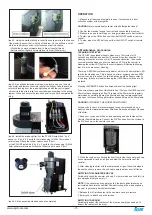
1. Release the spring-loaded band clamp at the bottom of the canister
filter and remove the plastic bag.
2. While supporting the canister filter assembly from the bottom, release
the spring-loaded band clamp from the top of the canister filter assembly.
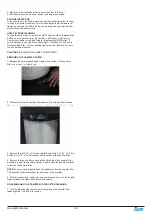
3. Remove the (4) 3/16” x 3/4” sheet metal Philip bolts, (1) 5/16” x 3/4” hex
bolt and (1) 5/16” x 7/8” flat washer off the bottom of the canister filter.
4. Remove the canister filter and carefully tilt the top of the canister filter
assembly to clear the paddle branches. Slightly bend the paddle branches
to remove the canister filter.
NOTE:
You may have to gently bend the paddles to free the canister filter.
This should not adversely affect the operation of the machine.
5. With the canister filter removed use a compressed air gun to thoroughly
clean between the pleats, both inside and outside.
RE-ASSEMBLING THE CANISTER FILTER AFTER CLEANING
6. With the aid of another person, carefully re-insert the canister filter
repeating step 1,2,3 and 4 in reverse.


