18
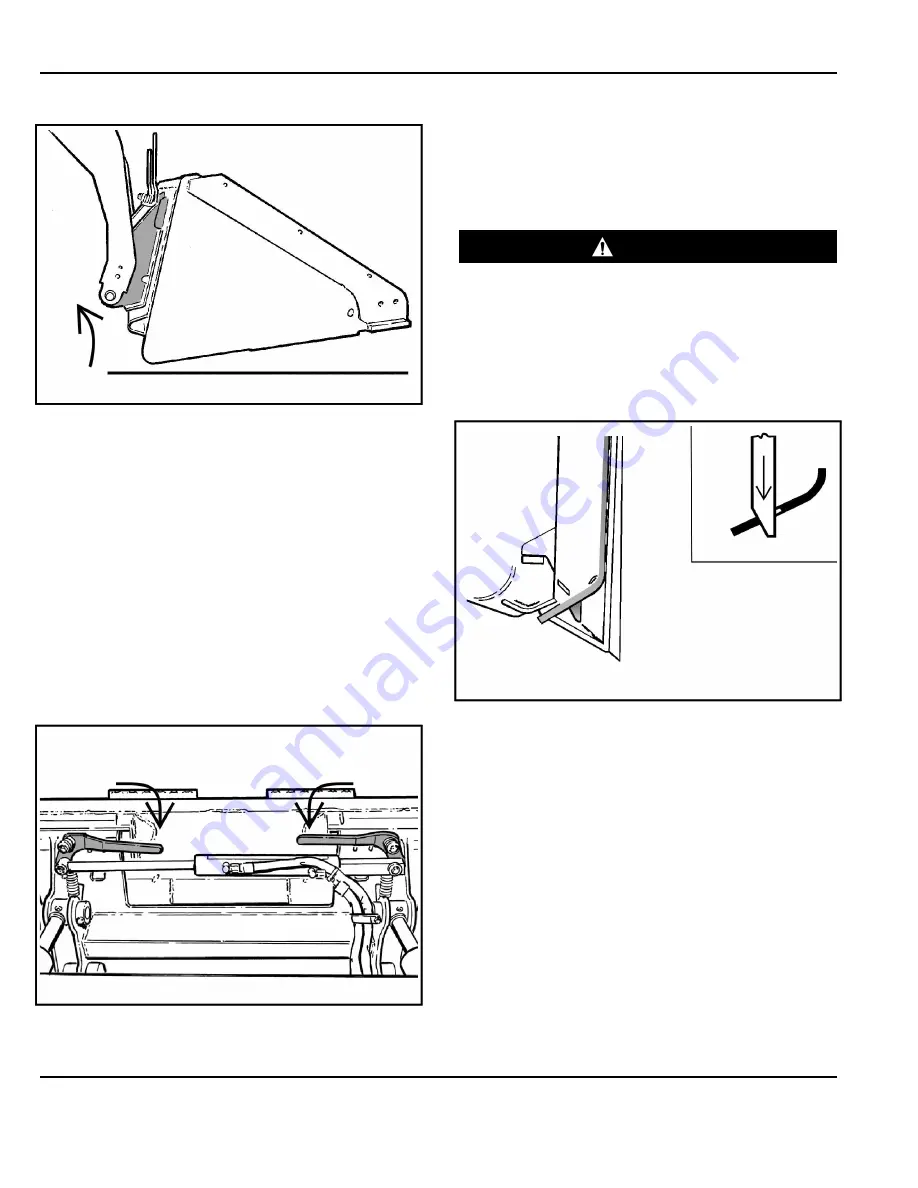
Figure 24
NA3447a
7.
Tilt the quick coupler backward until the attachment
is slightly off the ground [Figure 24].
This will cause the attachment mounting frame to fit
up against the front of the quick coupler.
Some powered quick coupler system have
continuous pressurized hydraulic oil to keep the
wedges in the engaged position and prevent
attachment disengagement. Because the wedges
can slowly lower, the operator may need to
reactivate the powered quick coupler to be sure both
wedges are fully raised before installing the
attachment.
8.
Operate the powered quick coupler until the levers
are fully raised (wedges fully raised).
Figure 25
NA3454A
9.
Operate the powered quick coupler until the levers
are fully engaged in the locked position [Figure 25]
(wedges fully extended through the attachment
mounting frame holes).
If both levers do not engage in the locked position,
see your machine dealer or representative for
maintenance.
WARNING
CRUSHING HAZARD
Failure to secure attachment coupler wedges can
allow attachment to come off and cause serious
injury or death.
Both wedges must extend through the holes in the
attachment mounting frame. Levers must be fully
down and locked.
◂
W-2715-EF
Figure 26
NA3450A
10. The wedges must extend through the holes
[Figure 26] in the attachment mounting frame,
securely fastening the attachment to the quick
coupler.
11. Lower the lift arms and put the attachment flat on the
ground.
12. Turn the machine off and exit the machine.


