24
NOTE:
Prevent excessive tilt-back operation to prevent
collision between sweeper attachment and hose
connections on a coupler.
Removing The Attachment
Removing With Non-powered Machine Quick Coupler
1.
Lower the lift arms and put the attachment flat on the
ground.
NOTE:
In muddy conditions or to prevent the
attachment from freezing to the ground, put
the attachment on planks or blocks before
removing the attachment from the machine.
2.
Turn the machine off and release auxiliary hydraulic
pressure (if applicable).
WARNING
GENERAL HAZARD
Failure to follow instructions can cause serious
injury or death.
Before you leave the operator’s seat:
•
Lower the lift arms and put the attachment /
implement flat on the ground.
•
Engage the parking brake.
•
Move all controls to the NEUTRAL / LOCKED
position to make sure the lift, tilt, and drive
functions are deactivated.
•
Stop the engine.
◂
W-3156
3.
Exit the machine.
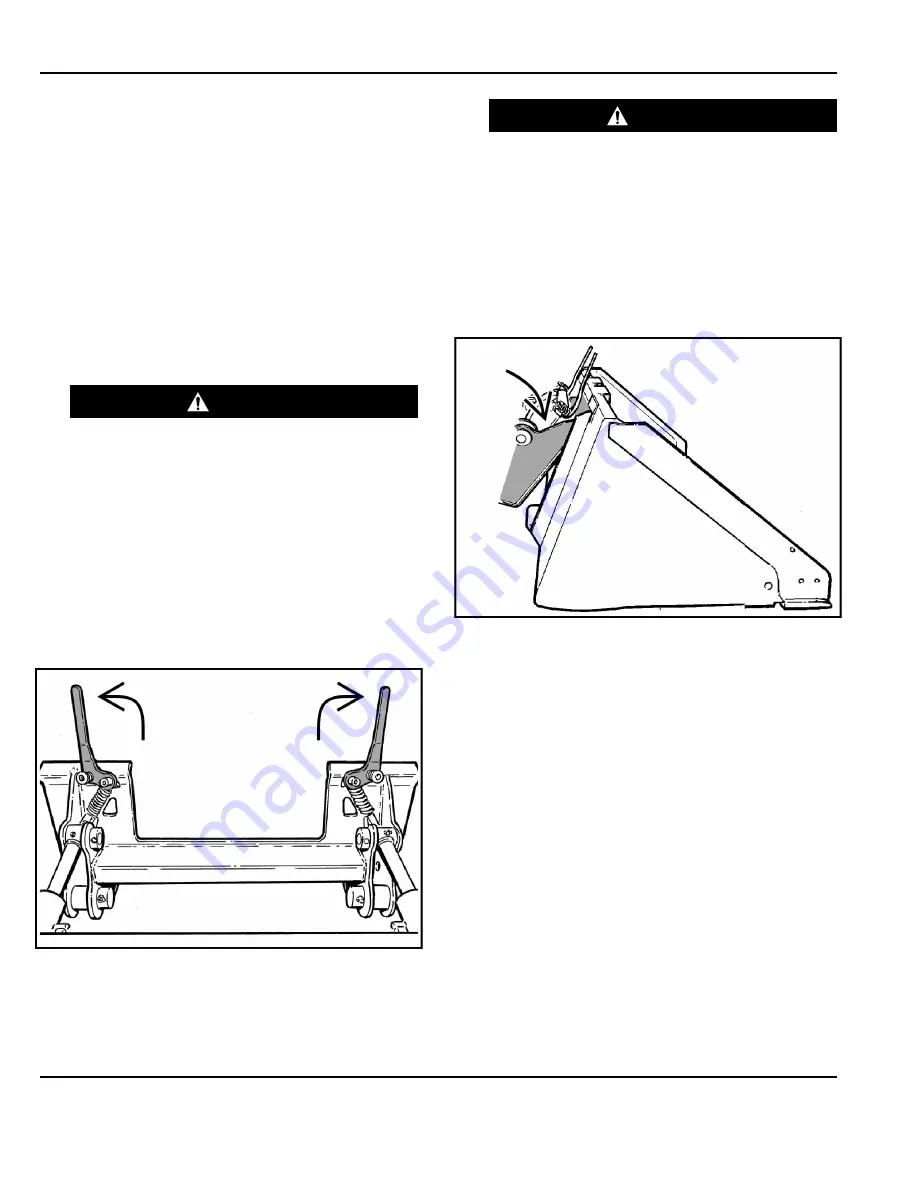
Figure 37
NA3445A
4.
Pull the machine quick coupler levers up [Figure 37]
until they are fully raised (wedges fully up).
5.
Enter the machine.
WARNING
PINCHING HAZARD
Failure to follow instructions can cause serious
injury.
Keep fingers and hands out of pinch points when
latching and unlatching the attachment quick
coupler.
◂
W-2541
6.
Turn the machine on.
7.
Release the parking brake.
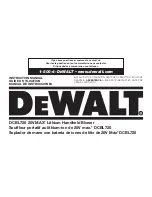
Figure 38
NA3447b
8.
Tilt the quick coupler forward and drive the machine
backward, away from the attachment [Figure 38].
Removing With Powered Machine Quick Coupler
For specific control location and operation of the
machines powered quick coupler, see the machine’s
Operation & Maintenance Manual.
1.
Lower the lift arms and put the attachment flat on the
ground. Lower or close the hydraulic equipment (if
equipped).
NOTE:
In muddy conditions or to prevent the
attachment from freezing to the ground, put
the attachment on planks or blocks before
removing the attachment from the machine.


