Quick
Start Guide
– 3 –
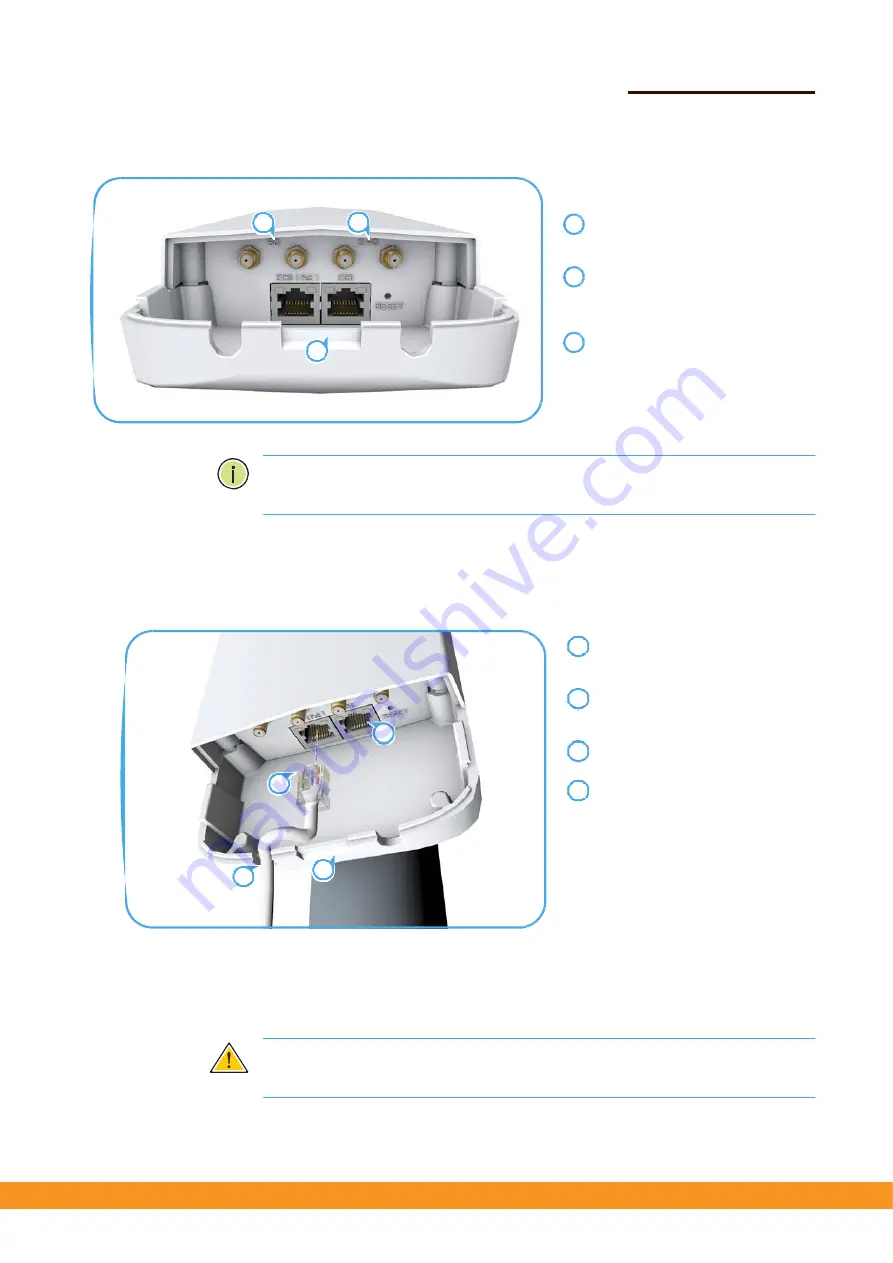
Attach
External
Antennas
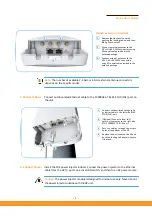
Remove
the
front
port
cover
by
pushing
the
locking
tab
up
and
then
sliding
the
cover
off.
Connect
external
antennas
to
the
AP’s
5
GHz
RP
‐
SMA
connectors
using
RF
coaxial
cable
provided
in
the
antenna
package.
Connect
external
antennas
to
the
AP’s
2.4
GHz
RP
‐
SMA
connectors
using
RF
coaxial
cable
provided
in
the
antenna
package.
Note:
The
number
of
available
2.4
GHz
or
5
GHz
external
antenna
connectors
depends
on
the
specific
model.
3.
Connect
Cables
Connect
outdoor
‐
rated
Ethernet
cable
to
the
1000BASE
‐
T
RJ
‐
45
ETH0
(PoE)
port
on
the
unit.
Connect
outdoor
‐
rated
Category
5e
or
better
cable
to
the
left
‐
side
RJ
‐
45
ETH0
(PoE)
port.
(Optional)
Connect
a
local
LAN
switch
or
computer
to
the
right
‐
side
ETH1
100BASE
‐
TX
RJ
‐
45
port.
Pass
the
cables
through
the
access
holes
at
the
bottom
of
the
AP.
Replace
the
port
cover
on
the
AP
and
push
the
locking
tab
down
to
secure
it
in
place.
4.
Connect
Power
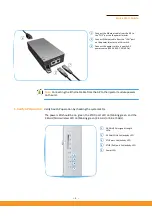
Install
the
PoE
power
injector
indoors.
Connect
the
power
injector
to
the
Ethernet
cable
from
the
AP,
to
a
port
on
a
local
LAN
switch,
and
then
to
an
AC
power
source.
Caution:
The
power
injector
module
is
designed
for
indoor
use
only.
Never
mount
the
power
injector
outside
with
the
AP
unit.
2
3
1
1
2
3
1
2
2
3
1
4
3
4
Summary of Contents for SkyFire AC1200
Page 11: ...20 Chapter 1 Introduction MainMenu...
Page 56: ...64...


