Chapter 4 Installing Software & Clearing Memory
BIOS and AP Chip Installation Steps
Remove the Brain Box from the terminal to install/update the Authentication Processor and the
BIOS image using a PC running Windows 7.
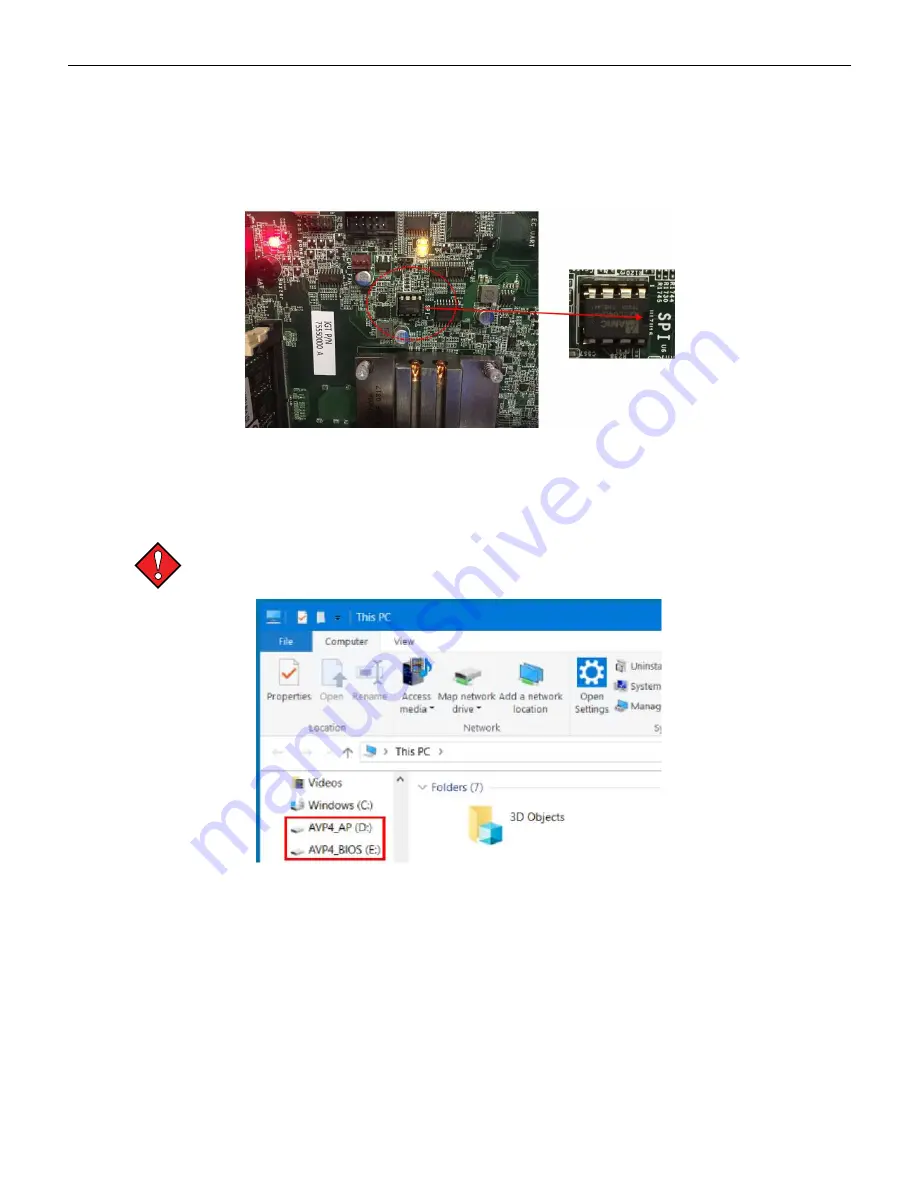
1. Install the Authentication Processor chip (example: APR00000X) into the 8-pin socket. Pay
attention to chip (notch) orientation.
Figure 4-1 BIOS and AP Chip Installation
2. Connect a USB cable from the PC to the Brain Box’s internal USB-B connector.
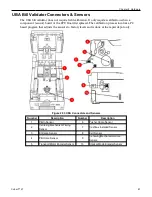
3. Apply power to the Brain Box. The Brain Box will chirp, and two drive partitions will appear in
Windows Explorer; AVP4_AP and AVP4_BIOS.
Do NOT access the AVP_AP partition. Accidently deleting the AP image will require
replacement of the Authentication Processor chip.
Figure 4-2 Windows Explorer Partitions
4. Select the partition named AVP4_BIOS.
Cobalt™ 27
81
Summary of Contents for Cobalt 27
Page 5: ...CFInit 85 Appendix A Stand Mounting 87 Cobalt 27 5...
Page 6: ...6 Cobalt 27...
Page 12: ...Chapter 1 Cobalt Overview Dimensions Figure 1 2 Dimensions 12 Cobalt 27...
Page 26: ...26 Cobalt 27 Chapter 1 Cobalt Overview...
Page 40: ...Chapter 2 Hardware Figure 2 16 Cabinet Controller Board Connectors 40 Cobalt 27...
Page 76: ...76 Cobalt 27 Chapter 2 Hardware...
Page 88: ...Appendix A Stand Mounting Figure A 2 Stand Drill Pattern 88 Cobalt 27...


