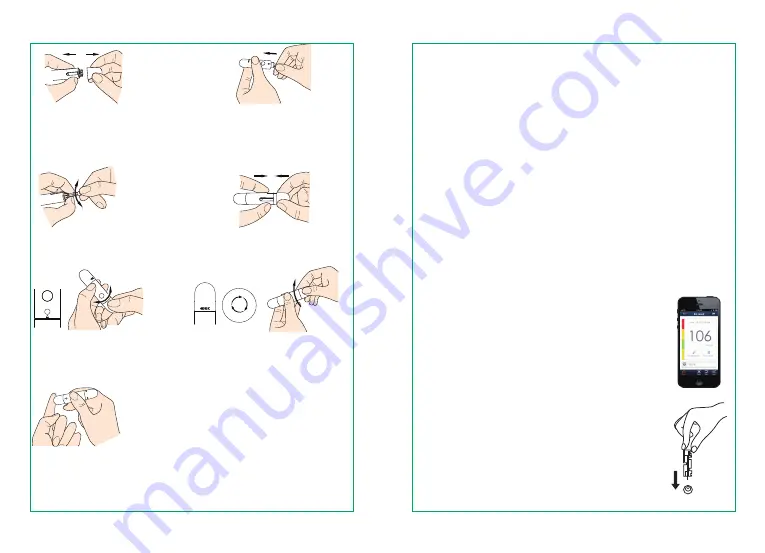
Pull off the lancet device
cap
Insert a new lancet firmly
into the lancing device cup
holder
Replace the lancing device
cap
Set a lancing level
Puncture your fingertip
Cock the handle
Twist off the lancet protective
disk
Step 5: Obtain a Blood Sample
Press the lancing device against the site to be lanced.
Press the release button to puncture your fingertip. Gently
squeeze and/or massage your fingertip until a round drop of
blood at least 0.7 micro liter forms on your fingertip.
Remove the used test strip from the
glucose meter using a small amount of
tissue paper. Discard the used test strip
and lancet properly. (Tip: Stick the lancet
in the protective disk and dispose
properly.)
Step 6: Apply the Blood Sample to the Test Strip
Apply the blood sample to the absorbent hole of the test
strip. Make sure the confirmation window of the test strip is
completely filled with the blood sample. Follow the
on-screen instructions in the App to complete the blood
glucose testing.
Step 7: Remove Test Strip from the Blood Sample
Your iOS device will beep when you should remove the test
strip from the blood sample.
Step 8: Read the Test Results
Wait for about 5 seconds, your blood glucose
result will appear on the iOS device screen.
Step 9: Discard the Used Test Strip and
Lancet
Note: For Alternative Site Testing and Control Solution
Testing, it is recommended that you read the iHealth
Wireless Smart Gluco-Monitoring System's Owner's Manual.
3


