900861-00NC
19
IHP.us.com
Step 10: Remove the RGB control box from the components parts
carton. The fireplace is supplied with 10-feet of wiring for the RGB
control box (switches and dimmer) installation. Find a suitable lo-
cation within a close proximity of the fireplace for convenience of
operation and mount the control box upright and level as shown in
Figure 27
. Use
Figures 25 and 26
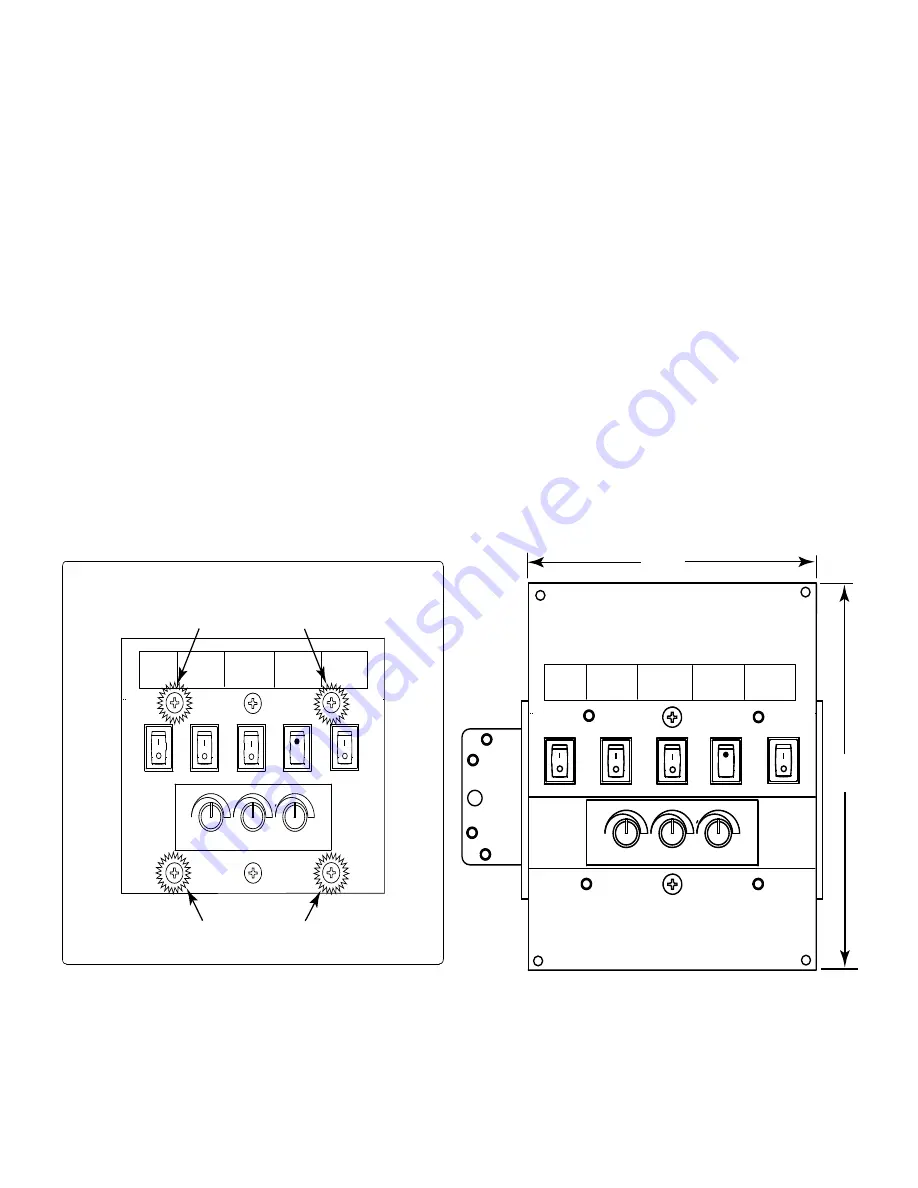
for dimensional reference.
CAUTION: ENSURE ALL SWITCHES ARE IN THE OFF POSITION.
“I” INDICATES IGNITE/ON AND “O” INDICATES OFF. LEARN BUT-
TON DOES NOT APPLY.
Step 11: Remove the four (4) outer screws from each corner in-
side the cover plate and lift off. See
Figure 25
. This will expose
the mounting plate. See
Figure 26
. CAUTION: DO NOT REMOVE
THE TWO CENTER SCREWS FROM THE COVER PLATE. THIS WILL
RELEASE THE ENTIRE SWITCH BOX WIRING FROM INSIDE THE
JUNCTION BOX AND MAKE IT DIFFICULT TO REINSTALL.
Take note of the 8-PIN and 6-PIN wire connectors. These are la-
beled LED lights (6-PIN) and Control Module (8-PIN) connections.
These will be the final connection to the fireplace and crucial to the
operation.
Figure 25 - RGB Control Box with 8-3/4” x 8-3/4” Cover Plate
Figure 26 - RGB Control Box Mounting Plate
Step 12: Mount the RGB control box into the desired location.
CAUTION: AVOID USING EXCESSIVE FORCE WHEN INSTALLING
ANY CONNECTORS.
Step 13: Remove the 8-PIN module wire harness (Cat. No. F3501)
from the components part box. Locate the 8-PIN male connector
from the valve box (under the fireplace) and connect it to the 8-PIN
female end of the wire harness. Connectors only attach one way;
press together until it snap locks into place. See
Figure 27
for de-
tails.
Step 14: Feed the other end of the wire harness through the square
access hole underneath the fireplace and pass the GFCI box, outside
the fireplace to the RGB control box and connect. Connectors only
attach one way; press together until it snap locks into place.
Step 15: Locate the two 1/4” male terminals from the valve box
and connect the AF-4000ADP24 adaptor (Cat. No. F3482). Plug the
7.5VDC adaptor into the 120VAC GFCI box.
Step 16: Locate the 6-PIN wire harness (Cat. No. F3500) for the
LED lights and feed the wire harness up to the RGB control box and
attach. Connectors only attach one way; press together until it snap
locks into place. See
Figure 27
.
LED LIGHTING INSTALLATION
Continued
RGB DIMMER
Cover Plate Surrounding Switch Plate
Remove screws to mount switch plate
Remove screws to mount switch plate
LED
ON/OFF
ON/OFF
LOW
HIGH
LEARN
CONT.
PILOT
RGB DIMMER
Mounting plate under switch cover
LED
ON/OFF
ON/OFF
LOW
HIGH
LEARN
CONT.
PILOT
5-5/8”
(143mm)
5-5/8”
(143mm)


