1
CHARRED OAK AND DRIFTWOOD LOG SETS
P/N 900796-00
Rev. NC, 09/2016
HEARTH PRODUCTS
KITS AND ACCESSORIES
KIT CONTENTS
1 ea. Log Set
1 ea. Instruction Sheet
TOOLS NEEDED
None
INSTALLATION INSTRUCTIONS FOR INSTALLING DRIFTWOOD AND CHARRED OAK* LOG SETS FOR USE WITH
SCORPIO AND DRT3500 SERIES DIRECT-VENT GAS FIREPLACES
GENERAL INFORMATION
This log placement guide has been prepared to present detailed log
placement illustrations and provide instruction to assist in the placement
of logs at the initial (new appliance) setup and after the annual cleaning
and inspection cycles. The information provided here is to be used in
conjunction with the Installation and Operation Instructions provided
with the appliance.
If you encounter any problems, need clarifi cation of these instructions or
are not qualifi ed to properly install this kit, contact your local distributor
or dealer.
Read this instruction sheet in its entirety before beginning the installation.
DO NOT attempt to install the logs until the appliance installation has
been completed, the gas line connected and tested for leaks and the
initial burner operation has been checked out.
The logs have notches/tabs to assist proper positioning. Upper logs rest
on lower logs via notches/tabs. Proper log placement is critical to prevent
sooting. Place the logs in the gaps between fl ame peaks, so they do not
impinge the fl ames. Follow the log placement instructions precisely.
ALL WARNINGS AND PRECAUTIONS IN THE INSTALLATION AND
OPERATION MANUAL PROVIDED WITH THE APPLIANCE APPLY TO
THESE INSTRUCTIONS.
SHUT DOWN THE APPLIANCE AND ALLOW IT TO COMPLETELY COOL
BEFORE PROCEEDING.
NOTE: DIAGRAMS & ILLUSTRATIONS ARE NOT TO SCALE.
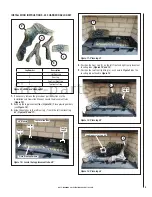
Figure 1
Log Sets - Traditional Models *
Cat. No.
Model
Description
F2876
CHAROAK35
35” Charred Oak Log Set
F2877
CHAROAK40-45
40” and 45” Charred Oak Log Set
F2878
DFTWOOD35
35” Driftwood Log Set
F2879
DFTWOOD40-45
40” and 45” Driftwood Log Set
Table 1
INSTALLATION INSTRUCTIONS - 35/40/45 DRIFTWOOD LOG SET
(Scorpio series only)
Figure 2 - Locate the log placement tabs
Log Location Tabs
Place Glowing Embers
Tab for
Log #2
Tab for
Log #1
Tab for
Log #2
1.
If necessary, remove the glass door per instructions in the
Installation and Operation Manual. Locate the placement tabs
(
Figure 2
)
.
2.
Bend up the log placement tabs
(
Figure 2
)
. Place glowing embers
and other media
(see
Figure 2
)
.
1
3
5
4
2
6
Log Number
Description
1
Left Rear Log
2
Rear Log
3
Left Top Log
4
Right Bottom Log
5
Right Top Log
6
Front Ember Log
* DRT3500 Series fi replaces are approved for use with the Charred Oak Log Sets only.
f i r e - p a r t s . c o m


