18
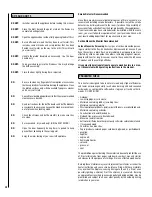
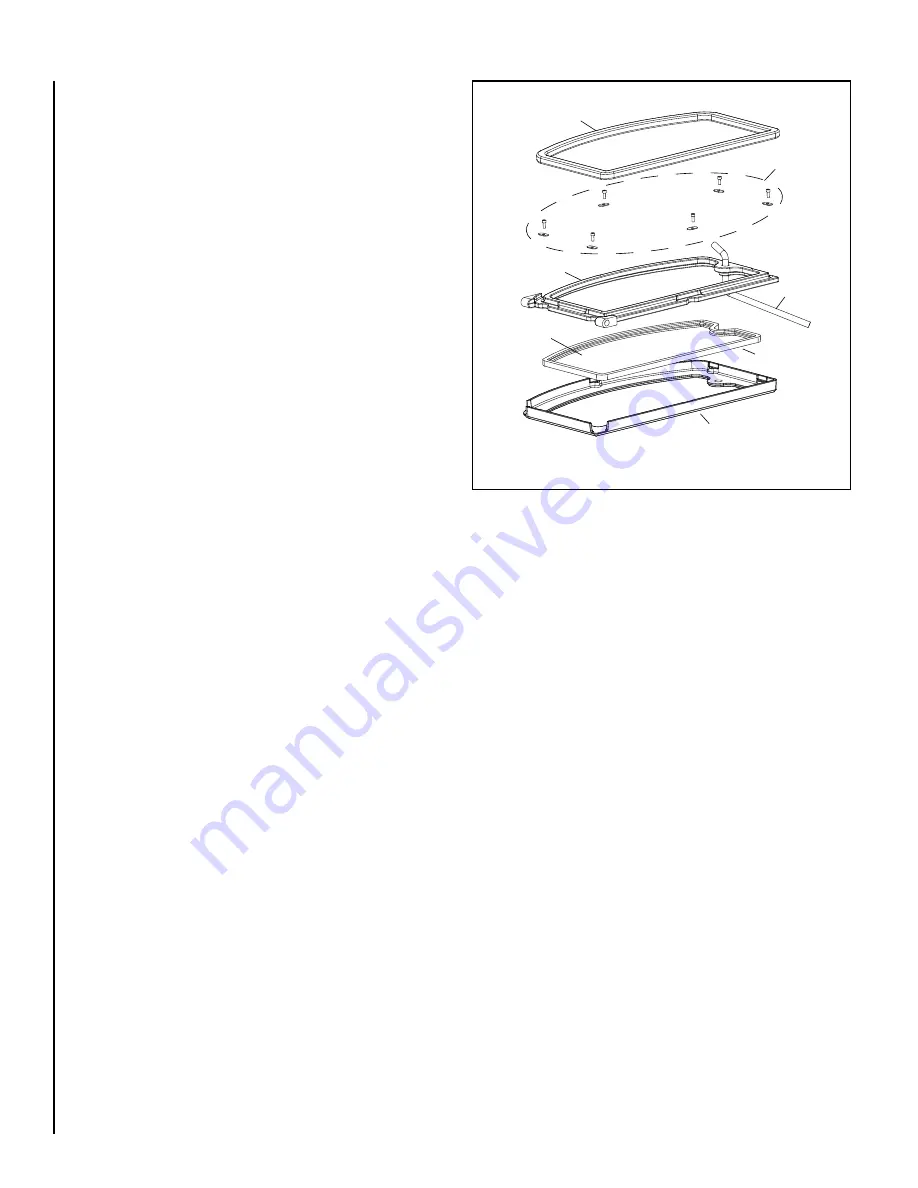
GLASS REPLACEMENT INSTRUCTIONS
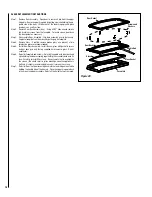
Step 1. Remove Door Assembly - Open door to remove E clip from the upper
hinge pin. Remove upper hinge pin by pulling up while holding the op-
posite side of the door. Lift door out of the lower hinge pin and place
face down on a soft surface.
Step 2. Remove Door Back Screws (6 ea.) - Using a 5/32” allen wrench remove
the 6 retainer screws from the faceplate. To locate screws, peel back
the door gasket as necessary.
Step 3. Disassemble Door Assembly - Flip door assembly over to be face up.
Separate faceplate from door back by pulling up on faceplate.
Step 4. Remove Glass - Carefully remove broken glass one piece at a time
(protective gloves are recommended)
Step 5. Install New Glass Assembly - Install the new glass with gasket in recess
on door back (use only factory supplied 5mm ceramic glass. Do not
substitute).
Step 6. Reinstall Faceplate and Screws - Reinstall faceplate onto door back and
while holding the door assembly together flip the assembly back onto it’s
face. Carefully reinstall the screws. Be very careful not to overtighten
the screws (this could result in glass breakage when the appliance is
hot) and it is highly recommended to use anti seize on the screws.
Step 7. Reinstall Door - Set door assembly back into the lower hinge mount while
holding the handle side of the door up. Place the upper hinge pin back
in the mount and door assembly. Reinstall the E clip that was removed.
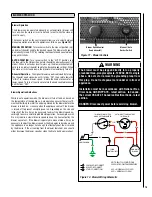
Figure 20
Faceplate
Glass Gasket
Glass
Door Back
Handle Rod
Door Gasket
Screws and
Washers

