6
NOTE: DIAGRAMS & ILLUSTRATIONS ARE NOT TO SCALE.
If your appliance has plated accessories, be sure to clean it with a
household type glass cleaner and a very soft cloth to remove any
fingerprints and residues prior to the first fire and before any fire if the
plated accessory has been handled or soiled. Do not close the door
tightly during the “Burn-In Period.” Also, open the door frequently
(every 5-10 minutes) to keep the gasket from adhering to the curing
paint. Ventilate the house well during these first firings as the paint gives
off carbon dioxide and unpleasant odors. It is recommended that persons
sensitive to an imbalance in the indoor air quality avoid the appliance
during the curing process.
Your new appliance is painted with a high temperature paint that cures
during the first few firings. We recommend that you put your stove or
fireplace insert through a regimen of three burns. The first two should
last for 20 minutes each at 250 degrees (the appliance should be allowed
to cool completely between each burn). The third should be a burn of
at least 450 degrees F. for 45-60 minutes. The paint will become soft,
gummy and emit non-toxic smoke during these burns. After the appliance
cools down for the third time, the paint will harden. DO NOT BUILD A
LARGE ROARING FIRE UNTIL THIS CURING EFFECT IS COMPLETE OR
YOU MAY DAMAGE THE FINISH OF YOUR STOVE OR INSERT. Spray
can touch-ups should be done only with a high temperature stove paint
(cat. no. H8159), available from all IHP dealers.
Please be patient with the heat output of your appliance for the first few
weeks. The steel will go through a curing process that eliminates mois-
ture, which is deep in the steel and firebrick. This moisture will reduce
initial heat output of your appliance and may make it difficult to start.
(DO NOT OVERFIRE THE STOVE OR INSERT DURING THIS PROCESS.
IF THE STOVE OR CHIMNEY BECOMES RED, REDUCE THE AMOUNT OF
AIR ENTERING THE STOVE OR INSERT IMMEDIATELY).
BURN-IN PERIOD
PAINT CURING
This appliance is designed to burn dry seasoned natural wood only (see
Page 20 for a list of prohibited fuels). Failure to burn proper fuels only
will void the certification and the warranty of the appliance.
Dry, seasoned wood is that which has been cut, split and allowed to dry
under a covered area where air is free to flow and circulate under and
around the wood (not under a tarp or plastic). Make sure wood is not
stacked directly on the ground, it may absorb moisture from the ground.
It should be allowed to dry in these conditions for a minimum of six
months, preferably one year or more. IT MUST BE UNDERSTOOD THAT
WOOD CANNOT BE LEFT IN ANY KIND OF WET OR DAMP AREA OR IT
WILL NEVER BECOME COMPLETELY SEASONED.
Do Not store fuel within space heater installation clearances or within
the space required for refueling and ash removal.
DO NOT OVERFIRE THIS HEATER
Attempts to achieve heat output rates that exceed heater design specifica-
tions can result in permanent damage to the heater.
What does “Well-Seasoned” mean?
When a tree is cut down, the wood is green, full of sap and moisture.
This moisture content can exceed 80%, which must be reduced to less
than 20%. Wood properly seasoned is then capable of generating the
heat the stove was designed to provide.
Green wood does not burn easily. Attempting to burn green wood often
results in a lot of smoke and very little fire. Time is the most important
factor in seasoning wood. Ideally the moisture content should be reduced
to 11-20%. NOTE: The use of a firewood moisture meter is recommended
to ensure the firewood contains less than 20% moisture.
Seasoning Guide
Softwoods - 6 months to 18 months
Hardwoods - 12 months to 24 months
Logs that are 5” diameter across or larger should be split in half, three
pieces if over 8 inches, and four pieces when over a foot across. If a tree
has been dead for 2 - 4 years it still needs to be cut, split, and seasoned
for 6 to 24 months depending on the wood.
FUEL
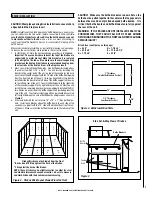
4'
4'
8'
Standard
Cord of
Wood
8 Ft.
(2.4M)
4 Ft.
(1.2M)
4 Ft. (1.2M)


