IHP.us.com
127160-01B
2
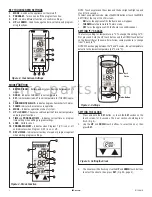
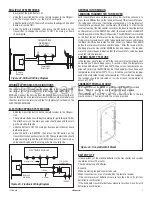
Figure 3 - Mode Function
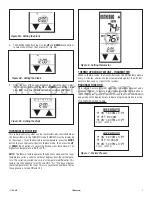
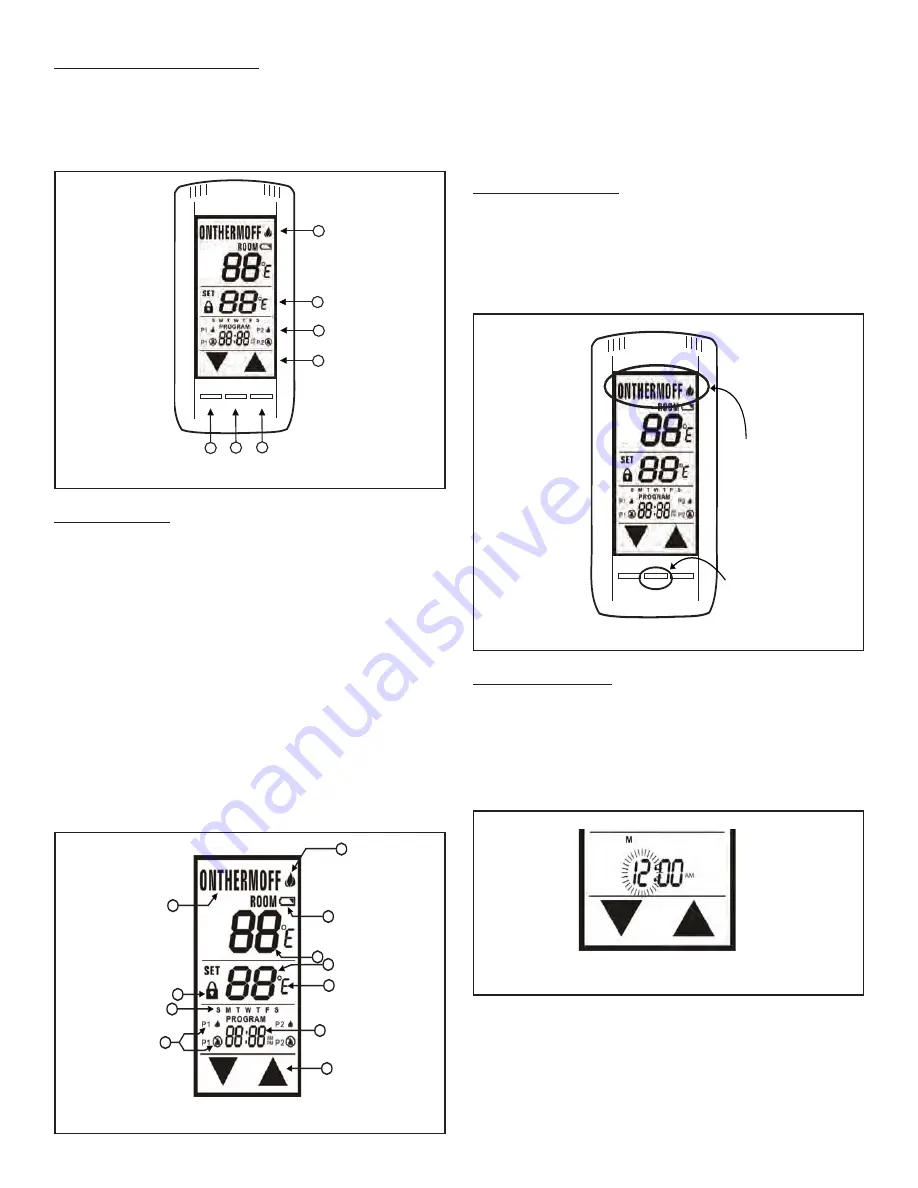
Figure 5 - Setting the Clock
Figure 4 - Settings
1
2
3
4
5
6
7
8
9
10
11
MODE
SET
PROG
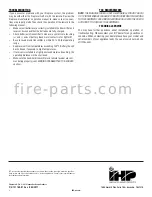
Mode: Button
Mode: Touch
Portion
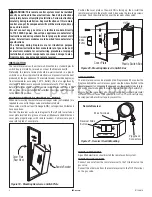
Figure 2 - Touchscreen Settings
MODE
SET
PROG
1
1
2
2
3
4
3
MODE FUNCTION
1. BATTERY
ICON
- . Battery power is low. Replace Batteries in 2 - 4
weeks.
2. ROOM
- Indicates CURRENT room temperature.
3. SET
- Indicates desired SET room temperature for THERMO opera-
tion.
4. FAHRENHEIT/CELSIUS
- Indicates degrees Fahrenheit or Celsius.
5. FLAME
- Indicates burner/valve in operation.
6. MODE
– Indicates operation mode of system.
7. UP
and
DOWN
– These are used to adjust the Time, Set temperature,
and program functions.
8. TIME
and
PROGRAM TIME
– Indicates current time or program
time setting when editing program settings.
9. LOCK
- Child lock out.
10. PROGRAM ON/OFF –
Indicates when Program 1 (P1) is on or off,
and indicates when Program 2 (P2) is on or off.
11. DAY of WEEK
- Indicates current day of week, or program segment
when editing program settings.
KEY TOUCHSCREEN SETTINGS
1. MODE
- Switches the appliance on/thermo/off.
2. PROGRAM
- Turns on and off the program function.
3. SET
- Used in different functions to confi rm settings.
4. UP
and
DOWN
- Used to change the time, set temp, and program-
ming functions.
NOTE: Touch anyplace on the screen and the back light will light up and
stay lit for 5 seconds.
To select an operation mode, press the MODE button or touch the MODE
SECTION at the top of the LCD screen.
• ON
turns the appliance ON, the fl ame icon will appear.
• THERMO
sets the remote to Thermo mode.
• OFF
turns the appliance OFF, the fl ame icon will disappear.
SETTING ºF/ ºC SCALE
The factory setting for temperature is ºF. To change this setting to ºC,
fi rst press and hold the UP touch button and the DOWN touch button
on the transmitter at the same time. Follow same procedure to change
from ºC back to ºF.
NOTE: When changing between the ºF and ºC scales, the set temperature
defaults to the lowest temperature (45 ºF, or 6 ºC).
SETTING THE CLOCK
1. Press and hold the
SET
button, or touch the
SET
section on the
touch screen, for 5 seconds. The hour section should begin to
fl ash. (Fig. 5).
2. Use
the
UP
and
DOWN
touch buttons to select the hour, then
press
SET
.
3.
The minutes will be fl ashing. Use the
UP
and
DOWN
touch buttons
to select the minute, then press
SET
. (Fig. 5A, page 3).
f i r e - p a r t s . c o m


