474-Add-on Modules
Installation and Setup
41
6
Installation and Setup
NOTICE
Please verify that cables, interfaces, and handling of the devices comply with the requirements (see chapter 8,
page 47).
First-time users are recommended to set up the system in a test environment that is limited to a single room. This
makes it easier to identify and solve any cabling problems, and experiment with your system more conveniently.
Add-on modules installed in the chassis can be hot plugged.
The chassis configuration determined by customer configuration is delivered accordingly with the initial order.
Installation by the customer is not intended and not necessary. In case of an extender module or add-on module
replacement, please refer to the installation instructions in the 474-BODY manual.
6.1 Connecting Add-on Module Analog Audio/Serial RS232
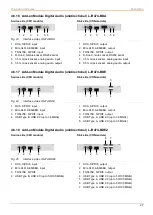
1. Connect the audio source to the CPU Unit (e.g., computer audio OUT with CPU Unit audio IN, computer audio IN
with CPU Unit audio OUT).
2. Connect the audio OUT on the CON Unit to headphones or suitable speakers.
3. Connect the audio IN on the CON Unit to a suitable microphone.
6.2 Connecting Add-on Module Analog Audio/Serial RS422
1. Connect the audio source to the CPU Unit (e.g., computer audio OUT with CPU Unit audio IN, computer audio IN
with CPU Unit audio OUT).
2. Connect the serial port of the source to the CPU Unit.
3. Connect the CON Unit to the serial port of the input device.
6.3 Connecting Add-on Module Digital Audio
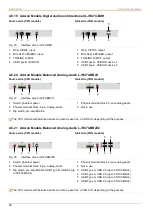
1. Connect the digital audio source to the audio input of the CPU Unit.
2. Connect the audio output of the CON Unit to suitable speakers or audio amplifiers.
If several active sources are connected, Mini-XLR input takes priority.
The audio signal is available at all outputs.
6.4 Connecting Add-on Module Balanced Audio
1. Connect the balanced audio source to the appropriate audio input of the CPU Unit.
2. Connect the audio output of the CON Unit to suitable speakers or audio amplifiers.
6.5 Connecting Add-on Module USB HID
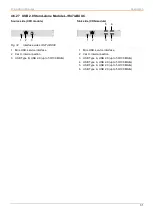
1. Connect the source to USB HID port of the CPU Unit.
2. Connect the USB HID devices to USB HID ports of the CON Unit.

