ENGLISH
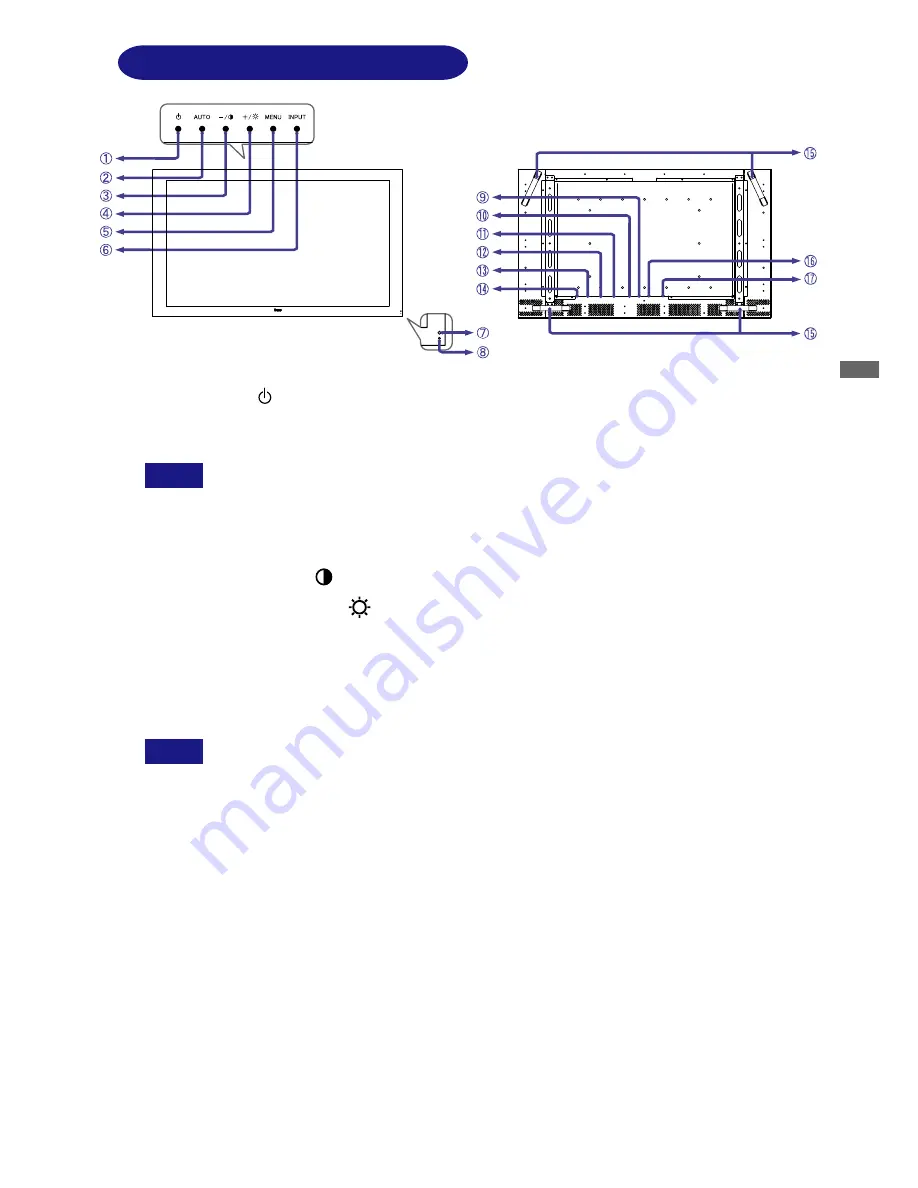
CONTROLS AND CONNECTORS
A
Power Button ( )
B
Auto Button (AUTO)
Adjusts Clock, Phase, H-Position and V-Position automatically.
n
For best results, use the Auto Set-up in conjunction with the test pattern Test.bmp.
(See page 19 for SCREEN ADJUSTMENTS.)
n
The screen becomes dark for approximately five seconds during the adjustment.
C
– / Contrast Button ( – / )
D
+ / Back Ground Button ( + / )
E
Menu Button (MENU)
F
Input Button (INPUT)
G
Remote Sensor
H
Power Indicator
Blue:
Normal operation
Orange: Power Management
The monitor enters into power management mode which reduces the power
consumption to less than 5W when receiving no horizontal and/or vertical sync signal.
I
DVI-D 24pin Connector (DVI)
J
RS-232C Connector (RS-232C)
K
External Speaker Output Terminal (SPEAKER)
L
Audio Connector (AUDIO IN)
M
AC Connector (AC IN)
N
Main Power Switch (POWER)
O
Handles
P
D-SUB mini 15pin Connector (D-SUB)
Q
Optional Video Adapter Slot
<Back>
NOTE
<Front>
NOTE
BEFORE YOU OPERATE THE MONITOR 6


