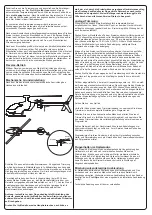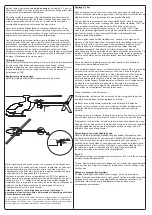
Angle of
incidence
Slide
Approx. 0.08 in.
in clearance
90°
Reverse Operation
Basic Mechanical Adjustment
After installation the tail servo must be mechanically aligned first.
Attention: Before first flight attempts check the direction of the gyro
effect. In case of a reversed direction of gyro effect your model may
crash due to uncontrollable pirouettes.
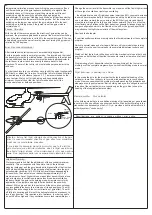
If you rotate the helicopter about its main rotor axis to the left the
gyro must produce a tail rotor deflection which in flight would have
the effect of a right rotation of the model about its rotor axis and vice
versa. Gyro beginners better ask an experienced clubmate for help.
Adjustment/Trimming
Specifications are subject to change without prior notice.
Change the servo travel at the transmitter up or down until the tail in flight arrives
at the verge of oscilation or just stops oscillating.
the adjusted value on a JR radio becomes lower than 80% you must decrease
the servo travel mechanically.To that purpose insert the tie rod at the servo arm
one hole closer toward the servo axis, at the ECO-heli you may additionally
move the rear hinge (at the tail) one hole further outward. There are, of course,
other factors which influence the flight behaviour, especially linkage play, a heli
design configuration which is too flexible or too stiff, or the gyro support itself
may influence the flight characteristic of the whole system.
Now land the helicopter.
If your transmitter contains a memory save the trim adjustments or the complete
program.
Switch to normal mode and start again. Retrim until your model stops turning
away and store the new trim values or the complete adjustment under a new
program.
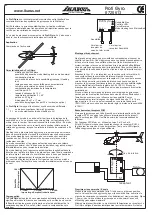
Watch out that the tail rotor slide does not hit the mechanical stops at both end
positions, on both sides of the slide there should remain a clearance of at least
0.08 in.
Programming of your transmitter should ensure switching of the trim value
memory or of the complete programs if you switch from holding mode to normal
mode.
Flight Behaviour in Heading Lock Mode
In this mode the gyro for the most part holds the longitudinal heading of the
helicopter, there is no tendency to turn into wind direction as in conventional
mode. Now you can without the problem of weathercocking fly backwards and
sideways even in gusty weather. But in holding mode you are obliged to control
turns about the vertical axis more consciously as the gyro tries to keep the
heading of the longitudinal axis constant.
Mixers/Transmitter
Stick Authority
In the holding mode there is no additional mixing of tail equalizing or gas allowed,
in normal mode you still can use mixers as before. Stick authority mixing in the
transmitter is unnecessary as the
Profi Gyro
provides a built in automatic stick
authority system ("stick priority").
temperature calibration process by switching the power supply off and
on.After switching-on the gyro requests availability of a signal at the
sensitivity channel. If there is no signal the gyro works untill to next
switching-on with the sensitivity which has been adjusted by
potentiometer. The jumper "Heading Lock Mode" on/off decides whether
the gyro will operate in the normal or holding mode. If at the moment of
switching-on the jumper was not set the gyro will work till to the next
switching-on in holding mode, if the jumper is set the gyro works in
normal mode.If
With the aid of the reverse jumper the direction of gyro action can be
reversed, the processor again sends a query at the moment of switching
on and the state of operation is valid till to the next switching-off. You can
alternatively reverse the servo travel by means of turning the gyro axis of
rotation by 180 degrees.
For this purpose switch to normal gyro mode. The joystick and trim tab of
the transmitter must be in middle position. Corresponding to the stick and
trim tab middle position the servo arm must be exactly perpendicular to
the tail boom in order to achieve exactly the same travel to both
directions. The arm of the tail tie rod must also be perpendicular to the
tail boom.
In order to achieve this you will either have to shift the servo longitudinally
(ECO-heli), or adjust the tie rod so far untill the tail rotor blades will attain
the desired angle of incidence (approx. 3..7°) as recommended by the
manu-facturer. Watch out for rod binding and keep backlash at a
minimum. Also watch out that the tail rotor slide does not hit the
mechanical stops at both end positions.
We recommend to find first the adjustment of the necessary maximum
sensitivity. This corresponds with the point at which the tail stops
wagging (swinging) and the gyro develops its highest effect, that is when
it shows best holding ability.To the purpose of adjustment turn the gyro
potentiometer clockwise to 100% till to its travel stop corresponding to
full sensitivity. Then adjust at your transmitter approximately 2/3 of
maximum servo travel. Higher values mean higher sensitivity and also a
higher inclination to oscillations, lower values mean lower oscillation
tendency.Switch the gyro to the holding mode by remote control or by
application of the jumper and apply full stick travel at the sensitivity
channel. Still on ground trim to an extent until the servo does not show
any recognizable tendency to run into one of its end positions. Then lift
slightly off and check again the correct direction of gyro effect. Then lift
off fully into hovering and trim until the helicopter shows no tendency to
turn in any direction. This requires a lot of patience. In order to go safe
do not lift off too high and if any oscillation occurs land immediately.
we 2


