background image

ENGLISH 12

Appliance maintenance and cleaning 

Clean the appliance regularly using a cloth 

and a solution of lukewarm water and 

neutral detergent specifically formulated for 

refrigerator interiors. Never use abrasive 

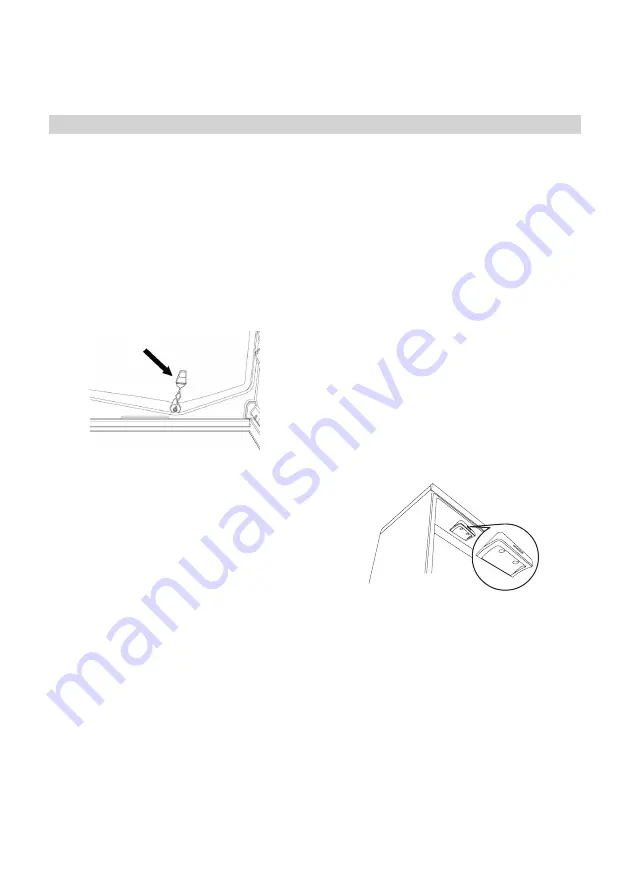
detergents. Clean inside the defrost 

water drain outlet on the rear wall of the 

refrigerator (near the fruit and vegetable 

crisper drawer) regularly, using the tool 

supplied with the appliance so as to ensure 

defrost water is removed correctly (see 

figure).

Before all cleaning or maintenance 

procedures, unplug the appliance from the 

mains or disconnect the electricity supply.

Defrosting the freezer compartment

No Frost models do not need defrosting.

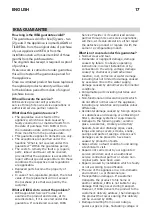
Storing food

Wrap food so that no water, moisture or 

condensate can enter; this will prevent 

odours or aromas going from one part to 

another in the refrigerator, ensuring better 

preservation of frozen foods.

Never place hot food in the freezer. Cooling 

hot foods before freezing saves energy and 

prolongs the life of the appliance.

Cleaning and maintenance

When the appliance is not in use

Unplug the appliance from the mains, then 

empty, defrost (if necessary) and clean 

it. Leave the doors ajar, so that air can 

circulate inside the compartments. This will 

prevent the formation of mould and bad 

odours.

During blackouts

Keep the doors closed to allow the stored 

food to stay cold as long as possible. Do 

not refreeze partially thawed food. If the 

blackout persists, the blackout alarm may 

sound.

Changing led

To replace LED lighting, contact the After-

Sales Service for assistance.

LED lights last longer than normal bulbs, 

they illuminate better and are more 

environmentally friendly.

Summary of Contents for 90444984

Page 1: ...40001 1362070 A Inter IKEA Systems B V 2019 18535 AA 2125532 1 400011362070...

Page 2: ...ENGLISH 4 5...

Page 3: ...r maintenance must not be carried Safety Information Table of contents out by children without supervision Children aged from 3 to 8 years are allowed to load and unload refrigerating appliances PERMI...

Page 4: ...turer to speed up the defrost process WARNING Do not use or place electrical devices inside the appliance compartments if they are not of the type expressly authorised by the Manufacturer WARNING Ice...

Page 5: ...igerator compartment 1 Upper area of the refrigerator compartment door temperature zone Store tropical fruit cans drinks eggs sauces pickles butter jam 2 Middle area of the refrigerator compartment co...

Page 6: ...switch off defrost clean dry and leave the door open to prevent mould developing inside the appliance INSTALLATION The appliance must be handled and installed by two or more persons risk of injury Us...

Page 7: ...will increase the Energy consumption of product Please remove the power cord from condenser hook during installation before connecting product to power supply ELECTRICAL WARNINGS It must be possible...

Page 8: ...Control panel 10 Dairy compartment 1 1 Door trays 12 Bottle holder 13 Bottle bin Least cold zone Intermediate zone Coldest zone Freezer compartment 8 Top drawer freezing area 9 Middle and bottom drawe...

Page 9: ...turned on the icon will be displayed The function turns off automatically after 6 hours or manually by pressing the Fridge button for 3 seconds Deactivating acoustic alarms Stop Alarm To deactivate th...

Page 10: ...eriod indicated on the package and freezes fresh food The amount of fresh food that can be frozen in 24 hours is shown on the rating plate place the food in the freezer compartment see Fast Freezing p...

Page 11: ...ndensate can enter this will prevent odours or aromas going from one part to another in the refrigerator ensuring better preservation of frozen foods Never place hot food in the freezer Cooling hot fo...

Page 12: ...nce could be in On Standby mode Activate the appliance with the On Standby button The temperature inside the compartments is not low enough There could be various causes see Solutions Make sure the do...

Page 13: ...ess the Stop Alarm button briefly to deactivate the acoustic signal After pressing the button the temperature display shows the set temperatures again If the freezer compartment has not yet reached th...

Page 14: ...ate the Service number the number after the word SERVICE on the rating plate inside the appliance Technical data Product dimensions ISANDE 90444984 Height 1770 Width 540 Depth 545 Net Volume l Fridge...

Page 15: ...d electronic equipment Energy saving tips To guarantee adequate ventilation follow installation instructions Insufficient ventilation at the back of the product increases energy consumption and decrea...

Page 16: ...A Service Provider or its authorized service partner through its own service operations will then at its sole discretion either repair the defective product or replace it with the same or a comparable...

Page 17: ...appliance complies and is installed in accordance with the technical specifications of the country in which the guarantee claim is made the Assembly Instructions and User Manual Safety Information Th...

Page 18: ...erservice alfuttaim com STATE OF KUWAIT Contact centre Web e mail 965 18 40 40 8 www IKEA com kw info IKEA com kw JORDAN Contact centre Web 962 6 400 1000 www IKEA jo KINGDOM OF SAUDI ARABIA Contact c...

Page 19: ...18 IKEA IKEA IKEA IKEA IKEA IKEA IKEA IKEA IKEA IKEA IKEA i IKEA 8 i 8 IKEA...

Page 20: ...17 IKEA IKEA 2 5 TILLREDA LAGAN IKEA IKEA IKEA IKEA IKEA IKEA IKEA IKEA IKEA IKEA...

Page 21: ...16 100 Stop Frost...

Page 22: ...2 4 239 38 C XXXXXXXXXXXXX XXXXXXXXX XXXXXXXXXXXXX XXXXXXXXX XXXXXXXXXXXXX XXXXXXXXX XXXXXXXXXXXXX XXXXXXXXX XXXXXXXXXXXXX XXXXXXXXXXXXX XXXXXXXXXXXXX XXXXX XXXXX XXXXX XXXXX XXXXX XXXXX XXXXX XXXXX X...

Page 23: ...14 F Stop Alarm Stop Alarm...

Page 24: ...13 On Standby LED On Standby...

Page 25: ...12 No Frost LED LED LED LED...

Page 26: ...11 24 8 2 24 3 48 Freezer 27 24 3 2...

Page 27: ...10 5 4 2 8 1 3 6 3 3 3 A B C D E A B C E D...

Page 28: ...9 1x 1x 1 LED 2 3 4 5 6 7 10 11 12 13 8 9 10 11 12 13 2 4 3 6 5 7 8 1 9...

Page 29: ...8 50 METOD...

Page 30: ...7 3 4 5 3 1 4 6 12 8 48 5...

Page 31: ...6 R600a 7 1 81 0 17 0 1 8 C 1 2...

Page 32: ...5 5 9 10 10 12 13 15 16 17 IKEA 3 0 8 3 8 8 3 244 2009 EC 32 10 SN 32 16 N 38 16 ST 43 16 T R600a HC...

Page 33: ...min 200 cm2 min 200 cm2...

Page 34: ...5 ENGLISH 4...

Page 35: ......

Page 36: ...ISANDE AR GB...

Reviews: