background image

Freezer blocks

x2

Freezer Blocks

Two freezer blocks are supplied in the

freezer; this increase the length of time for

which food will keep in the event of a pow-

er failure or breakdown.

Carbon Air Filter

Your appliance is equipped with a carbon

filter behind a flap in the rear wall of the air

distributing box.

The filter purifies the air from unwanted

odours in the fridge compartment meaning

that the storage quality will be further im-

proved.

Freezing fresh food

The freezer compartment is suitable for

freezing fresh food and storing frozen and

deep-frozen food for a long time.

To freeze fresh foods it is not necessary to

change the medium setting.

However, for a faster freezing operation,

turn the temperature regulator toward

higher settings to obtain the maximum cold-

ness.

Important!

 In this condition, the refrigerator

compartment temperature might drop

below 0°C. If this occurs reset the

temperature regulator to a warmer setting.
Place the fresh food to be frozen on the

bottom compartment.

Storage of frozen food

When first starting-up or after a period out

of use, before putting the products in the

compartment let the appliance run at least

2 hours.

The freezer drawers ensure that it is quick

and easy to find the food package you

want. If large quantities of food are to be

stored, remove all drawers except for the

bottom drawer which needs to be in place

to provide good air circulation. On all

shelves it is possible to place food that pro-

trude until 15 mm from the door.

Important!

 In the event of accidental

defrosting, for example due to a power

failure, if the power has been off for longer

that the value shown in the technical

characteristics chart under "rising time", the

defrosted food must be consumed quickly or

cooked immediately and then re-frozen

(after cooling).

Thawing

Deep-frozen or frozen food, prior to being

used, can be thawed in the refrigerator

compartment or at room temperature, de-

pending on the time available for this oper-

ation.

Small pieces may even be cooked still fro-

zen, directly from the freezer: in this case,

cooking will take longer.

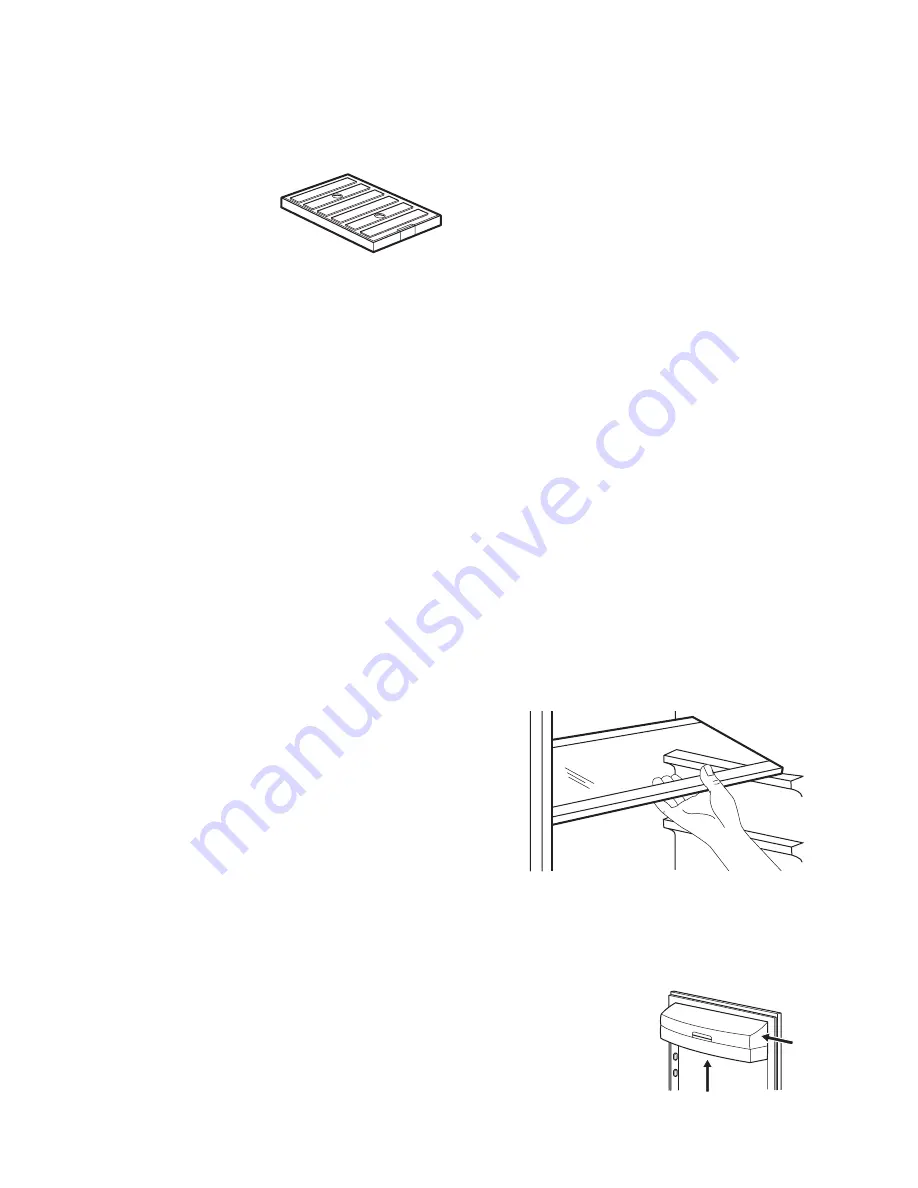
Movable shelves

The walls of the refrigerator are equipped

with a series of runners so that the shelves

can be positioned as desired.

Positioning the door shelves

To permit storage of

food packages of

various sizes, the

door shelves can be

placed at different

heights.

2

1

ENGLISH  

12

Summary of Contents for DYNAMISK

Page 1: ...DYNAMISK GB DE...

Page 2: ......

Page 3: ...ENGLISH 4 DEUTSCH 25...

Page 4: ...hey do not play with the appliance Keep all packaging well away from chil dren There is risk of suffocation If you are discarding the appliance pull the plug out of the socket cut the connec tion cabl...

Page 5: ...ot suitable for house hold room illumination Daily Use Do not put hot pot on the plastic parts in the appliance Do not store flammable gas and liquid in the appliance because they may ex plode Do not...

Page 6: ...required to do the servicing of the appliance should be car ried out by a qualified electrician or com petent person This product must be serviced by the Af ter Sales Service and only genuine spare pa...

Page 7: ...ns before using the appliance 2 1 1 1 10 8 9 7 5 4 6 3 1 Vegetable drawer 2 Low temperature compartment 3 Glass shelves 4 No Frost cooling 5 Bottle rack 6 Control panel 7 Butter shelf 8 Door shelves 9...

Page 8: ...co Mode function I Fast Freeze function J Freezer temperature indicator K Time L Bottle Chill function M Extra humidity function N Demo mode After selection of the fridge or freezer compartment the an...

Page 9: ...temperature will be reached within 24 hours Important After a power failure the set temperature remains stored Extra Humidity Mode If you need to increase the humidity in the refrigerator we suggest...

Page 10: ...aced in the freezer for fast cooling To switch on the function 1 Press the Bottle Chill button The Bottle Chill indicator appears The Timer shows the set value 30 mi nutes 2 Press the Temperature cold...

Page 11: ...door closed the alarm will stop During the alarm the buzzer can be switch ed off by pressing any button First use Cleaning the interior Before using the appliance for the first time wash the interior...

Page 12: ...ore putting the products in the compartment let the appliance run at least 2 hours The freezer drawers ensure that it is quick and easy to find the food package you want If large quantities of food ar...

Page 13: ...ob tain this result pull the shelf up so it can ro tate upwards and be placed on the next higher level No Frost Cooling The No Frost Cooling technology let food cool quickly and a more uniform temper...

Page 14: ...4 Slide upward the flap as shown in the figure Important The function switches off auto matically after few hours To switch off the function 1 Slide down the flap 2 Switch off the Shopping function 3...

Page 15: ...efrigerator do cover or wrap the food particularly if it has a strong flavour position food so that air can circulate freely around it Hints for refrigeration Useful hints Meat all types wrap in polyt...

Page 16: ...cleaning Caution Before carrying out any maintenance operation disconnect the power supply This appliance contains hydrocarbons in its cooling unit maintenance and recharging must therefore only be ca...

Page 17: ...iance is not in use for long periods take the following precautions 1 Disconnect the appliance from electrici ty supply 2 Remove all food 3 Defrost if foreseen 4 Clean the appliance and all accesso ri...

Page 18: ...ucts do not touch the rear plate Water flows on the ground The melting water outlet does not flow in the evaporative tray above the compressor Attach the melting water outlet to the evaporative tray T...

Page 19: ...O appears on the display The appliance is in demon stration mode Keep the MODE button press ed for approximately 10 sec onds until a long beeping sound is heard The display will shut off for a short w...

Page 20: ...y and correct operation of the appliance before installing the appliance Important Refer to the assembly instructions for the installation Location To ensure best performance install the ap pliance we...

Page 21: ...very the carbon filter is in a plastic bag to maintain it s duration and character istics The filter should be placed behind the flap before the appliance is turned on 1 Open the flap cover 2 Remove t...

Page 22: ...s sole dis cretion if it is covered under this guarantee If considered covered IKEA service provider or its authorized service partner through its own service operations will then at its sole discreti...

Page 23: ...he country in which the guarantee claim is made the Assembly Instructions and User Man ual Safety Information The dedicated After Sales Service for IKEA appliances Please do not hesitate to contact IK...

Page 24: ...p For any additional questions not related to After Sales of your appliances please con tact our nearest IKEA store call centre We recommend you read the appliance docu mentation carefully before cont...

Page 25: ...n einen sicheren Gebrauch des Ger tes ausschlie en nur unter Aufsicht oder nach ausreichender Einweisung durch eine verantwortungs bewusste Person benutzt werden die si cherstellt dass sie sich der Ge...

Page 26: ...er tes frei zug nglich ist 4 Ziehen Sie nicht am Netzkabel 5 Stecken Sie den Netzstecker nie in ei ne lockere Steckdose Es besteht Brand und Stromschlaggefahr 6 Betreiben Sie das Ger t nicht ohne Lamp...

Page 27: ...ten Sie sich f r die Bel ftung an die Installationsan weisungen Das Ger t sollte zur Vermeidung von Verbrennungen durch Ber hrung von hei en Bauteilen Kompressor Kondensator m glichst mit der R ckseit...

Page 28: ...betriebnahme des Ger ts sorgf ltig durch 2 1 1 1 10 8 9 7 5 4 6 3 1 Obst Gem seschublade 2 Niedertemperaturfach 3 Glasablagen 4 No Frost K hlung 5 Flaschenhalter 6 Bedienfeld 7 Butterfach 8 T rablagen...

Page 29: ...nderung l sst sich r ckg ngig machen Display B A C D E F G H I J K L M N A Balkenanzeigen B Anzeige K hlraumtemperatur C Anzeige K hlraum ausgeschaltet D Urlaubsmodus E K hlraumfunktion Eco Mode F Ein...

Page 30: ...n Werte an Die Balken geben an Wenn die Animation stoppt welche Schublade aktiv ist die gew nschte Temperatur auf der Ska la ob die eingestellte Temperatur h her oder niedriger als die vorherige Tempe...

Page 31: ...opping Mode wird nach et wa 6 Stunden automatisch abgeschaltet Zum Ausschalten der Funktion vor ihrer au tomatischen Abschaltung 1 Dr cken Sie die Mode Taste um eine andere Funktion zu w hlen oder dr...

Page 32: ...frier schranks zeigt die h chste erreichte Temperatur ein paar Sekunden lang an Danach zeigt sie wieder die einge stellte Temperatur an 4 Die Alarmanzeige blinkt so lange bis die normalen Bedingungen...

Page 33: ...i ner Klappe in der R ckwand des Luftvertei lungsfachs ausger stet Der Filter reinigt die Luft von unerw nschten Ger chen im K hlfach und verbessert so die Aufbewahrungseigenschaften Einfrieren frisch...

Page 34: ...gung stehenden Zeit im K hl schrank oder bei Raumtemperatur aufge taut werden Kleinere Teile k nnen sogar direkt aus dem Gefrierraum entnommen und anschlie end sofort gekocht werden In diesem Fall da...

Page 35: ...sh Zone Modus ist die Temperatur in der Schublade viel niedriger Einschalten des Fresh Zone Modus 1 Schalten Sie die Funktion Einkauf ein Siehe Seite 9 2 Die Anzeige Einkauf leuchtet 3 Schieben Sie di...

Page 36: ...Teile in der Schublade k nnen zur Rei nigung heraus genommen werden Entnahme von Gefrierk rben aus dem Gefrierschrank Die Gefrierk rbe sind mit einem An schlag ausgestattet der die versehentli che Ent...

Page 37: ...hen Legen Sie die Lebensmittel so hinein dass um sie Luft frei zirkulieren kann Hinweise f r die K hlung Tipps Fleisch alle Sorten wickeln Sie Fleisch in lebensmittelechte T ten und legen Sie diese au...

Page 38: ...erden sollen k n nen die Schubladen herausgenommen wer den Nur der unterste Korb sollte an seinem Platz verbleiben um eine ausreichende Luftzirkulation zu gew hrleisten So erzielen Sie die besten Erge...

Page 39: ...isch aus dem Verdampfer des K hlschranks ent fernt Das Tauwasser l uft durch eine Rin ne in einen speziel len Beh lter an der R ckseite des Ger ts ber dem Motorkompressor wo es ver dampft Reinigen Sie...

Page 40: ...laut Unebenheiten im Boden sind durch Unterlegen nicht aus geglichen worden Kontrollieren Sie ob eventuel le Unebenheiten der Standfl che korrekt ausgeglichen wur den so dass alle vier F e fest auf de...

Page 41: ...nsmittel auf Raumtemperatur abk h len bevor Sie sie in das Ger t legen Es wurden zu viele Produkte auf einmal eingelegt Legen Sie weniger Produkte auf einmal ein Die Temperatur im K hlschrank ist zu h...

Page 42: ...ie T r ist nicht richtig ge schlossen Siehe hierzu Alarm T r offen Die Temperaturanzeige zeigt oben oder unten ein Quadrat an Beim Messen der Temperatur ist ein Fehler aufgetreten Bitte wenden Sie sic...

Page 43: ...er Aufstellung des Ger ts sorgf ltig durch um Gefahren f r Sie selbst zu vermeiden und einen korrekten Betrieb des Ger ts zu gew hrleisten Wichtig Die Gebrauchsanweisung f r den Einbau beachten Stando...

Page 44: ...st ein Aktivkohlefilter der schlechte Ger che aufsaugt und so den Ge schmack und das Aroma der Lebensmittel ohne Risiko von Geruchs bertragung opti mal aufrecht erh lt Der Filter wird mit einer Kunsts...

Page 45: ...te sind nicht durch die IKEA 5 F nfjahresgarantie abgedeckt Die Ger te Serie LAGAN und alle Ger te die vor dem 1 August 2007 bei IKEA ge kauft wurden Wer bernimmt den Kundendienst Der IKEA Kundendien...

Page 46: ...nd Teile des Geh uses es sei denn es kann nachgewiesen werden dass diese Sch den durch Produktionsfehler verursacht wurden F lle in denen bei einem Besuch des Kundendienstes kein Fehler gefunden werde...

Page 47: ...lten des Benutzerhandbuchs und zu Spezifikationen des IKEA Ger ts Um sicherzustellen dass wir Sie stets opti mal unterst tzen lesen Sie bitte die Monta geanleitung und oder den Bedienungsan leitungsab...

Page 48: ...00 12 00 12 45 17 00 Pnkt 8 00 12 00 12 45 15 45 Magyarorsz g 061 998 0549 Belf ldi d jszab s H tk znap 8 s 10 ra k z tt Nederland 0900 235 45 32 and or 0900 BEL IKEA 0 10 EUR min niet lokaal Incl BTW...

Page 49: ...49...

Page 50: ...50...

Page 51: ...51...

Page 52: ...Inter IKEA Systems B V 2008 AA 905123 01 280151832 A 212013...

Reviews: