background image

16

ENGLISH

Care and cleaning


Warning! 

Refer to Safety chapters.

General warnings


Caution! 

Unplug the appliance before 

carrying out any maintenance operation.

  This appliance contains hydrocarbons in its 

cooling unit; maintenance and recharging 

must therefore only be carried out by 

authorized technicians.

  The accessories and parts of the 

appliance are not suitable for washing in a 

dishwasher.

Cleaning the interior

Before using the appliance for the first time, the 

interior and all internal accessories should be 

washed with lukewarm water and some neutral 

soap to remove the typical smell of a brand-new 

product, then dried thoroughly.


Caution!

 Do not use detergents or 

abrasive powders, as these will damage 

the finish.

Initial power on


Caution!

 Before inserting the power 

plug in to the outlet and switching on 

the cabinet for the first time, leave the 

appliance standing upright for at least 

4 hours. This will assure a sufficient 

amount of time for the oil to return to the 

compressor. Otherwise the compressor 

or electronic components may sustain 

damage.

Periodic cleaning


Caution! 

Do not pull, move or damage any 

pipes and/or cables inside the cabinet.


Caution! 

Do not damage the cooling 

system.


Caution! 

When moving the cabinet, lift it 

by the front edge to avoid scratching the 

floor.

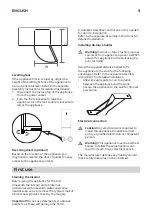
The equipment has to be cleaned regularly:

1.  Clean the inside and accessories with 

lukewarm water and some neutral soap.

2.  Regularly check the door seals and wipe 

clean to ensure they are clean and free from 

debris.

3.  Rinse and dry thoroughly.

4.  If accessible, clean the condenser and the 

compressor at the back of the appliance 

with a brush. This operation will improve 

the performance of the appliance and save 

electricity consumption.

Periods of non-operation

When the appliance is not in use for long 

periods, take the following precautions:

1.  Disconnect the appliance from electricity 

supply.

2.  Remove all food.

3.  Defrost (if necessary) and clean the 

appliance and all accessories.

4.  Clean the appliance and all accessories.

5.  Leave the door/doors open to prevent 

unpleasant smells.


Caution! 

If you want to keep the appliance 

switched on, ask somebody to check it 

once in a while to prevent the food inside 

from spoiling in case of a power failure.

Defrosting fridge compartment 

Frost is automatically eliminated from the 

evaporator of the refrigerator compartment 

every time the motor compressor stops, 

during normal use. The defrost water drains 

out through a trough into a special container 

at the back of the appliance, over the motor 

compressor, where it evaporates.
It is important to periodically clean the defrost 

water drain hole at the back of the refrigerator 

compartment to prevent the water overflowing 

and dripping onto the food inside.

Defrosting freezer compartment

The freezer compartment has automatic 

defrosting function.

Due to seasonal changes, a thick layer of frost 

may form. To defrost manually, observe the 

followings.

 • Disconnect the appliance from the power 

supply, and leave open the freezer door.

 • Remove all foods, ice cube tray and shelf or 

transfer to refrigerator compartment.

Summary of Contents for MEDGANG

Page 1: ...MEDG NG GB...

Page 2: ...Please refer to www IKEA com au and select your local store for local store phone numbers and opening times...

Page 3: ...ENGLISH 4...

Page 4: ...nerable people safety This appliance can be used by children aged from 8 years and above and persons with reduced physical sensory or mental capabilities or lack of experience and knowledge if they ha...

Page 5: ...of the type recommended by the manufacturer Do not use water spray and steam to clean the appliance Clean the appliance with a moist soft cloth Only use neutral detergents Do not use abrasive product...

Page 6: ...cture clear of obstruction The appliance is equipped with a lamp for interior lighting Only service is allowed to replace the lighting device Contact your Authorised Service Centre WARNING To avoid a...

Page 7: ...of the mains plug Use Warning Risk of injury burns electrical shock or fire The appliance contains flammable gas isobutane R600a a natural gas with a high level of environmental compatibility Be caref...

Page 8: ...e ambient temperature corresponds to the climate class indicated on the rating plate of the appliance Climate class Ambient temperature SN 10 C to 32 C N 16 C to 32 C ST 16 C to 38 C T 16 C to 43 C SN...

Page 9: ...e wall using tip over restraints Using the supplied distance holder to fix the appliance to the wall for the following advantages Refer to the separate Assembly Instructions for detailed installation...

Page 10: ...rview 1 2 3 4 5 6 7 8 9 1 Door balconies 2 Bottle balcony 3 Door gaskets 4 Freezer drawers 5 Low temperature compartment 6 Vegetable drawer 7 Glass shelves 8 LED lamp 9 Control panel Least cold zone I...

Page 11: ...LISH Operation Control panel 1 2 3 4 5 1 On Off button alarm off button 2 Refrigerator temperature button 3 Refrigerator temperature indicators 4 Freezer temperature button 5 Freezer temperature indic...

Page 12: ...3 refrigerator temperature indicators on or off for setting different temperatures 8 C 4 C 2 C One on indicates 8 C is set Two on indicate 4 C is set Three on indicate 2 C is set Temperature regulatio...

Page 13: ...the freezer compartment for air to circulate around the packages Also let enough room at the front so the door can close tightly Warning In the event of accidental defrosting for example due to a powe...

Page 14: ...st or ice on the evaporator If this happens set the internal temperature toward warmer one to allow automatic defrosting and so a saving in electricity consumption Hints for fresh food refrigeration D...

Page 15: ...uently to thaw only the quantity required Wrap up the food in aluminium foil or polythene and make sure that the packages are airtight Do not allow fresh unfrozen food to touch food which is already f...

Page 16: ...d wipe clean to ensure they are clean and free from debris 3 Rinse and dry thoroughly 4 If accessible clean the condenser and the compressor at the back of the appliance with a brush This operation wi...

Page 17: ...freezing or vacation function if applicable on your model is activated Deactivate the control mode Refer to Operation chapter The compressor operates continually Temperature is set incorrectly Refer t...

Page 18: ...gged Clean the drain hole with a piece of wire The doors does not close completely The door gaskets are dirty Clean the door gaskets The appliance is not level Make sure the appliances is installed in...

Page 19: ...duct category Product type Refrigerator Freezer Installation type Freestanding Product dimensions Height 1874 mm Width 595 mm Depth 630 mm Net volume Fridge 219 L Freezer 83 L Defrost system Fridge Au...

Page 20: ...laced parts become the property of IKEA The guarantee exists only if the appliance complies and is installed in accordance with The technical specifications The Assembly Instructions and user manual S...

Page 21: ...ution work The benefits conferred by this express guarantess are in addition to all other conditions warranties guarantees rights and remedies expressed or implied by the Trade Practices Act and simil...

Page 22: ...for your appliances at the time of service call request Please refer to www IKEA com au and select your local store for local store phone numbers and opening times Before calling us assure that You ha...

Page 23: ......

Page 24: ...Inter IKEA Systems B V 2021 AA 2230023 1...

Reviews: