background image

27

Camera does not

take a picture


Problem

Solution

Fogging occurs on

the Lens Port

-   Humid air is trapped inside the housing.  

    The camera produces heat and may condense 

    any trapped moisture forming fog on the lens port.

    Close the housing in an air-conditioned room or 

    vehicle, or in front of an air-conditioner. 

-   The housing should not be in direct sunlight for an

    extended period of time.

-   Purchase desiccant packs also known as 

    moisture munchers from a local camera store. 

    Place one or two new packs in your housing 

    before each day of diving.

-   If moisture or water droplets are present around 

    the controls or sealing areas, return the housing 

    to Ikelite for evaluation. 

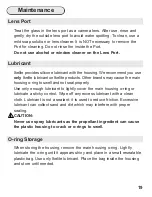
-   Clean the main housing o-ring and sealing 

    surface of the housing.

-   Make sure the camera is mounted properly in the 

    housing and controls are out of the way.

-   Main housing o-ring is not seated properly.

Housing is hard to

close

-   Install a fully charged battery.

-   There is not enough available light for the camera 

    to properly focus. Add a focusing light or strobe 

    with a built-in focusing or video light to your

system.

-   Select a center focus point in your camera menu.

-   Return Zoom control to the “disengaged” position,

    see Zoom Control Use, 

page 11

.

Summary of Contents for 6170.45

Page 1: ...s instruction manual completely before attempting to operate or dive with this product Please refer to the back page of this manual to register your Ikelite product 6170 45 Underwater TTL Housing for...

Page 2: ...Camera to Mounting Tray P 8 9 STEP 4 Installing Camera in Housing P 10 STEP 5 Closing the Housing P 10 STEP 6 Final Check P 11 Housing Usage P 11 Zoom Control Use P 11 Built in Flash and Strobe Use P...

Page 3: ...roughly inspect and immerse the empty housing completely in water before installing a camera If any fogging occurs or droplets of water enter the housing do not install a camera Clean the main housing...

Page 4: ...al Tray Mounting 12 24 thread external tray mounting with 3 in 76 mm spacing Main O Ring 0109 Housing Dimensions Dimensions 6 8 x 4 9 x 5 3 in 173 x 122 x 135 mm Housing Material Polycarbonate front a...

Page 5: ...5 Parts of the Housing Front View Zoom Lever Shutter Release Camera ON OFF Button External Tray Mount Lid Snap Lens Port Wi Fi Button Fiber Optic Ports Mode Dial...

Page 6: ...2 EXP DISP 1 3 4 10 1 Motion Picture Button 2 EXPOSURE Button 3 Playback Button 4 Exp Comp Up Button 5 Self timer Left Button 6 MENU SET Button 7 Flash Setting Right Button 8 Macro Mode Down Button 9...

Page 7: ...ed Flash On and Macro Mode to AF Macro In Menu Rec Set Picture Size to 4 3 16M and Quality to Fine Set ISO Sensitivity to 200 and White Balance to AWB For best results manually set white balance for e...

Page 8: ...thread or overtighten the Mounting Tray Bolt as you may damage the camera tripod socket threads 1 The Mounting Tray for the camera is secured to the housing back Position the camera on the Mounting T...

Page 9: ...Mounting Tray Bolt Diagram A L Lumix 9 Mounting Tray STEP 3 Attach Camera to Mounting Tray continued...

Page 10: ...nstalled the o ring should touch the housing all the way around There should be an even gap on each side of the housing between the housing and the back 2 Lift the lid snaps so they are extended and p...

Page 11: ...he way around the back open the lid snaps reseat the housing back and close the lid snaps Visually check the seal again 11 Housing Usage Turn the camera on and operate each of the housing controls to...

Page 12: ...a s built in flash is used The built in flash is effective between 1 3 feet 0 3 0 9 m from the subject in clear conditions For best results a color correcting filter or external lighting is recommende...

Page 13: ...Flash Deflector Installation and Removal The factory installed flash Deflector should be removed and replaced by the Diffuser page 14 when using ONLY the built in camera flash and no external strobes...

Page 14: ...ould only be used when shooting with the built in camera flash Always remove the Deflector before using ONLY the built in camera flash with a Diffuser To install the diffuser push the Cut out Section...

Page 15: ...blue water settings enhances warm reds and oranges with available sunlight up to 80 ft 24 m Use in the Caribbean Indonesia and any blue water setting The UR Pro color correcting filter 6441 86 for gr...

Page 16: ...les with the housing mounts If the tray is positioned properly the handle will be on your left side facing down 3 Place a shoulder washer in each 3 8 tray hole with the small end of the washer facing...

Page 17: ...rmation regarding this and other strobe package options ik el ite 3 5 A F ik el it e AU TO FL AS H If you have purchased an optional Ikelite Tray and Handle for your housing an Ikelite Strobe Arm will...

Page 18: ...n about recommended accessories for your housing External Macro Adaptor 9306 82 Allows attachment of 67mm threaded macro lenses from Inon and Epoque NOT for use with 67mm threaded wide angle lenses WD...

Page 19: ...Never use spray lubricants as the propellant ingredient can cause the plastic housing to crack or o rings to swell Treat the glass in the lens port as a camera lens After use rinse and gently dry the...

Page 20: ...ubricant Only apply enough lubricant to make the o ring feel slick Do Not stretch the o ring This light coating of lubricant will help to keep the o ring from drying out and will help to show a dark s...

Page 21: ...on If this does not correct the problem return the housing to Ikelite for maintenance If you are on a trip and unable to return the housing immediately a push button may be lubricated by pressing and...

Page 22: ...tton several times until the lube is worked up into the o ring In the unlikely event one of the control shafts sticks or becomes difficult to operate you can remove the control from the housing and lu...

Page 23: ...osen the set screw in the knob allen wrench required remove the knob If there is salt or dirt build up on the exposed control shaft clean the shaft Open the housing and gently slide the control shaft...

Page 24: ...ft before reinserting into gland Diagram C O rings Knob Control Gland Housing Lubricate shaft Pull out knob to expose shaft Diagram D Diagram E Loosen set screw allen wrench required Tighten set screw...

Page 25: ...Do not shoot down on subjects as they will quite often blend into the background and be difficult to see in the photograph Shoot subjects straight on or shoot up at a slight angle using the blue wate...

Page 26: ...cky grab the control knob pull it out and then push back in If still sticky see the Control Maintenance section pages 22 24 Return housing to Ikelite for routine maintenance Problem Solution Image is...

Page 27: ...your housing before each day of diving If moisture or water droplets are present around the controls or sealing areas return the housing to Ikelite for evaluation Clean the main housing o ring and sea...

Page 28: ...nstalled and immerse in water Return housing to Ikelite for evaluation Problem Solution Pictures are too blue or too green Use custom manual white balance Reset for each working depth or when attachin...

Page 29: ...Spare Parts available through Ikelite or any Ikelite Dealer Customer Support Please read the troubleshooting section of this instruction manual before contacting Ikelite Customer Support Ikelite Unde...

Page 30: ...fective products should be returned to Ikelite postage paid Ikelite will at its sole discretion repair or replace such products and will return to customer postage paid All other claims of any nature...

Page 31: ...number inside of the package Send postage paid to Ikelite Underwater Systems Attention Service Department 50 West 33 Street Indianapolis IN 46208 USA No reimbursements for postage paid will be issued...

Page 32: ...50 West 33rd Street Indianapolis IN 46208 USA ikelite com Product Registration Please go to ikelite com to register your Ikelite housing within 15 days of purchase 6170 45_Panasonic ZS45_01 0415 2015...

Reviews: