background image

GB-8

GB

 | 

Operating Instruction

shrubs and that the impact of the nylon line against the 

trunk of bushes or trees with soft bark could seriously 

damage the plant.

Clearing

When mowing away, you capture the whole vegetation 

down to the ground. To do so tilt the cutting head to the 

left with an angle of 30 degrees. Adjust the handle to the 

desired position. Be aware of the higher danger of injuries 

for the operator, surrounding persons and animals, and 

the danger of damages to property through hurled-away 

objects (e.g., stones) (Fig. 26).

CUTTING WITH THE CUTTING BLADE 

(Fig. 25)

When cutting with the cutting blade, always wear protec-

tion goggles, face protection, protection clothes, and use 

the shoulder strap.

Start cutting above the under growth and then move 

down with the scything blade so as to cut the brush into 

small pieces.

SCYTHING 

(Fig. 26)

Proceed at a regular pace, with a circular motion similar 

to a traditional scythe, without tilting the cutting line head 

during the operation. 
First try cutting at the right height in a small area, so as to 

then achieve a uniform cutting height keeping the cutting 

line head at a constant distance from the ground.
For heavier cutting it can be useful to tilt the cutting line 

head by about 30°.

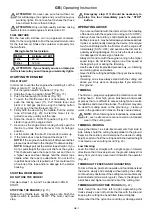
WARNING! Do not work in this way if there is 

the possibility of causing objects to be thrown, 

which could harm people and animals and 

cause damage.

IF THE CUTTING DEVICE GOT STUCK

Shrubs and trees may jam the cutting blade and cause 

the blade to stop. Avoid the blade from getting stuck by 

cutting through appropriate undergrowth and brushwood 

from changing sides. If the cutting blade should, how-

ever, got stuck stop the engine immediately. Hold the 

device up an avoid that the cutting blade deformed by 

bending or even breaks when you push the brushwood 

to be cut away from the cutting blade.

AVOIDING KICKBACKS

When using metal cutting tools (thicket blade) there is 

the danger of kickbacks if the tool gets in touch with 

some solid object (tree trunks, branches, stones etc.). If 

this should happen, the device is “kicked“ or thrown back 

against the turning direction of the tool. This may lead to 

the loss of control over the tool and to the danger of injury 

for the operator and people nearby! 

Do not use metal cutting tools near fences, metal 

posts, boundary stones, or foundations.
Extending the cutting cord

To extend the cutting cord let the engine run at full throttle 

and bump the cutting head (1) on the ground. The cord is 

automatically extended. The cutter at the protection cover 

cuts the cord to the required length (Fig. 28).

Important note:  Do not use metal wire or plas-

tic-sheathed metal wire of any kind in the cutting 

head. This may lead to serious injuries of the 

operator.
ATTENTION: Regularly remove any remainders 

of grass and weed to avoid an overheating of 

the shaft tube. Remainders of grass and weeds 

get caught under the protection cover (Fig. 29) 

avoiding a sufficient cooling of the shaft tube. 

Remove the remainders carefully with a screw-

driver or a similar tool.

Replacing the cutting cord

1.  Remove the screw by turning it clockwise (Fig. 30). 

2.  Remove the coil and spring from the spindle (Fig. 30).

3.  Remove the remaining cutting cord.

4.  Fold a 6 m x 2,0 mm cord in half. Put the loop end into 

the slot of the spool (Fig. 31). The slot is located in the 

centre wall that divides the two cord chambers from 

each other.

5.  Roll both halves of the cord concurrently around 

the spool. The wrapping direction is engraved in the 

spool: “Wind Cord”. Make sure that the cord is always 

tensioned and that each half of the cord stays in the 

proper separate spool housing. Roll up the cord until 

15 cm of cord remain at each end (Fig. 32).

6.  Lead each cord end through the openings at the re-

spectively opposite side of the coil (Fig. 33).

7.  Lead the spring over the spindle and thread the cord 

ends through the eyelets in the housing (Fig. 34).

8.  Lead the coil into the housing while pulling the cord 

ends through the eyelets. Make sure that the spring is 

positioned correctly in relation to the coil and housing 

(Fig. 34).

9.  When the coil sits in its correct position in the housing, 

push it firmly into the housing so that the spring is ten

-

sioned. Firmly pull at both ends of the cord so that the 

cord cannot be pinched between the coil and housing. 

Maintain the spring tension through continuous pres-

sure on the coil in the housing and fix the screw by 

turning it anticlockwise. Fasten the screw fingertight 

only (Fig. 35).

10. Cut the cord to about 17 cm to avoid excessive load 

to the engine during the starting and warm-up phase 

(Fig. 15).

MAINTENANCE AND REPAIR

ATTENTION! Always wear protective gloves 

when carrying out maintenance work. Never 

perform maintenance works with the engine still 

being hot.

AIR FILTER

 (Fig. 36+37)

To clean the air filter:

1. 

Remove the fixing screw (x) of the air filter cover (Fig. 

36).

2.  Clean the filter using soap and water. 

   Never use petrol or benzene !

3.  Let the Filter dry in the air.

4.  Now put the filter in again proceeding the other way 

round.

Summary of Contents for IBF 25-1

Page 1: ...tion of the original Operating Instructions Read operating instructions before use FR Lire attentivement le mode d emploi avant chaquemise en service Mode d emploi Traduction du mode d emploi d origin...

Page 2: ...hneidfaden 6 Schaftrohr 7 Schaftkupplung 8 Handgriff 9 Gashebel 10 Z ndschalter 11 Sperrhebel 12 Sperrknopf 13 Luftfiltergeh use 14 Startergriff 15 Schalld mpferabdeckung 16 Kraftstoffpumpe 17 Starter...

Page 3: ...Facultatif Outil IT Identificazione dei componenti 1 Testina del filo 2 Filo tagliente 3 Copertura di protezione per lama di taglio metallica 4 Lama di taglio 5 Copertura di protezione per filo tagli...

Page 4: ...aj 9 Ro ica za plin 10 V igalno stikalo 11 Zaporni vzvod 12 Gumb za zaklepanje 13 Ohi je zra nega filtra 14 Ro aj zaganjalnika 15 Pokrov za zvo no izolacijo 16 rpalka za gorivo 17 Zagonska loputa du...

Page 5: ...4 21 16 15 17 cm 18 16 19 11 9 12 20 13 14 4 12 13 10 4 1 3 2 11 2 17 17 17 20 21 21...

Page 6: ...5 31 26 27 29 30 28 1 23 25 32 33 22 24...

Page 7: ...6 41 38 39 A 35 40 0 6 0 7 mm 37 34 X 36...

Page 8: ...fahr f r den Benutzer darstellen Beachten Sie unbedingt die Einschr nkungen in den Sicherheitshinweisen Bitte beachten Sie dass unsere Ger te bestimmungsgem nicht f r den gewerblichen handwerklichen o...

Page 9: ...ufendes Werkzeug Werkzeug l uft nach 11 ACHTUNG Heisse Oberfl che 12 Garantierter Schallleistungspegel LWA 13 Gefahr umherfliegender Teile 14 Dritte aus dem Gefahrenbereich halten 15 Dr cken Sie die B...

Page 10: ...ners auftreten k nnen mit dementsprechend schweren Gesundheitsrisiken Tr gern dieser medizinischen Vor richtungen wird daher dringend empfohlen einen Arzt oder den Hersteller der Vorrichtungen zu befr...

Page 11: ...Geh rschutz tragen Keine Schale Hemden Halsketten oder andere lose h ngende Zubeh re tragen die sich in der Ma schine oder in eventuell auf dem Arbeitsplatz be findlichen Gegenst nden verfangen k nnt...

Page 12: ...enkabel heraus bevor Sie die Maschine berpr fen reinigen oder Arbeiten an ihr durchf hren nachdem ein Fremdk rper getroffen wurde Pr fen Sie ob an der Maschine Sch den entstanden sind und f hren Sie d...

Page 13: ...nge zu k rzen und den Benutzer zu sch tzen 4 MONTAGE DES FADENSCHNEIDKOPFS 1 Entfernen Sie den Splint vom Ende der Antriebswelle Abb 7 2 Stecken Sie einen Inbusschl ssel seitlich in das Loch des unte...

Page 14: ...le Flaschen Steine o k nnen weggeschleudert werdenund ernste Verletzungen verursachen sowie das Ger t dauerhaft besch digen Sollten Sie aus Versehen einen festen Gegenstand mit dem Trimmer ber hren 6...

Page 15: ...oder Baumstamm bei weicher Rinde die Pflanze stark besch digen kann Abm hen Beim Abm hen erfassen Sie die gesamte Vegetation bis zum Grund Dazu neigen Sie den Fadenkopf im 30 Grad Winkelnachlinks Ste...

Page 16: ...G Tragen Sie bei den Wartungsarbei ten stets Schutzhandschuhe F hren Sie keine Wartung bei warmen Motor aus Luftfilter Abb 36 37 Um den Luftfilter zu reinigen 1 Drehen Sie die Halteschraube x des Luft...

Page 17: ...mit der richtigen Kraftstoff lmi schung Siehe Kapitel Treibstoff und l FEHLER DES MOTORS BEHEBEN PROBLEM M GLICHE URSACHE KORREKTUR Der Motor startet nicht oder er startet Falscher Startvorgang Beacht...

Page 18: ...ehmer wie folgt Garantie Die Garantiezeit betr gt 24 Monate und beginnt mit der bergabe die durch Originalkaufbeleg nachzuweisen ist Ausgenommen von der Garantie sind Verschlei teile und Sch den die d...

Page 19: ...in these instruc tions can lead to the device being damaged and a serious risk for the operator Observe the restrictions in the safety instructions Please note that our device has not been designed wi...

Page 20: ...nder the cover of the machine when it is running Caution Rotating electrical too 11 ATTENTION HOT SURFACE 12 Guaranteed acoustic capacity level LWA 13 Danger of flying objects 14 Keep third parties ou...

Page 21: ...r possible to exclude the possibility of interference on any active or passive medical devices that operators may be wearing this could be risky for their health conditions All those using medical dev...

Page 22: ...flammable keep the fuel in containers which have been specif ically manufactured and homologated for such use never smoke when handling fuel slowly open the fuel tank to allow the pressure in side to...

Page 23: ...k in an area where the fuel vapours could reach an open flame a spark or a strong heat source 3 Allow the engine to cool before storing in any en closure 4 To reduce fire hazards keep the engine exhau...

Page 24: ...ective blade protector ATTENTION Always wear rugged protection gloves when working on the cutting blade 1 Remove the split pin from the end of the drive shaft Fig 7 2 Insert an Allen key into the hole...

Page 25: ...S FIg 27 Walk round the tree from left to right approaching the trunks slowly so as not to strike the tree with the line and keeping the cutting line head tilted forward slightly Remember that the nyl...

Page 26: ...l throttle and bump the cutting head 1 on the ground The cord is automatically extended The cutter at the protection cover cuts the cord to the required length Fig 28 Important note Do not use metal w...

Page 27: ...ut the cutter into a vice and fix it firmly Sharpen the cutter using a flat file File with care and keep the sharpening angle Always file in one direction only TRANSPORT When transporting the tool by...

Page 28: ...apply to commercial use of the product All postage or delivery costs as well as any other subse quent expenses will be borne by the customer Spare parts Please contact our service department if you n...

Page 29: ...et repr senter un danger s rieux pour l utilisateur Observez absolu ment les restrictions de ces consignes de s curit Veuillez noter qu en vertu des dispositions nos appareils n ont pas t con us pour...

Page 30: ...UE DE BLESSURE Les lames de coupe continuent tourner apr s d connexion de l appareil 11 ATTENTION SURFACE BRULANTE 12 Niveau sonore garanti LWA 13 Danger li aux projections de pi ces 14 Ecarter des ti...

Page 31: ...ndant pas tre exclu que des dysfonctionnements surviennent en cas d implants actifs ou passifs de l op rateur avec des risques graves pour la sant Il est fortement recommand aux porteurs de ce type d...

Page 32: ...rateur est responsable des accidents et dommages qui peuvent mettre en danger les per sonnes ou leur propri t B MESURES PRELIMINAIRES 1 Lors du travail l op rateur doit porter des v tements appropri...

Page 33: ...urner 6 La machine ne doit pas tre expos e des forces ex cessives et les petites machines ne doivent pas tre utilis es pour les travaux difficiles L utilisation d une machine appropri e r duit les ris...

Page 34: ...ent tre employ pour la coupe de gazon ou de mauvaises herbes Il est express ment interdit de couper d autres mat riaux N utili sez pas votre coupe bordures comme levier pour soulever d placer ou hache...

Page 35: ...rester coin c e et ou le bo tier de d marrage tre endommag l crou l aide de la cl livr e avec l appareil dans le sens des aiguilles d une montre 3 Retirer la bride de retenue sup rieure 4 Montez la la...

Page 36: ...guli re ill 23 DEBROUSSAILLER COURT Tenez le coupe bordures droit l g rement inclin vers l avant afinqu ilsed placetoutpr sdusol D broussailler toujours en loignant l appareil de votre corps jamais en...

Page 37: ...enfilez les extr mi t s du fil par les oeillets du bo tier ill 34 8 Mettez la bobine dans le bo tier tandis que vous faites passer les extr mit s du fil par l oeillet Assurez vous que le ressort est p...

Page 38: ...rtes et de sources de chaleur telles que les chauffe eau instantan s des chau di res huile etc REMISE EN SERVICE 1 Retirez la bougie 2 Tirez rapidement sur la corde de d marrage afin d en lever l huil...

Page 39: ...cet appareil l essence la garantie suivante La p riode de garantie est de 24 mois et entre en vigueur la remise de l outil qui sera justifi e par pr sentation du bon d achat original Les pi ces d usur...

Page 40: ...iare l apparecchio e rappresentare una seria minaccia per l utente Ri spettare assolutamente le restrizioni indicate dalle avvertenze di sicurezza Tenere a mente che i nostri apparecchi non sono stati...

Page 41: ...otto alla copertura della macchina quando questa in funzione Le lame continueranno a ruotare una volta spenta la macchina 11 ATTENZIONE SUPERFICIE INCANDESCENTE 12 Livello di potenza sonora garantito...

Page 42: ...ti attivi e passivi nell utilizzatore con relativi gravi rischi per la salute Si raccomanda assolutamente a coloro che portano tali impianti medici di con sultare un medico o il produttore dei disposi...

Page 43: ...astrarsi nella macchina oppure in oggetti che si trovano sul posto di lavoro Legare eventuali capigliature lunghe 2 ATTENZIONE PERICOLO La benzina altamen te infiammabile Conservare quindi il carburan...

Page 44: ...eseguire le opportune indagini in un azienda specializzata se la macchina non viene utilizzata D MANUTENZIONE E IMMAGAZZINAMENTO 1 Accertarsi che tutti i dadi e le viti siano strette salda mente per...

Page 45: ...o sull asta filettata in senso antiorario e stringerla a mano con forza Fig 6 Accertarsi che il rocchetto portafilo sia correttamente posizionato nel portarocchetto che la molla si trovi sotto al rocc...

Page 46: ...imatura e falciatura di erbe infestanti Durante il funzionamento non tenere mai la testina del filo al di sopra dell altezza del ginocchio In caso d impiego dell attrezzo su terreni scoscesi manteners...

Page 47: ...rotezione una protezione del viso indumenti di protezione e cintura a tracolla Iniziare il taglio dalla parte superiore delle piante quindi lavorare con la lama verso il basso e ridurre i rami in picc...

Page 48: ...una tanica adeguata Aprire con cautela il tappo del serbatoio di modo che la pressione interna possa scaricarsi gradualmente AVVERTENZA tenere sempre puliti la valvola di sfiato ed il coperchio del s...

Page 49: ...i ad un centro di assistenza mal regolata autorizzato per la regolazione Candela sporca Pulire regolare o sostituire la candela Filtro del carburante otturato Sostituire il filtro Il motore si avvia m...

Page 50: ...l quale da comprovare me diante lo scontrino fiscale Sono esclusi dalla garanzia le componenti soggetti ad usura e danni che sono causati dall utilizzo di accessori non conformi da riparazioni con com...

Page 51: ...priru niku mo e uz rokovati o te enja ure aja i predstavljati ozbiljnu opasnost za korisnika Svakako se pridr avajte ograni enja navede nih u sigurnosnim napomenama Imajte na umu da na i ure aji namje...

Page 52: ...OPASNOST OD OZLJEDA Rotiraju i alat Alat se zaustavlja 11 POZOR Vru a povr ina 12 Zajam ena razina ja ine zvuka LWA 13 Opasnost od razletjelih dijelova 14 Zabranite pristup opasnom podru ju drugima 1...

Page 53: ...nim implantatima rukovatelja s popratnim te kim zdravstvenim rizicima Korisnicima takvih medicinskih ure aja stoga preporu ujemo da se prije rukovanja strojem svakako savjetuju s lije nikom ili proizv...

Page 54: ...teno otvarati a benzin dolije vati kada motor radi ili kada je stroj vru Ako se benzin prelije nije dopu teno poku avati pokrenuti motor Umjesto toga stroj valja maknuti s povr ine one i ene benzinom...

Page 55: ...a na reznom ure aju nosite rukavice 7 Zbog sigurnosnih razloga nikada ne rabite stroj s istro enim ili o te enim dijelovima O te ene dijelove potrebno je zamijeniti i oni se nikada ne smiju popravljat...

Page 56: ...na taj na in da imbus izvadite bo no iz prirubnice dr a a 8 Ukoliko metalni rezni list elite zamijeniti sa glavom za rezanje niti postupajte molimo Vas na sljede i na in Utaknite imbus bo no u rupu d...

Page 57: ...brzinom hodajte naprijed pritom obavljajte lu no kretanje sli no uobi ajenom ko enju tako da glavu sa strunom ne naginjete tijekom rada POSTUPAK POKRETANJA HLADAN START Kako se motor ne bi opteretio p...

Page 58: ...svitak Wind Cord Pazite na vrstu zategnutost i na to da se obadvije polovice niti nalaze u doti no razdvojenim ku i tima svitka Namotajte nit skroz dok ne ostane po 15 cm du ine niti slika 32 6 Doti...

Page 59: ...POGON 1 Izvadite svje icu 2 Brzo potegnite u e za startanje kako bi se iz prostora sagorijevanja uklonilo preostalo ulje 3 O istite svje icu i provjerite njen razmak elektroda Po potrebi zamijenite s...

Page 60: ...arancijsko razdoblje traje 24 mjeseca i zapo inje pri mopredajom koju valja dokazati originalnim kupovnim ra unom Garancija ne obuhva a potro ne dijelove i o te enja uzrokovana uporabom pogre ne dodat...

Page 61: ...a unom Kod komercijalne uporabe i iznajmljivanja rok jamstva skra uje se na 12 mjeseci Iz jamstva su isklju eni potro ni dijelovi i tete koje nastanu uporabom neispravnih dodatnih dijelova popravaka s...

Page 62: ......

Page 63: ...a lahko povzro i po kodbe naprave in resno nevarnost za uporabnika Nujno upo tevajte omejitve v varnostnih navodilih Upo tevajte da na a naprava ni izdelana ustrezno za gospodarsko obrtno ali industri...

Page 64: ...KODB Vrtljivo orodje Orodje se vrti po zaustavitvi 11 POZOR vro a povr ina 12 Garantirani nivo jakosti zvoka LWA 13 Nevarnost lete ih delov 14 Na nevarnem obmo ju naj ne bo drugih oseb 15 6 krat priti...

Page 65: ...i aktivnih ali pasivnih vsadkih uporabnika z ustreznimi hudimi tveganji za zdravje e imate take medicinske pripomo ke se zaradi tega mo no priporo a da se pred uporabo te priprave posvetujete z zdravn...

Page 66: ...e tlak ki je nastal gorivo dolivajte samo na prostem in s pomo jo lija gorivo je treba doliti pred zagonom motorja Med tem ko motor te e ali e je stroj vro zapirala ne smete odpirati rezervoarja oz do...

Page 67: ...c izpu nih plinov in skladi ni prostor brez ostankov vej listov ali ezmerne koli ine ma obe Vsebnik z ostanki rezanja nikoli ne pustite v prostoru 5 e je treba rezervoar izprazniti to storite na prost...

Page 68: ...zalni list sl 9 5 Matico s pomo jo dobavljenega izvija a dobro priteg nite v smeri proti urnemu kazalcu 6 Vijak zopet zavarujte z razcepko sl 11 7 Obvezno odstranite blokado tako da inbus klju s stran...

Page 69: ...a namen nagnite glavo rezilne nitke v kotu 30 stopinj na levo Ro aj nastavite v eljeni polo aj Upo tevajte pove ano nevarnost pred po kodbami pri uporabniku pri ivalih ki stojijo naokrog kakor tudi ne...

Page 70: ...trave plevela se zagozdijo izpod itnika sl 29 to prepre uje zadostno hlajenje cevi dr ala Ostanke previdno odstranite z izvi ja em ali ne im podobnim ZAMENJAVA REZALNE NITKE 1 Odstranite vijak s tem d...

Page 71: ...rjena Zagotovite da med transportom ne bo iztekal bencin Prepre ite kode in po kodbe Pri transportu in skladi enju naprave je treba name stiti za ito rezila SKLADI ENJE 1 Ravnajte se po vseh do sedaj...

Page 72: ...garancija Garancija ne velja e izdelek uporabljate v komercialne namene PROBLEM MO EN VZROK POPRAVILO Motor ne tarta ali tarta ampak ne Napa en potek tarta Upo tevajte napotke v tem Navodilu te e dalj...

Page 73: ...originalnega ra una o nakupu V garancijskem roku poravnamo stro ke v zvezi z odstranitvijo pomanjkljivosti ali okvar ter stro ke morebitnega prevoza pokvarjenega izdelka e bo izdelek poslan v trgovin...

Page 74: ......

Page 75: ...la d claration sont conformes aux prescriptions fondamentales en mati re de s curit et de sant stipul es y compris les changements dans les Directives de la waarop deze verklaring betrekking heeft be...

Page 76: ...e sa lik taleplerinin uygun bi imde uygulanmas i in a a daki normlar ve veya tekni k spesifikasyona spesifikasyonlara ba vurulmu tur P i dn aplikaci bezpe nostn ch a zdravotn ch po adavk uveden ch ve...

Page 77: ...ten og kan i tillegg fastsl s ved hjelp av det fortl pende serienummeret Tillverknings ret st r p typskylten och kan dessutom ber knas med hj lp av det l pande serienumret Valmistusvuosi on painettu a...

Page 78: ......

Page 79: ......
Page 80: ...820 Banyoles Girona 34 902 555 677 34 972 57 36 00 info yaros es Horario de 09 00 a 13 00 y 15 00 a 18 00 IN l Agritech Floritech Inc 206 B Rajindera Arihant Tower B 1 Community Centre Janak Puri New...

Reviews: