background image

iks aquastar midi 

28 

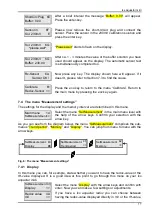
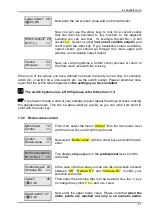
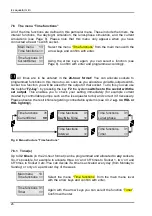
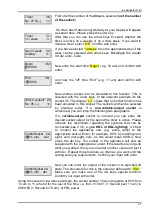
Next, you can use the arrow keys to select other time functions 
or  programme  another  timer  with 

enter

.  Press  the 

esc  key 

to 

return to the main menu. 


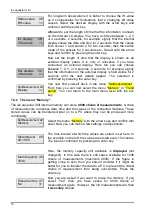
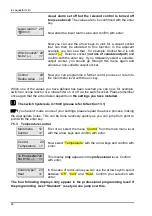
The briefest switch period is 1 second. If you want a socket to be active for 24 

hours a day you can do this by entering “00:00:00” in both “Begin” and “End”.


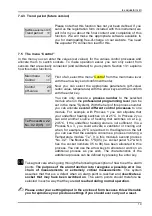
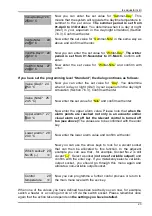
 If you haven’t made a note of your settings, please repeat the above process, making 

the appropriate notes. This can be done relatively quickly as you can jump from point to 
point with the 

enter

 key. 


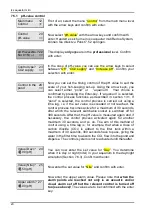
7.6.2  The interval function(s) 

You  can  programme  up  to 

32  interval  functions

.  Using  the  interval  function  you  can 

programme 

constantly  reccuring

  on/off  switching  processes  to  a  single  socket..  In  the 

Professional” mode

 (Section 7.1.5) the set times can have a 

random factor

 added to 

them. Here an 

example:

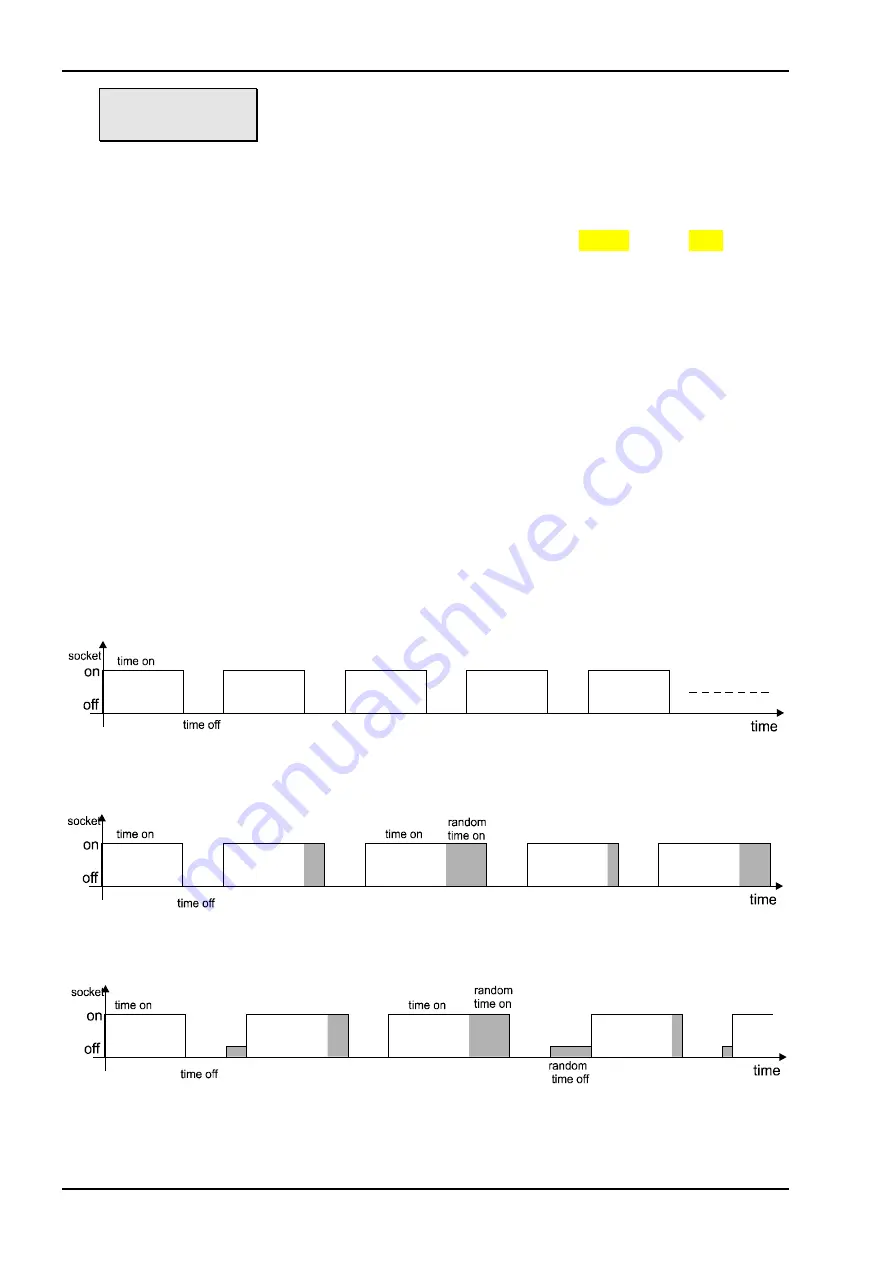
 If you have determined that the interval is to be “on” for 2 minutes 

(i.e  programmed  socket  ‘live’)  and  fix  1  minute  in  “random  factor”,  this  means  that  this 
interval (and socket) will always be active (socket ‘live’) for between 2 and 3 minutes (2 
minutes  fixed  interval  plus  0  to  1  minute  chosen  at  random  by the computer. The same 
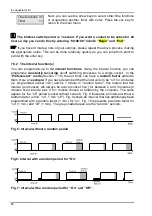
applies for the “off” period (socket without current). Fig. 8 illustrates an interval without a 
random factor (2 min. “on”, 1 min. “off”). Fig. 9 shows an interval that has additionally been 
programmed with a random factor (1 min.) for “on”. Fig. 10 represents a random factor for 
“on” (1 min.) and “off” (1 min.). The grey-shaded areas are the “random” periods.  

Fig. 5: Interval without a random period 


Fig 6: Interval with a random period for ‘‘On‘‘ 

Fig. 7: Interval with a random period for ‘‘On‘‘ and ‘‘Off‘‘. 

Time functions  31 
Timer                <> 

Summary of Contents for aquastar midi

Page 1: ...The menu 11 7 Programming 11 7 1 The menu System 12 7 1 1 The time 12 7 1 2 The date 13 7 1 3 The acoustic alarm 13 7 1 4 The external alarm 13 7 1 5 Contrast 13 7 1 6 The programming level 14 7 2 The menu Run 14 7 3 The menu Calibrate 15 7 3 1 Calibrating the pH sensor 15 7 3 2 Calibrating the Redox sensor only aquastar midi redox 16 7 4 The menu Measurement settings 17 7 4 1 Display 17 7 4 2 The...

Page 2: ...nical data 48 10 Guarantee 49 11 Registration 49 12 Declaration of conformity 49 13 Tips and tricks 50 13 1 The control principle 50 13 2 Salt content Salinity and density in seawater aquariums 50 13 3 Hints on calibration 51 13 4 Sensor care 52 13 5 Measuring the water values 52 13 6 Labelling the socket panels 53 13 7 Lunar phase simulation 53 14 Notes 54 ...

Page 3: ...djusted to suit your own requirements The active and passive phases of the interval duration can be set separately from each other The night day simulation makes child s play of your aquarium s lighting and optimises it too You can use it to set a wide variety of lighting on and off times If the lighting you use can be dimmed you can simulate sunrise and sunset This function even makes the fall in...

Page 4: ...ct and meets the highest demands of modern aquarium enthusiasts So you no longer have to depend on coincidence luck or the renowned salty fingers for the optimal maintenance and care of you favourites Please consider the following for the benefit of your animals Your iks aquastar midi can help you in every aspect with the supervision of your aquarium and reduce your workload with routine tasks It ...

Page 5: ...tion to programme your particular settings yourself If you set the programming level to professional in Section 7 1 5 various dialogs will appear while programming which do not appear in the programming level standard The presentation of the display dark or light grey background in this manual or an additional note draw your attention to this Standard Professional You will find an extensive Help I...

Page 6: ...lashing AL will alert you to an activated alarm and makes you aware that the system is not in the control mode by showing Pro Programming mode When the iks aquastar midi is in the control mode Standard mode of operation the readings from the connected sensors are monitored and the commands carried out that you have programmed Additionally the system values date time measurement readings socket pan...

Page 7: ...mber with Ù and reduce it with Ú These keys are also for entering prefixes del This key enables variable output sockets to be activated directly with the set output when testing This key is also required for resetting You can find out more about this in the appropriate sections Ù Ú del By pressing these keys simultaneously you can adjust the contrast to the maximum at any time enter the most famil...

Page 8: ... result 4 2 1 Fitting the sensors to the aquarium Where possible these sensors are to be located in the aquarium in a place where water continually flows around them To prevent the risk of becoming covered in algae this place should be as dark as possible An open external filter for example is a good position The lead connection however is under no circumstances to be allowed to reach into the wat...

Page 9: ...appliances that can be operated with phase angle control thyristor can be connected to this panel The output is limited to 250 W per socket If you are not certain if you can run a particular appliance on this panel please contact your dealer or appliance manufacturer for advice If you require a simple on off function e g for solenoid operated valve heating HQI lighting etc than you should use a no...

Page 10: ... DIN port labelled PC with the mini DIN plug Once the mains receiver supplied and permanently connected to the display has been connected to the mains the display will commence operation without further adjustments The external display can be fitted either inset or mounted on a surface For inset installation a hole measuring 19 5 cm x 5 cm must be made at a suitable location Please note that the d...

Page 11: ... of the functions If a particular is only available in the professional level your attention is drawn to this in the text 7 Programming This quite extensive section introduces and explains all of the system s programmable functions Despite the wide range of possibilities that the iks aquastar midi offers its operation is designed logically and after a little practice becomes self explanatory Take ...

Page 12: ... section will be of great help at the outset Now let s go through the sub menu Time together The procedure with the other menus is identical so we will be able to deal with those a little more rapidly 7 1 1 The time Using the arrow keys or Ø we can look for the menu Time in the menu System and confirm it by pressing the enter key Now you can use the arrow up or the arrow down key to enter the valu...

Page 13: ... that a function has not yet been allocated to this socket Confirm your selection with enter You can allocate a further alarm function to a switch socket or just have the one on a switch socket This enables you to activate an external alarm system e g a siren or a light signal Here too you decide under which circumstances the alarm is activated later on in the menu Control Before allocating a func...

Page 14: ... the following information is shown in alternation on the display Time and date all connected measurement modules 2 at a time and the switch socket panel switch positions If the information is not displayed in alternation please press the enter key see below The pH value in the example on the left is 8 25 the temperature 26 2 C The Minus symbol next to pH pH value means that a downward control is ...

Page 15: ... sensor If you have an iks aquastar midi pH the display will appear as shown on the left If you have an iks aquastar midi Redox you can jump straight to Section 7 3 2 Confirm your choice with enter Several general settings for the relevant sensor will be requested before the actual calibration process starts The system requires a few details to compensate for the pH sensor s dependence on temperat...

Page 16: ...n solution pH7 If this calibration solution is recognised correctly and the appropriate value displayed correctly then the calibration process for the pH sensor has been completed The automatic sensor test is simultaneously completed too Now press any key The display shown here will appear If it doesn t please refer to Section 7 3 to find the cause Press the esc key to return to the menu Calibrate...

Page 17: ...e arrow keys Confirm your selection with the arrow key As you can see from the diagram below the menu SetMeasurement comprises the sub menus Trend period Memory and Display You can jump from menu to menu with the arrow keys Fig 6 The menu Measurement settings 7 4 1 Display In this menu you can for example state whether you want to have the redox value or the rH value displayed It is a good idea at...

Page 18: ...urn to the main menu level with the esc key 7 4 2 The menu Memory The iks aquastar midi internal memory can store 4000 chains of measurements A chain of measurements comprises date time and the values of the connected modules These stored values can be transferred later on to a PC where they can be processed more comfortably Select the menu Memory with the arrow keys and confirm with enter Now you...

Page 19: ... that your underfloor heating switches on at 25 C In Process 2 you can add another source of heating that switches on at e g 24 5 C if the underfloor heating alone is not sufficient Via a Process No 3 you could activate a ventilator or cooling unit when for example 28 C is reached In the diagram on the left you can see that the example concerns a process involving a Temperature module Te It is thi...

Page 20: ...onds after which the relevant switchable socket is switched off for 300 seconds After that the pH value is measured again and if necessary the control process activated again for another maximum 30 seconds and so on The aim of this method of control using a time lag is for example that when a dose of carbon dioxide CO2 is added to the filter tank within a maximum of 30 seconds 300 seconds have to ...

Page 21: ...e refer to Section 13 1 If you haven t made a note of your settings please repeat the above process making the appropriate notes This can be done relatively quickly as you can jump from point to point with the enter key 7 5 2 Redox value control First of all select the menu Control from the main menu level with the arrow keys and confirm with enter Now select Redox value with the arrow keys and co...

Page 22: ...ket Please remember once again that the action taken depends on the settings you have installed The switch hysteresis is 10mV please refer to Section 13 1 If you haven t made a note of your settings please repeat the above process making the appropriate notes This can be done relatively quickly as you can jump from point to point with the enter key 7 5 3 Temperature control First of all select the...

Page 23: ...s are reached not only is an acoustic and or visual alarm set off but the relevant control is turned off too see above The values are to be confirmed with the enter key Now enter the lower alarm value and confirm with enter Now you can use the arrow keys to look for a vacant socket that can then be allocated to this function In the adjacent example you can see that for example Socket No 2 is still...

Page 24: ...esis is 0 15 C please refer to Section 13 1 If you haven t made a note of your settings please repeat the above process making the appropriate notes This can be done relatively quickly as you can jump from point to point with the enter key ...

Page 25: ...iks aquastar midi 25 Notes ...

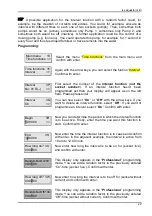
Page 26: ...to check your setting immediately for example current created by controllable pumps such as the iks aquastar turbo and correct it if necessary Please observe the restrictions regarding connectable systems see 4 3 2 e g no HQI or HQL lighting Fig 4 Menu structure Time functions 7 6 1 Timer s Up to 32 timers in the 24 hour format can be programmed and allocated to any sockets So it s possible for ex...

Page 27: ...he desired socket output for the period the timer is active Please observe the restrictions regarding the systems that can be connected see 4 3 2 e g no HQI or HQL lighting It s best to connect the appliances now e g pump lamp to the appropriate socket Enter for example 80 by entering zero eight zero not eight zero as this would mean 800 Now press the del key The socket or the appliance will now b...

Page 28: ...n the Professional mode Section 7 1 5 the set times can have a random factor added to them Here an example If you have determined that the interval is to be on for 2 minutes i e programmed socket live and fix 1 minute in random factor this means that this interval and socket will always be active socket live for between 2 and 3 minutes 2 minutes fixed interval plus 0 to 1 minute chosen at random b...

Page 29: ...f with the arrow keys If you want to delete an interval function select Off If you want ot programme an interval select On Confirm with enter Now you can determine the period in which the interval function is to be active Firstly enter the time you want this function to start Confirm with enter Now enter the time the interval function is to cease and confirm with enter In the adjacent example the ...

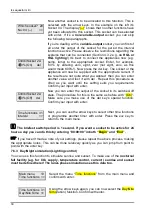
Page 30: ...an enter the output of the socket in its switched off state The procedure for this is the same as before with On Make sure you make use of the del key s special function Confirm your input with enter Next you can use the arrow keys to select other time functions or programme another timer with enter Press the esc key to return to the main menu The briefest switch period is 1 second If you want a s...

Page 31: ...is function This is selected with the arrow keys In the adjacent example it s the socket 03 The display shows that no further function has been allocated to this socket The socket can then be selected by pressing enter If a non variable output socket is concerned you can jump the following two paragraphs If you re dealing with a variable output socket you can first of all enter the output of the s...

Page 32: ...wer down under Programming The difference between the two are explained there In order for the lunar phase to operate correctly in On you must programme a day night simulation beforehand Section 7 5 9 If you selected On at that stage the lunar phase takes place as follows The function calculates an artificial midnight from the times entered for sunrise sunset On the basis of this the times are cal...

Page 33: ...eriod the interval function is active Please observe the restrictions regarding the systems that can be connected Section 4 3 2 e g no HQI or HQL lighting It s best to connect the appliances now e g pump lamp to the appropriate socket Enter for example 80 by entering zero eight zero not eight zero as this would mean 800 Now press the del key The socket or the appliance will now be supplied with th...

Page 34: ... be turned on or off Theoretically you can control up to 16 pumps with the iks aquastar It is then possible to create optimum current conditions even in very large tanks Programming Select the menu Time functions from the main menu and confirm with enter Using the arrow keys again you can now select the current simul ation Confirm with enter This display only appears in the professional programmin...

Page 35: ...serve the restrictions regarding the systems that can be connected Section 4 3 2 e g no HQI or HQL lighting It s best to connect the appliances now e g pump lamp to the appropriate socket Enter for example 80 by entering zero eight zero not eight zero as this would mean 800 Now press the del key The socket or the appliance will now be supplied with the appropriate current If the results are not qu...

Page 36: ...to a complete standstill If you have selcted Hi Lo tide the following dialogue appears You can now specify how long the high tide or low tide phases are to last Enter the desired periods and confirm with enter This display only appears in the professional programming mode You can extend the previously specified time by a radom factor see also Section 7 6 2 Confirm your selection with enter Now you...

Page 37: ... for off state The procedure for this is the same as before with On Make sure you use the del key s special function then confirm with enter Now allocate high tide to a variable output socket Select with the arrow keys In the adjacent example it s Socket No 04 The symbol indicates that no other function has yet been allocated to this particular socket Confirm the socket selection by pressing enter...

Page 38: ...atic feeding break is only worthwhile if for example you are using an automatic feed dispenser to operate at a specified time If you tend to feed your fish etc at rather more irregular intervals then the semi automatic feeding break setting is more appropriate This can be activated manually whenever you like by pressing the key Ù with aquastar midi in the control mode and automatically deactivated...

Page 39: ...o is switch the manual feeding break on or off manually using the Ù key whilst in the control mode simply enter 00 00 00 when How long active appears Please note that the semi automatic feeding break is inactive at the setting 00 00 00 The feeding break must be switched off manually Now a socket is to be allocated to the feeding break function This is selected with the arrow keys In the example on...

Page 40: ...nt to allocate the feeding function to a further socket the times for Begin and How long active are copied and applied automatically Please note that these times are identical for all sockets If you haven t made a note of your settings please repeat the above process making the appropriate notes This can be done relatively quickly as you can jump from point to point using the Enter key Time functi...

Page 41: ...ensors this is the area where a control process type can be selected for programming with the keys arrow keys The desired dialogue is started by pressing enter 21 Sensor No If several sensors of the same kind are connected then you can enter here the sensor for which you would like to enter the control values The number corresponds with sensor port number of the appropriate sensor 22 e g Te Proces...

Page 42: ... a living system such as an aquarium is governed by a wide variety of factors and is always subject to natural fluctuations 29 Which socket Here you can state the number of the socket to which your controllable appliance e g heater is connected On the socket panel L1 are the sockets 1 4 on L2 à 5 8 The switch socket from thePower Station L0 has the number 0 2A CntrlblSocket If the socket selected ...

Page 43: ...the pulse duration should be for a wave 36 Nocturnal fall By entering Yes the current can be reduced at nite 37 Fall of At night the output of the relevant socket On and Off value is reduced by this amount For example a night time value of 60 is produced with Fall of 20 from a daytime value of 80 A daytime 10 becomes 0 at night You can enter the duration of the night under àTime functions àDay nig...

Page 44: ...ws you to produce an astronomic simulation The moon rises and sets in your tank as it does in the real world The intensity of light changes too 3K Timer No You can programme 32 time periods Each period of time is allocated a number that you can select here Please observe that not all numbers are displayed but only the maximum number required The number in brackets states which socket has been allo...

Page 45: ...red longitude here 40 Time zone Enter the time zone here 8 4 Measurement settings 41 Trend period only in the Professional level The iks aquastar midi determines the development of your water values over a certain period of time You specify that period here 42 Memory store Input of the settings for storing measurement data in the memory e g Storage interval 43 Display With an iks aquastar midi Red...

Page 46: ...pecify a temperature via the menu point input 65 Buffer temperature You require the temperature of the buffer solution in order to carry out temperature compensation A good result is achieved if you first place the bottle of buffer solution in the tank water for a while The buffer temperature will the correspond with that of the tank 66 Sensor in Buffer 1 Place the sensor in the appropriate first ...

Page 47: ...re is an error 6F Sensor in Sol 230 mV The sensor must be re connected to the measurement module Then place the sensor in the 230V buffer solution and press the enter key 6G Sol 230mV Please wait appears on the display If this does not disappear after a few minutes then there is an error If OK appears please press the enter key 6H Rx Sensor An evaluation of the calibration process takes place here...

Page 48: ...esolution pH 0 01 Temperature compensation manual automatic Switch hysteresis pH 0 05 Redox Measuring range 300mV to 600mV Resolution 1mV Switch hysteresis 5 mV Temperature Measuring range 5 C to 50 C Resolution 0 05 C Switch hysteresis 0 15 C Interface RS232 serial interface Display 1 LC Display 2x16 characters 1 LED Display Outputs 8 TTL switching outputs for connecting the iks switch socket pan...

Page 49: ...urchaser s demands The guarantee is void if the supplied original product is damaged or altered in any way 11 Registration Please complete the enclosed registration form and send it to us Only when we have received this can we keep you up to date with new developments and additions Your details will be treated confidentially and under no circumstances whatsoever passed on to third parties 12 Decla...

Page 50: ...le 13 2 Salt content Salinity and density in seawater aquariums The salinity expresses the sum of the concentrations of all salts contained in a sample of seawater A differentiation is made between the absolute salinity and the practical salinity whereby the absolute salinity is the real total salt content of the water in question As this value is found by the individual determination of the conce...

Page 51: ... the bottles of calibration solutions can be left to float in the tank for a while until the temperatures have aligned themselves There are however other methods for particularly cautious people To prevent the tank water being contaminated by calibration solutions a bowl of water can be suspended in the tank instead of placing the bottles in the tank The calibration solutions are then placed in th...

Page 52: ...rature will occur Secondly by doing this there is a danger that liquid will escape from the sensors and poison the water if ever they accidentally fall into the tank A special care maintenance set for pH and redox electrodes is available fron iks Please ask your dealer for details And finally please consider the comparison with a lightbulb Sensors don t last forever either 13 5 Measuring the water...

Page 53: ...e telephone where something is to be plugged in or unplugged It s also not a bad idea to make a few notes especially when several identical sensors are being used in different tanks 13 7 Lunar phase simulation It s by all means possible to create a lunar phase simulation that has to be calculated on the basis of the day night simulation even though the main source of lighting comes from non dimmab...

Page 54: ...iks aquastar midi 54 14 Notes ...

Reviews: