background image

TM70Bi V3.2 (11/02)

1121174 L0.pdf

78

IKUSI reserves the right to change this information without prior notice.

21.1 – MAIN CHARACTERISTICS

Software version 3.2:

New TM70 range software features supported:

- Up to 5 R8CAN electronic boards -> it allows to include in the same box up to 53 relays

- Up to 10 analogue outputs; maximun: 5 x A2VCAN or 5 x A2ICAN or 5 x A1P4RCAN cards or a MIX of
these cards completing 10 analogue outputs

- The IN 0-4/20mA analogue current input card is supported (

when available

).

- IN4D without feedback information as a linking condition in multi-receiver systems.

- Analogue outputs with independent and progressive response. Up to 8 different and slectable progressive
responses.

Hardware and mechanics compatible with software version SW 3.2:

Important Remark: This software versión is only compatible with LR72 E version cards or higher
versions.

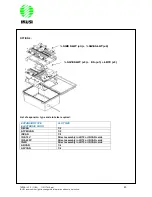
The new mechanics allows to configure the R70 receiver with these 4 modular OPTIONS (maximun
configurations)

OPTION 1:

½ SIZE SLOT (x4)

½ SIZE SLOT (x1) + P.S. (x1) + LR72 (x1)

Summary of Contents for T70/1

Page 1: ...IKUSI Angel Iglesias 360 Herndon Parkway Model TR800CE EMB Suite 1400 Standards FCC 90 IC RSS 119 Herndon VA 20170 http www rheintech com FCC ID PVTTR800CE EMB Report 2011148 Page 33 of 41 Appendix M Manual Please see the following pages ...

Page 2: ...TM70Bi V3 2 11 02 1121174 L0 pdf IKUSI reserves the right to modify this information without prior notification OPERATION INSTALLATION MANUAL TM70 PUSHBUTTON TRANSMITTERS T70 1 T70 2 MODELS ...

Page 3: ...NNEX A PROGRAMMING A SPARE TRANSMITTER 15 ANNEX B PROGRAMMING THE MACHINE IDENTIFICATION IN LCD TRANSMITTERS 16 8 FREQUENCY CHANGE 17 8 1 SYSTEM DESCRIPTION 18 8 2 DEFINITIONS 18 8 3 BASE CHANNEL FREQUENCY CHANGE 18 8 4 WORKING CHANNEL FREQUENCY CHANGE 19 ANNEX A CHANNEL TABLE 433 050 434 790 MHZ 20 ANNEX B CHANNEL TABLE 869 70625 869 90 MHZ 21 ANNEX C CHANNEL TABLE 914 150 915 875 MHZ 22 9 CAN OP...

Page 4: ... 15 IN0450P OPTION 52 15 1 INTRODUCTION AND FUNCTIONAL DESCRIPTION 53 15 2 IN0450P AND LR70 ASSEMBLY 54 16 IN4D OPTION 55 16 1 INTRODUCTION AND FUNCTIONAL DESCRIPTION 56 16 2 IN4D AND LR71 LR72 ASSEMBLY 59 17 A1P4RCAN OPTION 60 17 1 INTRODUCTION FUNCTIONAL DESCRIPTION 61 17 2 CONNECTIONS JUMPERS CONFIGURATION 61 18 A2ICAN OPTION 64 18 1 INTRODUCTION FUNCTIONAL DESCRIPTION 65 18 2 CONNECTIONS JUMPE...

Page 5: ...70 TM70 2 870 Cumple con las Directivas de Consejo Complies with the provisions of Council Erfüllt die Richtlinien des Rates Accompli les Directives du Conseil E conforme alle Direttive del Consiglio Cumpre as Directivas del Consello Conform is met de richtlijnen van de Raad 2006 42 EEC MACHINERY 1999 5 EEC R TT Normas armonizadas utilizadas Applied harmonized standards Angewendete harmonisierte N...

Page 6: ...sturing IKUSI Cumple con las Directivas de Consejo Complies with the provisions of Council Erfüllt die Richtlinien des Rates Accompli les Directives du Conseil E conforme alle Direttive del Consiglio Cumpre as Directivas del Consello Conform is met de richtlijnen van de Raad 2006 42 EEC MACHINERY 1999 5 EEC R TT Normas armonizadas utilizadas Applied harmonized standards Angewendete harmonisierte N...

Page 7: ...464 000 MHz ERP 120mW 902 000 to 928 000 MHz ERP 1mW Response Time 100 ms Temperature range 20º to 70ºC The T70 1 and T70 2 Transmitters Ingress protection IP65 NEMA 4 The R70 13 and R70 21 Receivers Power supply 48 115 230 Vac 10 50 60 Hz Optional 12 or 24 Vdc Consumption 20 W Relays 230 Vac 8 A STOP Relays 230 Vac 6 A Protection IP65 NEMA 4 Electrical Security Class II EN50178 Storage temperatur...

Page 8: ...e the transmission key when the set is not in use On starting each working day check to make sure that the STOP button and other safety measures are working When in doubt press the STOP button Whenever several sets have been installed make sure the transmitter you are going to use is the right one Identify the machine controlled on the label for this purpose on the transmitter Service the equipmen...

Page 9: ...ound to comply with the limits for a Class A digital device pursuant to Part 15 of the FCC Rules These limits are designed to provide reasonable protection against harmful interference when the equipment is operated in a commercial environment This equipment generates uses and can radiate radio frequency energy and if not installed and used in accordance with the instruction manual may cause harmf...

Page 10: ... it indicates that the battery loading process has finished The capacity of the batteries decreases with use Their life span is estimated to be 500 recharging cycles but this depends largely on the conditions of use for which the following is recommended Do not recharge the battery until it is completely flat The transmitter indicates this moment Always charge the batteries at temperatures between...

Page 11: ...ring and connector between the receiver and the electrical cabinet of the machine Remember that the receiver has several voltage powered circuits Even when the power has been cut off there is still a risk of electrical shocks Find a suitable location for the receiver with easy access in a place designated for reception of the radio transmitter signal and away from any intense radio electric distur...

Page 12: ...eceiver outputs The STOP relays KSTOP1 and KSTOP2 are in series and must be connected to the main contactor coil circuit The K2 START is activated once the start up command is held down The K1 SAFETY relay is a safety relay which is activated when certain commands predefined as active on configuration of the set i e commands which give rise to manoeuvres are activated Figure 4 Receiver s electroni...

Page 13: ...owing LED s will be lit in the receiver POWER 1 ON indicates that the power supply is correct HARDOK 2 ON indicates the absence of faults on the boards SIGNAL 3 OFF in the case of the channels being signal free Blinks ON when there is a RF signal on the channels DATA 4 OFF when there is not another TM70 system active in the area Blinks ON in the opposite case ID 5 OFF CAN_RUN 6 ON Indicates that C...

Page 14: ... CAN_RUN ON Indicates that communications with CAN expansion boards are OK CAN_ERR OFF ORDER ON Indicates the activation of any digital manoeuvre RELAY ON Indicates the activation of STOP relays Now the STOP relays KSTOP1 and KSTOP2 will be activated The K2 START relay is activated once the start button is pushed Press on any of the transmitter s manoeuvre buttons and its corresponding relay will ...

Page 15: ...arted transmitting From now on if any of the transmitter s command buttons are pressed the corresponding manoeuvre will be activated To be able to start up the transmitter all the command controls associated with active manoeuvres must be in the neutral position not activated This is not the case for the selection functions When 4 minutes have passed and no active manoeuvre command has been activa...

Page 16: ...the right to evaluate breakdowns and damage Under no circumstances will IKUSI be held responsible for hold ups at work accidents or expenses incurred as a result of equipment malfunctioning 7 2 PRECAUTIONS This equipment is designed for use in an industrial environment However we recommend you follow the instructions below to extend the life span of your remote control set Use the belt provided wi...

Page 17: ...itter manoeuvre buttons and observe the response of the output relays If the response is normal the problem is not related to the remote control equipment and the installation must be checked If any of the relays is not activated the problem is associated with the remote control equipment If this happens observe the appearance of the LED s LED LIT FLASHING OFF POWER Power Supply OK Power Supply no...

Page 18: ... selector is in wrong position after a crane has been selected previously Error EEP Error when trying to access the content of the EEPROM or the internal memory The content of the EEPROM cannot be copied into the internal memory Error Wrong EEP EEPROM data corrupted Error Copy FLASH When duplicating EEPPROM modules a copy failure occured during the new EEPROM updating process Error Open File Inter...

Page 19: ...described above and insert the EP70 module from the receiver 2 Introduce a charged battery turn on the ON OFF key push and extract the STOP button The LED will pulse green for around 15 seconds 3 To copy its contents into the internal memory of the transmitter press pushbutton 6 followed by START keeping both buttons pressed together while LED blinks red Once the LED start to blink orange release ...

Page 20: ...g 3 4 seconds and then you will enter the CONFIG MODE Press pushbutton 4 press TWICE pushbutton 4 if it only appears the option CONFIG MODE 4 Move through the menu with pushbuttons 1 and 2 until reaching the EDIT LABEL menu Press push button 4 5 Once you have entered into EDITING mode there appears in the display the text CRANE in which the first character blinks From this point you can edit the n...

Page 21: ...TM70Bi V3 2 11 02 1121174 L0 pdf 17 IKUSI reserves the right to change this information without prior notice 8 FREQUENCY CHANGE FREQUENCY CHANGE TM70 ...

Page 22: ...hannels are also scanned although with a smaller priority 8 3 BASE CHANNEL FREQUENCY CHANGE The change of frequency is made via commands that in normal work mode will operate or move the machine It is very important to follow the programming sequence rigidly as described below to avoid any movements of the machine ENTERING PROGRAMATION MODE In order to enter the progamation mode the following proc...

Page 23: ...nce The Working Channel will coincide with the Base Channel If you try to select a Base Channel that is not included within the permitted range then the LED will flash red If the Base Channel change has made with a range control system in place then the receiver will locate the new frequency by entering into a temporary TRACKING mode once the new channel is located this will be memorised and will ...

Page 24: ...434 200 13 433 350 48 434 225 14 433 375 49 434 250 15 433 400 50 434 275 16 433 425 51 434 300 17 433 450 52 434 325 18 433 475 53 434 350 19 433 500 54 434 375 20 433 525 55 434 400 21 433 550 56 434 425 22 433 575 57 434 450 23 433 600 58 434 475 24 433 625 59 434 500 25 433 650 60 434 525 26 433 675 61 434 550 27 433 700 62 434 575 28 433 725 63 434 600 29 433 750 64 434 625 30 433 775 65 434 ...

Page 25: ...ight to change this information without prior notice ANNEX B Channel table 869 70625 869 9 MHz Channel MHz 1 869 70625 3 869 73125 5 869 75625 7 869 78125 9 869 80625 11 869 83125 13 869 85625 15 869 88125 17 869 90625 19 869 93125 21 869 95625 23 869 98125 ...

Page 26: ...914 375 45 915 250 11 914 400 46 915 275 12 914 425 47 915 300 13 914 450 48 915 325 14 914 475 49 915 350 15 914 500 50 915 375 16 914 525 51 915 400 17 914 550 52 915 425 18 914 575 53 915 450 19 914 600 54 915 475 20 914 625 55 915 500 21 914 650 56 915 525 22 914 675 57 915 550 23 914 700 58 915 575 24 914 725 59 915 600 25 914 750 60 915 625 26 914 775 61 915 650 27 914 800 62 915 675 28 914 ...

Page 27: ...TM70Bi V3 2 11 02 1121174 L0 pdf 23 IKUSI reserves the right to change this information without prior notice 9 CAN OPEN INTERFACE CANopen INTERFACE TM70 ...

Page 28: ... 2 specification The implemented profile is described in CiA DS 401 v2 1 Input Output standard where the pushbutton manoeuvres are considered as digital inputs The implemented characteristics are NMT Functioning slave NodeID EEPROM configurable from 1 to 127 Baud rate EEPROM configurable Supported speeds 10 20 50 100 125 250 500 800 and 1000 Kbps Error control it can work Heartbeat as well as Node...

Page 29: ...is important for a correct bus operation that bus terminations are connected in both ends and disconnected in the intermediate nodes 9 3 DATA DICTIONARY The dictionary objects supported by the TM70 are 1000 DEVICE TYPE 1001 ERROR REGISTER 1002 STATUS REGISTER 1003 PREDEFINED ERROR FIELD 1003 0 number of errors 1003 x standard error field 1005 COB ID SYNC 1006 COMMUNICATION CYCLE PERIOD 1007 SYNCHR...

Page 30: ...mber of entries 1A00 1 PDO mapping entry 1A00 2 PDO mapping entry 1A00 3 PDO mapping entry 1A00 4 PDO mapping entry 6000 DIGITAL INPUT 8 BITS 6000 0 number of entries 6000 1 start and stop buttons start1 start2 stop 6000 2 buttons 1 4 M1 M8 6000 3 buttons 5 8 M9 M16 6000 4 buttons 9 10 and auxiliary inputs M17 M20 A1 A2 9 4 PDO The system is provided with a 4 byte configured transmission PDO 1 st ...

Page 31: ...Ingress protection IP67 NEMA 6 Antenna External NEARSON S325TR 015 or equivalent Working frequency selection Automatic LBT listen before talking Weight 430 gr Dimensions Long 151mm Width 129mm 160mm with PG Height 61mm EEPROM Extractable EP70 module Signaling MultiLED 7 external LEDS 6 green 1 bicoloured 2 internal LEDS CAN status 1 red 1 green Connexions Fast PLUG IN plugs and 2 x M16 cable gland...

Page 32: ...I reserves the right to change this information without prior notice Connections scheme Receiver s dimensions in milimeters It is also available the option Ref IKUSI 3302620 Fast fixation kit including a set of 4 magnets and 4 shock absorbers ...

Page 33: ...ch LED On and the transmitter switched Off indicates occupied radio channel LED On and DATA switched Off indicates radio channel occupied by a non IKUSI system Verify transmitter s radio and battery DATA GREEN LED Off if a wrong frame is received Blinking if receiving good frames LED Off and SIGNAL LED On Radio breakdown Replace radios ID GREEN Blinking if a correct ID is received Switched Off and...

Page 34: ...TM70Bi V3 2 11 02 1121174 L0 pdf 30 IKUSI reserves the right to change this information without prior notice 10 FIRST COME FIRST SERVED FIRST COME FIRST SERVED OPERATION TM70 ...

Page 35: ...operator releases the crane by pressing the Stop button After a time defined in EEPROM 0 1 25 seconds default 4 seconds the receiver liberates the ID to which it was locked and starts scanning IDs and radio channels The first transmitter switched on is the First transmitter to hold control of the crane and it will not let any other transmitter to have control of the crane until the transmitter is ...

Page 36: ...TM70Bi V3 2 11 02 1121174 L0 pdf 32 IKUSI reserves the right to change this information without prior notice 11 LA70 LA70M RANGE LIMITER OPTION LA70 LA70M RANGE LIMITER OPTION TM70 ...

Page 37: ...ed by transmitter microprocessor which in this way knows when the operator has left the working area Consequently outputs are deactivated Application examples 11 1 2 INFRARED SENSOR As explained in the above the sensor element is located in the remote control transmitter and its function is to receive the infrared information coming from the LA70 transmitter The location of this sensor is the foll...

Page 38: ...e transmitter is inside the working zone 3 Range Limiter at startup and operation The transmitter in order to work must be inside the working zone always 4 Range Limiter only as an output Relay This functionality makes the transmitter not to show In range or Out of range situation in the transmitter itself It will not mask any order The information will be sent to the receiver in order to process ...

Page 39: ...ne Do not forget to connect the earth cable Use flame resistant cables for the connections Find a suitable place for the installation of the infrared transmitter away from elements which could generate intense electrical disturbances and obstacles to the transmission of light Choose the correct power supply and connect it Fit the jumper selector in master position Select the code programmed in the...

Page 40: ...transmitters can be connected in series programmed as slaves in the selector In this case the code emitted corresponds with the selector in the master transmitter The communication connection between transmitters must be done with shielded wires 11 2 3 LA70 TECHNICAL CHARACTERISTICS Infrared Transmitter Power supply 48 115 230 Vac 10 50 60 Hz Operating temperature 20 a 65ºC Protection IP55 ...

Page 41: ...2 10MT 2301234 CABLE CONEX M12 LA70M specifications Modules LA70M AC LA70M DC SPECIFICATIONS AC Power Supply 48 115 230v AC 20 50 60Hz DC Power Supply 8 35v DC AC Power Supply Fuse 0 63A 250v DC Power Supply Fuse 2A 250v Maximum power consumption 20VA Operating temperatura range 20 70 ºC IP ingress protection rating IP67 Maximum range 50 meters External connection M12 conector 5 poles female I8 Ju...

Page 42: ...aterial Polycarbonate Ingress Protection IP67 EN 60529 Base colour RAL 7035 Impact Resistance IK07 EN 62262 Cover colour Clear transparent Electrical Isulation Totally insulated Cover screws material Stainless steel Halogen free SI DIN VDE 0472 Part 815 Gasket material Polyurethane UV resistance UL 508 TEMPERATURES Flammability rating UL 746 C 5 UL 94 5V Short term 40 120 ºC Glow Wire Test IEC 695...

Page 43: ...ration and ID selector for the Master modules I3 ID selector Allowed range 2 3 8 9 A B F 14 positions Default configuration ID 3 I14 TM60 or TM70 compatibillity selector I2 NON available functionallity Normal position by default h m D m 20º d m 0º 6 7 2 8 9 3 10 12 4 12 14 4 14 16 5 16 18 6 18 21 6 20 23 7 ID SELECTOR I 3 IR LEDS CONNECTORS Normal Expanded J TAG CODE SELECTOR I 2 0 2 F LA60 70 I 1...

Page 44: ...nnections between the Master module and the Slaves or expansions Find a suitable place for the installation of the infrared transmitter away from elements which could generate intense electrical disturbances and obstacles to the transmission of light Choose the correct power supply and connect it Fit the jumper selector in master position Select the code programmed in the EEPROM memory of the tran...

Page 45: ...TM70Bi V3 2 11 02 1121174 L0 pdf 41 IKUSI reserves the right to change this information without prior notice 12 PITCH CATCH OPERATION PITCH CATCH OPERATION TM70 ...

Page 46: ...nciple exactly as the First come First served mode of operation In the event of pressing the STOP pushbutton the other transmitter is switched on and the START order is being pressed the second transmitter gets hold of the crane without falling the STOP relays This way users of the same crane with different transmitters can pass each other the crane without falling the STOP relays As the START pus...

Page 47: ... the crane must be pressing the START button The receiver will free the ID code and will SCAN new ID codes and new channels if in the lapse of time of a passive STOP it encounters the new ID it will keep on going without falling the STOP relays In the event that the transmitter governing the crane stops while the second transmitter is switched off the system will STOP normally and will be free unt...

Page 48: ...TM70Bi V3 2 11 02 1121174 L0 pdf 44 IKUSI reserves the right to change this information without prior notice 13 TANDEM OPERATION TANDEM OPERATION TM70 ...

Page 49: ...ows in the LED that the selection made is not correct with 0 4s red pulses The transmitter must be switched off and restart it with the selection with which it was switched off A Tandem operation with cranes is always delicate Remember that there are safety devices limit switches anti collision guard systems etc which can affect and stop one of the cranes while the other continues working In the t...

Page 50: ...T button The transmitter will send to the RECEIVER 2 the liberation order remaining disconnected and ready to accept a new ID code At this stage the position 1 2 may be selected in the MASTER transmitter and then press the START button until the Green LED is switched on and it will send the new ID code Both receivers 1 and 2 will then be started and ready to TANDEM operation When TANDEM operation ...

Page 51: ...r was working will be liberated and ready to accept another ID code within the list and the transmitter gets disconnected Following this the transmitter that is going to perform the tandem operation the position 1 2 should be selected and then press the Start button until the green LED light is switched on Both receivers will be connected with the transmitter When the operation has been finalised ...

Page 52: ...0Bi V3 2 11 02 1121174 L0 pdf 48 IKUSI reserves the right to change this information without prior notice 14 ANALOGUE FEEDBACK IN 0 10v OPTION CALIBRATION ANALOGUE FEEDBACK IN 0 10v OPTION CALIBRATION TM70 ...

Page 53: ...e updated in the receiver EEPROM In order to do it please copy the new information located in the transmitter EEPROM into the receiver one At the remote control start up the Calibration must be done as follows 1 Insert a fully charged battery and turn ON the contact key 2 Push and Pull the STOP pushbutton An orange blink will be seen on the LED followed by green pulses 3 Place a known load on the ...

Page 54: ...3 12 Press STOP and restart the crane again Replace the load with another known load 13 Repeat the process again steps 4 to 8 selecting VALUE 2 in the CALIBRATION menu 14 Once finished the feedback calibration process the system will be calibrated At this point the system is ready to work normally Until calibration is performed data appearing in the display will be inconsistent Calibration generat...

Page 55: ...TM70Bi V3 2 11 02 1121174 L0 pdf 51 IKUSI reserves the right to change this information without prior notice 14 3 LR71 72 and 0 10V ASSEMBLY IN0 10V Ref 2303755 Cod 2303755 Cod 1135024 x2 Cod 1131026 x4 ...

Page 56: ...TM70Bi V3 2 11 02 1121174 L0 pdf 52 IKUSI reserves the right to change this information without prior notice 15 IN0450P OPTION IN0450P Option TM70 ...

Page 57: ...uency voltage converter and it can be used for example as an interface between an anemometer sensor that provides a pulsed signal in order to show in the transmitter s display the speed of the wind in real time mode using the feedback option The card supplies a 12v DC voltage output to power the sensor Technical characteristics Maximum resolution 8 bits Input frequency range 0 450 Hz Galvanically ...

Page 58: ...TM70Bi V3 2 11 02 1121174 L0 pdf 54 IKUSI reserves the right to change this information without prior notice 15 2 IN0450P and LR70 ASSEMBLY IN0450P Cod 1131026 x4 Cod 1135024 x2 ...

Page 59: ...TM70Bi V3 2 11 02 1121174 L0 pdf 55 IKUSI reserves the right to change this information without prior notice 16 IN4D OPTION IN4D OPTION TM70 ...

Page 60: ...single one The IN4D card is basically a four digital to analogue signal converter The four digital signals IN1 IN2 IN3 and IN4 are converted to a 0 to 3 volts analogue value available in the LR70 or in the INCAN card See figure 1 The four digital inputs IN1 IN2 IN3 and IN4 must have the following analogue values in reference to the pin 6 GND I3 connector 0 to 4V is equivalent to a deactivated stat...

Page 61: ...ailable the card provides through pin number 1 VI a voltage between 12 and 20 volts to activate the inputs as shown in the figure 2 Block diagram of the signals see figure 3 VI IN1 IN2 IN3 IN4 GND IN4D 1 2 3 4 5 6 I3 1 2 3 4 5 6 I1 Figure 2 VI IN1 IN2 IN3 IN4 GND LR70 GND VI 3 3V GND GND IN IN4D 1 2 3 4 5 6 I3 1 2 3 4 5 6 I1 1 2 3 4 5 6 P16 Figure 3 ...

Page 62: ...TM70Bi V3 2 11 02 1121174 L0 pdf 58 IKUSI reserves the right to change this information without prior notice Electronic card top view see figure 4 1 2 3 4 5 6 I3 I1 1 2 3 4 5 6 Figure 4 ...

Page 63: ...TM70Bi V3 2 11 02 1121174 L0 pdf 59 IKUSI reserves the right to change this information without prior notice 16 2 IN4D AND LR71 LR72 ASSEMBLY Cod 1131026 x4 Cod 1135024 x2 pin 1 ...

Page 64: ...TM70Bi V3 2 11 02 1121174 L0 pdf 60 IKUSI reserves the right to change this information without prior notice 17 A1P4RCAN OPTION A1P4RCAN OPTION TM70 ...

Page 65: ...rames The CAN address of the electronic card is conformed using the 7 jumpers of P1 connector Jumper in position 1 corresponds with the first bit of the CAN address Thus inserting several bridges it is possible to select different addresses from 1 until 127 2 7 maximum Very important The address 0 is not a valid address so the board allways must be fitted with at least one jumper With one jumper i...

Page 66: ...ion 1 K1 contact normally closed 2 K1 common contact 3 K1 contact normally opened 4 K2 contact normally closed 5 K2 common contact 6 K2 contact normally opened 7 K3 contact normally closed 8 K3 common contact 9 K3 contact normally opened 10 K4 contact normally closed 11 K4 common contact 12 K3 contact normally opened Cod 1141684 TM70 1M abatable base Cod 1184005 UNEX 2221 0 clip Cod 1095040 CAN RC...

Page 67: ... power supply Minimun 50V 4 V Positive power supply Maximun 50V TELE TEACHING V3 1 OF SOFTWARE OR HIGHER VERSIONS Through Tele Alignment can set the maximum and minimum values the polarity inversion acceleration or deceleration ramp and curve type of the analogue output To change to Tele Alignment mode is necessary to introduce a bridge in the jumper P5 see Jumpers configuration Only available for...

Page 68: ...TM70Bi V3 2 11 02 1121174 L0 pdf 64 IKUSI reserves the right to change this information without prior notice 18 A2ICAN OPTION A2ICAN OPTION TM70 ...

Page 69: ...Generic I O Modules Generates two analogue outputs in current according to the received instructions and the settings for each output There are two types of response curves for each output Linear response of the analogue output proportional to the input Non linear the response of the analogue output is exponentially regarding the input Variations of the joystick inputs at the beginning of his move...

Page 70: ...rity inversion acceleration or deceleration ramp and curve type of the analogue output To change to Tele Alignment mode is necessary to introduce a bridge in the jumper P6 see Jumpers configuration Only available for TM70 consol box from 3 1 software version or higher Other features of the PWM current outputs Power supply range of the expansion 8 30V and of the outputs 5 35V Each output channel ha...

Page 71: ...WM2 The connections of the output 1 are through 4 pole terminal plug with the follow pin assignment Output 2 connector Pin name Function VPP2 Power of channel 2 GND2 Ground of channel 2 VO2 DIRECT analogue PWM output of channel 2 VR2 INVERSE analogue PWM output of channel 2 ISP PROGRAMACION IN CIRCUIT IN SYSTEM The expansion has a connector to record In System eg Microprocessor software update Thi...

Page 72: ...Jumper for configuration of the CAN direction of the expansion Jumper ON 1 logic Programmable addresses 1 63 max P6 Jumper to enable or disable the Tele Alignment process Enabled Tele Alignment jumper placed or ON P6 Disabled Tele Alignment jumper eliminated or OFF P6 1 VPP channel power 2 GND Channel ground 3 VO DIRECT analogue PWM output 4 VR INVERSE analogue PWM output ...

Page 73: ...TM70Bi V3 2 11 02 1121174 L0 pdf 69 IKUSI reserves the right to change this information without prior notice 19 A2VCAN OPTION A2VCAN OPTION TM70 ...

Page 74: ...ile 401 input output digital analogue CIA DS401 CANopen Device Profile for Generic I O Modules Generates two analogue outputs in voltage according to the received instructions and the settings for each output There are two types of response curves for each output Linear response of the analogue output proportional to the input Non linear the response of the analogue output is exponentially regardi...

Page 75: ...each output Outputs protected against short circuit 19 2 CONNECTIONS JUMPERS CONFIGURATION CONNECTIONS WITH THE LR72 The expansion connects to the LR72 electronic board through two connectors one of 2 pin for power supply VI and GND and the other of 5 pin for the CAN bus with the following signals Power connector Pin number Function GND Ground VI DC between 8 y 30V CAN bus connector Name Function ...

Page 76: ... 2 connector Pin name Function VPP2 Power of channel 2 GND2 Ground of channel 2 VO2 Analogue output of channel 2 VR2 Zero position signal signal to get through the output 2 when the relay is inactive ISP PROGRAMACION IN CIRCUIT IN SYSTEM The expansion has a connector to record In System eg Microprocessor software update This connector has 10 pins ISP connector Pin name Function ISP2 Input connecte...

Page 77: ...ation of the CAN direction of the expansion Jumper ON 1 logic Programmable addresses 1 63 max P6 Jumper to enable or disable the Tele Alignment process Enabled Tele Alignment jumper placed or ON P6 Disabled Tele Alignment jumper eliminated or OFF P6 1 VPP channel power 2 GND Channel ground 3 VO Channel voltaje analogue output 4 VR Zero position voltage when K rely of each channel is inactive ...

Page 78: ...are used to supply the output stage of the A2VCAN electronic board s analogue outputs This expansion is mounted as datasheet only the number of required DC DCs power supplies will be mounted Each DC DC can supply the outputs of two A2VCAN 4 analogue outputs in voltage The energy for POT70V4 module is provided by the LR72 board Technical features Size of LR72 2 DC DC available o 12V 0 12V 85mA o 15...

Page 79: ...TM70Bi V3 2 11 02 1121174 L0 pdf 75 IKUSI reserves the right to change this information without prior notice 20 T70 1 T70 2 ATEX TRANSMITTERS T70 1 T70 2 ATEX TRANSMITTERS TM70 ...

Page 80: ... Type of battery Nominal charge BT06K ATEX 500mAh Battery charger compatibility BC70K o CB70 Orange LED signalling Replaced by a double signalling green red DLA option Display and Limit Range option Not available Feedback information option Not available Antenna Internal SIMM module parameter s set up Extractable EP70 EEPROM Maximum number of maneouvres 6 START STOP 10 START STOP Weight including ...

Page 81: ...i V3 2 11 02 1121174 L0 pdf 77 IKUSI reserves the right to change this information without prior notice 21 R70 XX RECEIVERS SOFTWARE VERSION SW 3 2 COMPATIBLE R70 XX RECEIVERS SW 3 2 version compatible TM70 ...

Page 82: ...nalogue outputs The IN 0 4 20mA analogue current input card is supported when available IN4D without feedback information as a linking condition in multi receiver systems Analogue outputs with independent and progressive response Up to 8 different and slectable progressive responses Hardware and mechanics compatible with software version SW 3 2 Important Remark This software versión is only compat...

Page 83: ...2 1121174 L0 pdf 79 IKUSI reserves the right to change this information without prior notice OPTION 2 OPTION 3 SIZE SLOT x1 SIZE SLOT x6 SIZE SLOT x1 P S x1 LR72 x1 SIZE SLOT x2 SIZE SLOT x4 SIZE SLOT x1 P S x1 LR72 x1 ...

Page 84: ...xpansión type and slot size required EXPANSION TYPE ELECTRONIC CARD SLOT SIZE R8CAN 1 2 A1P4RCAN 1 2 INCAN 1 2 IN 0 10V Direct assembly in LR72 or INCAN cards IN 0 450P Direct assembly in LR72 or INCAN cards IN 4D Direct assembly in LR72 or INCAN cards A2ICAN 1 4 A2VCAN 1 4 SIZE SLOT x3 SIZE SLOT x2 SIZE SLOT x1 P S x1 LR72 x1 ...

Page 85: ... 4 Antenna External standard Working frequency channel selection Fix or automatic listen before talking EEPROM Weight Maximum 7 Kg 53 relays Dimensions Length 350 mm Width 250 mm Heigth 150mm EEPROM Internal and extractable EP70 Signaling MultiLED internal LEDs Connections External input output terminal plugs for using with cable glands and base panel connectors Maximun current over resistive load...

Page 86: ... information without prior notice 21 2 REMARKS FOR THE INTERNAL WIRINGS The POWER cables MUST be wired and guided by the center of the slot The rest of the CAN bus wirings can be placed without any restriction POWER wirings CAN bus wirings UPPER SLOT LR72 P S BOTTOM SLOT R8CAN ...

Page 87: ...TM70Bi V3 2 11 02 1121174 L0 pdf 83 IKUSI reserves the right to change this information without prior notice 22 BINARY ROTARY SWITCH OPTION BINARY ROTARY SWITCH OPTION TRANSMITTERS T70 1 T70 2 ...

Page 88: ...rotary switch option wirh reference 2305236 contains the following Items Binary rotary switch body including physical STOP limits without personalisation Ref 1102138 Selector handle body cover arrow Refs 1107033 1107032 1107034 Silkscreen printing of the rotary switch in gravoplay format numerichal marked from 0 to 15 pos NOT included in the KIT OPTIONAL UNDER DEMAND PROJECT REQUIREMENTS Cables of...

Page 89: ... is modified the transmitter will not start until the last position is recovered Example If the transitter is switched OFF in position 13 and the user changes to position 9 the transmitter will not start in the position 9 EDITING TEXT IN THE DISPLAY máximum 32 texts Instead of displaying the corresponding rotary postion number 1 5 13 it is posible to edit text and or to mix alphanumeric characters...

Page 90: ... 56 2 233 7511 ikc ikusi com FRANCE IKUSI FRANCE SARL Tel 33 1 43 03 52 22 Fax 33 1 43 03 52 42 ikf ikusi com MEXICO IKUSI MÉXICO S A DE C V Tel 52 55 5663 8600 Fax 52 55 5663 8684 contacto ikusi gs com mx GERMANY IKUSI GmbH Tel 49 8464602420 Fax 49 8464602423 ikd ikusi com PORTUGAL IKUSI ELECTRÓNICA LDA Tel 351 22 947 8240 Fax 351 22 947 8249 ikp ikusi com RUSSIA IKUSI LLC Tel 7 495 583 93 41 Fax...

Page 91: ...TM70Bi V3 2 11 02 1121174 L0 pdf 87 IKUSI reserves the right to change this information without prior notice CHINA 北京市朝阳区望京阜通东大街方恒国际中心C座902室 电话 86 10 84674931 传真 86 10 84674931 811 ...

Reviews: