OPERATIONAL INSTRUCTIONS
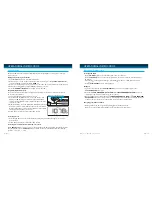
When the iPod mode is selected, the “iPod” logo icon will show on the display. If authentication is
successful the unit will automatically play after approximately
3 - 5 seconds.
While initializing, the LCD screen will display
the word “WAIT” When completed, your iPod
or iPhone will play back automatically.
Using the iPod Function
NOTE:
Your iPhone can only playback and charge on the iPod/
iPhone
Dock. If your iPhone is inserted in
iPod Dock , the display on your iPhone LCD screen will
read, “This accessory is not made to work with iPhone
”.
Press SELECT button on the unit or L, R button on remote control to select “iPod
” or “
iPod
”
When your selection is made “iPod L” or “iPod R” will show on the display.
When only one of two docks is occupied, the SELECT button will not function.
When Aux mode is selected, the “Aux” icon will
display. Use this mode to play audio devices
through the 3.5mm jack.
Aux Mode
Use the Volume knob to adjust the Volume. Display shows “VOL” and assigns a numerical value
between 0 and 40 (40 is Max).
For example: “VOL 23” may display current volume level. This volume level setting will be stored
when the unit is power off. When the unit is powered on, the unit will return to this volume setting.
Adjusting the Volume
OPERATIONAL INSTRUCTIONS
Make sure the unit is turned off in order to set the clock.
The default clock setting is 12:00AM. If you set the clock during
Daylight Saving Time, be sure to set the DST switch on to ensure
the proper function of the DST
switch. When setting the clock
during Standard time, make sure the DST switch is off.
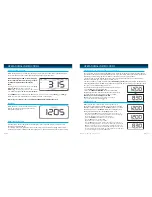
· Press and hold the SET
button on the unit for three (3) seconds to set
the year, day and time. The current year will flash as shown on this page.
· The year will blink first at the bottom of the LCD splay.
Rotate the SEARCH knob until the current year appears.
Press the SET button to set and confirm.
Repeat these steps to set the day and time.
· Press the SET
button to confirm. If no knob or button is pressed for 10
seconds, the setting will return to the current clock time and exitclock mode.
Note
: There is no AM icon on this LCD screen. When setting the clock for an
afternoon or evening time, make sure that the PM icon appears on the screen
· The time setting sequence should be: Year > Month/Date > Hour/ Minute.
· To exit clock setting mode, press the
SET button.
Setting the Clock
iLuv | 10
iMM173 | V12M12_IM_EN_05082009
9 | iLuv
The easiest way to set the clock on the iMM173 is to synchronize it with the atomic clock function on
your iPhone or iPod. This unit is equipped with a Time Sync function which automatically sets the date
and time by synchronizing it with your iPhone or iPod, when it is placed in the dock.
1. With the power turned ON and the power connected, the Time Sync function is automatically
enabled as indicated by a “Sync” icon on the LCD screen.
2. When your iPhone or iPod is placed in the
iPod/iPhone dock*,the unit will begin authentication.
3. During authentication, the iMM173 will update the time and date according to your iPhone or iPod.
The “Sync” icon will blink during this process.
To turn off the Time Sync Function, follow these instructions:
1. Set the iMM173 into Standby mode.
2. Press the
SELECT / TIME SYNC
button to turn OFF/ON
the Time Sync function. If the Time Sync function is turned off,
the unit will not sync the time from your iPhone or iPod,
and the “Sync” icon will disappear on LCD.
Setting the Clock using the Time Sync Function
Note: The Time Sync function only works when your iPhone
or iPod is docked in the iPod/iPhone
dock


