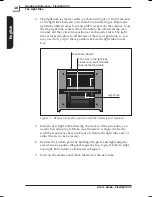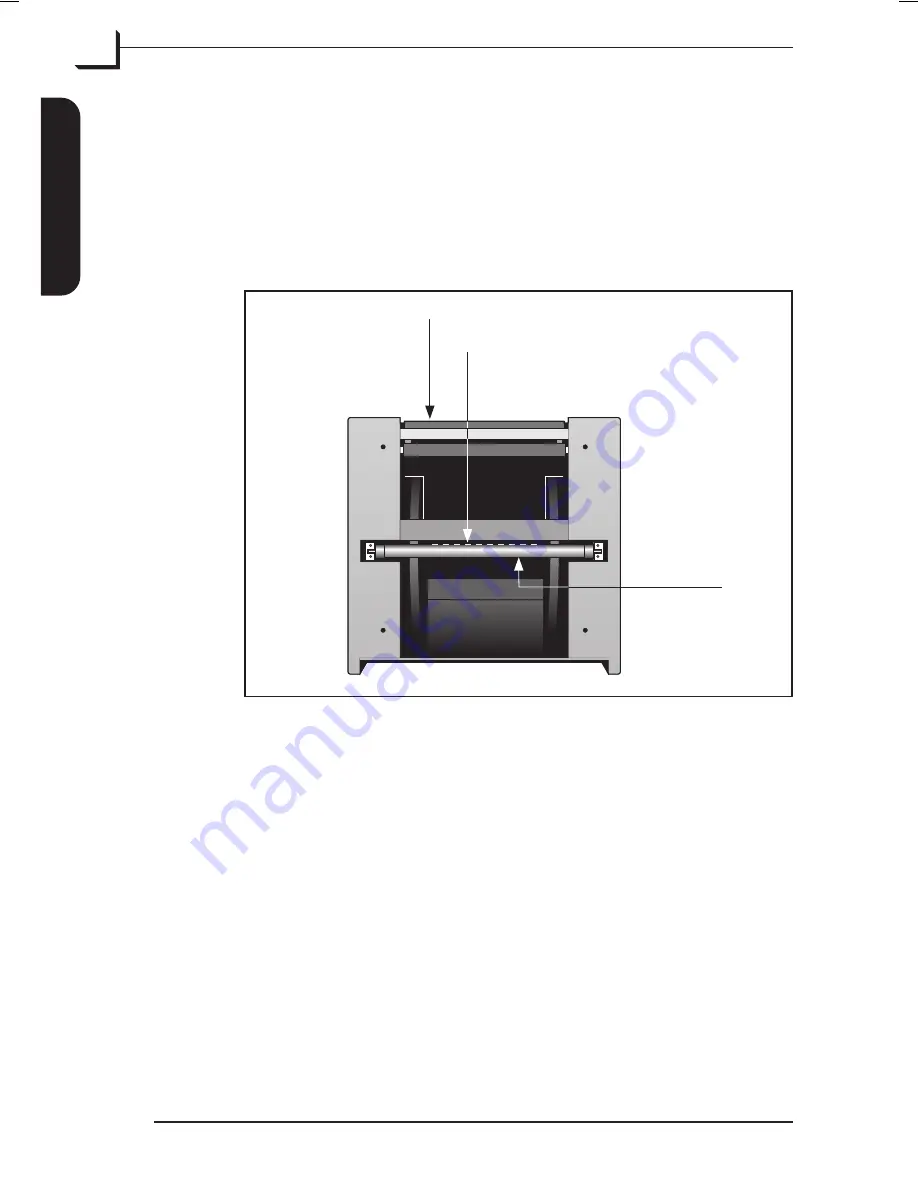
6. The light tube is clearly visible, as shown in Figure 7. Hold each end
of the light tube between your thumb and index finger. Rotate the
light tube until it comes free and pull it away from the scanner. Note
that the light tube sockets allow the tube to be rotated all the way
around, but they click into position at each quarter turn. The light
tube is locked in place in all but one of these four positions, so you
may need to try up to three positions before the light tube comes
free.
7. Install a new light tube following the reverse of the procedure you
used when removing it. Make sure the sleeve is aligned correctly
with the scanner as shown in Figure 5. Rotate the light tube and/or
adjust the sleeve as necessary.
8. Replace the bottom panel by holding it in place and tightening the
screws in an opposite-diagonal sequence (e.g. top-left, bottom-right,
top-right, bottom-left) as indicated in Figure 6.
9. Turn on the scanner and check function of the new tube.
User's Guide - Flextight 343
Hardware Reference - Flextight 343
18
The Light Tube
English
Feed Table (closed)
Light Tube
The holes in the light tube
sleeve must point forwards,
towards the feed table.
Figure 7: Bottom view of the scanner with the bottom panel removed


