Shell+ 12 Wall Mounted Tablet Enclosure
Instructions
+44 (0) 1202 892 863 |
1-888-858-9778 |
sales
@imageholders.com
Unit B8, Arena Business Centre, Nimrod Way, Wimborne, Dorset. BH21 7UH.
©
image
HOLDERS
Ltd. All rights reserved
A/B
017_12_161
Applicable To:
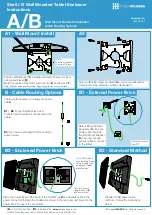
Wall Mount Bracket Installation
Cable Routing Options
B3 - Standard Method
B2 - Enclosed Power Brick
B1 - External Power Brick
B - Cable Routing Options
A2
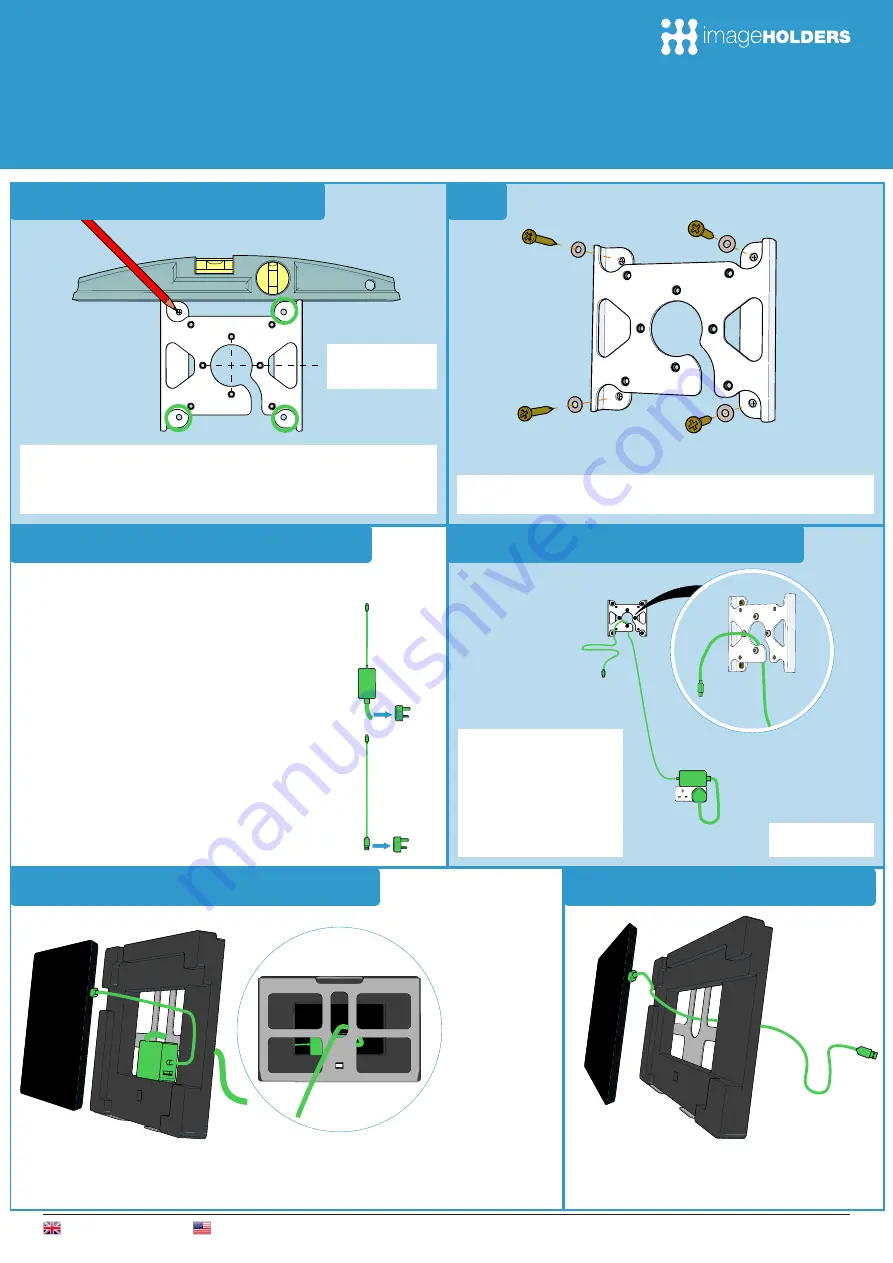
A1 - Wall Mount Install
There are three ways of routing your power
cables;
B1
+
B2
if your Tablet Device has a
Transformer/Power Brick connected to the
cable.
B3
if you have a standard USB connection
power cable.
Before fitting the Rear
Enclosure (
A
), loop the
power cable through
the Wall Mount Bracket
(
D
) ensuring enough
excess cable to connect
to the tablet.
Standard USB power cable
method - Follow the instructions
below.
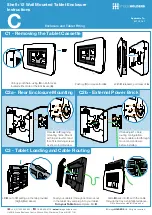
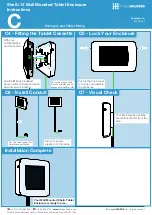
Follow instructions
from
C1
Place the Power Brick in the back of the Tablet Tray (
B
) as illustrated. Feed the
power connector through the middle slot shown in the rear view and plug into the
power brick. Connect to your Tablet.
Tip: Store excess
cable in back of
B
with power brick.
Note: This method
may require a longer
figure 8 cable than
supplied by tablet
manufacturer.
Screw in
F
using screw provided (
G
) or your own alternative
screw (5mm max. diameter, surface dependent).
Position Wall Bracket (
F
) in desired position. Ensure it is level
using a spirit level (
M
).
Mark the centre of the holes with a pencil (
K
) and remove
F
.
Note: Drill pilot holes and install Raw Plugs if required by chosen surface.
Note:
Centre of Bracket =
Centre of Screen.


